Southern Comfort Food
Texas Roadhouse Grilled Chicken Copycat
Chef Mia's Texas Roadhouse grilled chicken copycat: simple marinated, juicy grilled chicken breast. Not herb-crusted, not smothered. Ready in 30 minutes.
Quick answer: Texas Roadhouse grilled chicken is a plain, juicy marinated chicken breast, the same one they put on the grilled chicken salad and the grilled chicken plate. To make it, pound 4 boneless skinless breasts to an even thickness, then marinate them 30 minutes to 4 hours in olive oil, fresh lime juice, Worcestershire, a splash of soy sauce, garlic, a little brown sugar, smoked paprika, onion powder, salt, and pepper. Cook on a hot flat-top or grill about 5 to 6 minutes per side until the center hits 165 degrees, then rest 5 minutes. That is the whole trick: simple marinade, even thickness, high heat, do not overcook.
This is the chicken that gets lost in the shuffle at Texas Roadhouse. Everybody talks about the herb-crusted chicken or the smothered chicken piled with cheese and mushrooms, but underneath all of that is a plain, juicy, marinated grilled chicken breast that is honestly delicious on its own. It is the chicken on the grilled chicken salad. It is the chicken on the grilled chicken plate. It is simple, it tastes like the grill, and once you learn the marinade you will make it on a random Tuesday without thinking twice. That is the version I am giving you today, the bare, beautiful one.
Let me be clear about what this is and is not, because people mix these up constantly. This is not the herb-crusted chicken, which has a dry seasoned crust pressed onto it. It is not the smothered chicken, which gets topped with sauteed mushrooms and melted cheese. This is the foundation, the plain marinated grilled breast, and the other two are built on top of it. If you came here wanting the crusted one or the smothered one, I have separate recipes for those. If you want the clean, juicy, marinated grilled chicken that works in a salad or next to a baked potato, you are in exactly the right spot.
Why This Is the Simplest Texas Roadhouse Copycat
Of all the Texas Roadhouse chicken dishes you can recreate at home, this is hands down the easiest. There is no crust to press on, no cheese to melt, no mushrooms to saute, no gravy to build. It is a marinated chicken breast cooked on a hot surface, and that is the whole thing. If you have ever been intimidated by copycat recipes that read like a chemistry lab, this one is your gentle entry point. A handful of pantry ingredients, a hot pan, and a thermometer, and you are there.
The reason it works so well is that Texas Roadhouse keeps this chicken plain on purpose. It is the workhorse protein. They put it on the grilled chicken salad, they serve it as the grilled chicken plate with sides, and it shows up in a few other spots on the menu. Because it has to play nice with salads, dressings, and sides, it is not heavily seasoned or sauced. That simplicity is exactly why it is so easy to nail at home.
I have made this more times than I can count, usually on a weeknight when I want protein for salads or meal prep and do not want to fuss. The marinade comes together in two minutes while the pan heats. The cooking is hands-off once the chicken is down. And the payoff is juicy, savory grilled chicken that tastes like the restaurant without the restaurant price. Once you see how little effort it takes, it becomes a default in your kitchen.
If you want the dressed-up versions, they build right on top of this. The herb-crusted one adds a seasoned crust, and the smothered one piles on cheese and mushrooms. But the base, the part that actually has to taste good and stay juicy, is this marinated grilled breast. Master this and you have unlocked all three.
Pounding the Chicken for Even Cooking
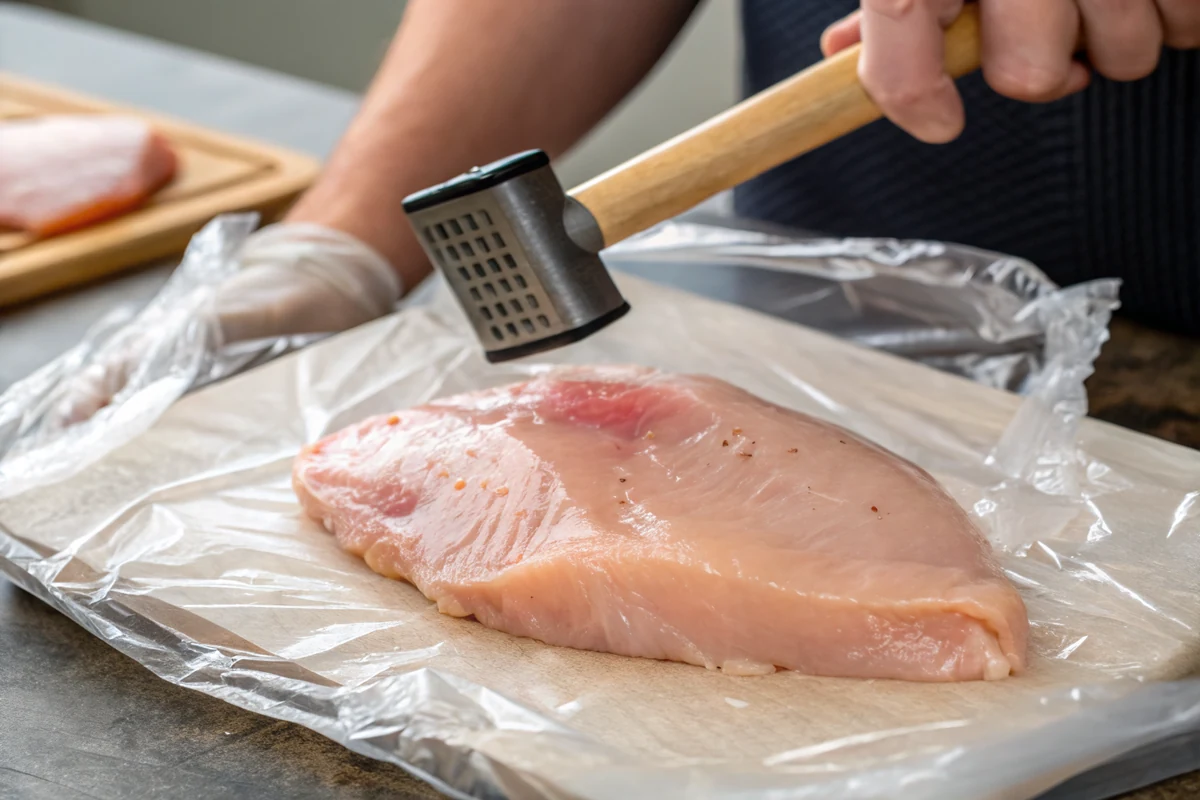
I will say this as plainly as I can: pounding the chicken to an even thickness is the single most important step, and it is the one home cooks skip the most. A raw chicken breast is naturally lopsided, fat and rounded on one end, thin and tapered on the other. If you throw it on the heat as-is, the thin end overcooks into dry, stringy meat long before the thick end is safe to eat. You end up with one breast that is half jerky and half undercooked.
The fix takes two minutes. Lay each breast between two sheets of plastic wrap or slip it into a zip-top bag so it does not splatter, then pound it with a flat meat mallet or the bottom of a heavy skillet. Work from the thick center outward and aim for an even three-quarter-inch thickness across the whole breast. You are not trying to flatten it into a cutlet, just to level it out so every part cooks at the same rate.
There is a bonus to pounding beyond even cooking. Lightly breaking down the muscle fibers makes the finished chicken more tender, and a flatter breast has more surface area touching the hot pan, which means better grill marks and more of that seared flavor. It also helps the marinade reach more of the meat. So this one quick step pays you back in three ways: even doneness, tenderness, and flavor.
If you genuinely do not have a mallet or a heavy pan handy, you can butterfly the thicker breasts instead, slicing them horizontally so they open into a thinner, more even piece. It is not quite the same, but it solves the same problem of uneven thickness. Whatever method you use, get those breasts even before they hit the heat and half your battle is already won.
The Marinade, Ingredient by Ingredient
The marinade is short, and every piece is doing a job. The base is a quarter cup of olive oil, which carries the flavors, helps the seasonings cling to the meat, and protects the surface from drying out on high heat. Oil is also what helps you get a good sear instead of a sticky mess. It is the backbone that everything else rides on.
The brightness comes from 2 tablespoons of fresh lime juice, though lemon works just as well if that is what you have. The acid does two things: it adds a clean, fresh tang that cuts the richness of the chicken, and it gently tenderizes the surface of the meat. I always use fresh citrus here, not the bottled stuff, because the bottled juice tastes flat and slightly bitter by comparison. It is worth squeezing a real lime.
Then come the savory builders. Worcestershire sauce and a small splash of soy sauce both bring umami, that deep savory note that makes the chicken taste like more than just chicken. Minced garlic adds aromatic punch, smoked paprika brings a whisper of smokiness that makes it read like it came off a grill, and onion powder rounds out the savory base. Salt and black pepper season it through. There is just 1 teaspoon of brown sugar in the whole thing, barely enough to balance the tang and help with browning, not enough to make it sweet.
What I love about this marinade is the balance. It is savory first, tangy second, and only faintly sweet underneath. It does not try to be a teriyaki or a barbecue marinade. It tastes like clean, grilled, well-seasoned chicken, which is exactly the point. If you want to tweak it, a pinch of cayenne adds heat and a little extra garlic never hurts, but I would not mess with the core. It is dialed in.
How Long to Marinate
Timing the marinade matters more than people expect, and there is a sweet spot. The minimum is 30 minutes, which is enough to season the surface of the chicken and give you noticeably better flavor than no marinade at all. If you are in a hurry, 30 minutes on the counter while your pan heats and your sides come together is completely fine and still tastes great.
If you have more time, a couple of hours in the fridge is even better. Over an hour or two the flavor sinks a little deeper past the surface, and the smoked paprika, garlic, and Worcestershire really get to know the meat. When I am planning ahead, I will mix the marinade in the morning and let the chicken sit until dinner. That is my favorite window, somewhere between 2 and 4 hours.
Here is the hard limit, though: do not marinate this longer than 4 hours. The lime juice is acidic, and acid that sits on chicken too long starts to break down the proteins on the surface. Instead of tenderizing, it begins to denature the outside of the meat, leaving it mushy, chalky, and weirdly opaque even before it cooks. More marinade time is not better past a point. Four hours is the ceiling.
If you want to prep further ahead than that, marinate the chicken without the acid, then add the lime juice in the last 30 minutes before cooking. That way you get the deep savory flavor of a long soak without the acid doing damage over time. But honestly, for a weeknight, 30 minutes to a couple of hours covers it, and you will get juicy, flavorful chicken every time.
Flat-Top vs Grill
Texas Roadhouse cooks this chicken on a flat-top griddle, and that flat-top is part of what gives it those even, deep grill marks and a consistent sear across the whole surface. At home you can absolutely recreate that with a cast iron skillet or a flat griddle pan on your stove. The big, even contact between the meat and the hot metal gives you a beautiful crust and a restaurant-style sear. This is my go-to method indoors, especially in winter.
An outdoor grill works wonderfully too, and it brings something the flat-top cannot, a little char and smoke from the open flame. If you want that backyard, just-grilled flavor, fire up the grill. You will get classic crosshatch grill marks and a slightly smoky edge. The trade-off is that a grill has hot and cool spots and flare-ups, so it takes a bit more attention than a flat, even griddle surface.
Whichever you choose, the rule is the same: get it genuinely hot before the chicken goes on. On the stove that means a medium-high pan with a shimmer of oil. On the grill that means a hot zone you can only hold your hand over for a second or two. A hot surface sears and marks the chicken fast; a lukewarm one just steams it gray and sad. Heat is non-negotiable here.
One small thing that helps on both surfaces: do not crowd the pan or grill. If you pack four breasts onto a skillet that only really fits two, they drop the temperature and steam each other instead of searing. Cook in batches if you need to. Give each breast room, keep the heat high, and you will get that clean, marked, seared finish on every piece no matter which method you pick.
Hitting 165 Without Drying It Out
This is the part that makes or breaks grilled chicken breast. Chicken is safe to eat at 165 degrees Fahrenheit in the thickest part, and the goal is to hit exactly that and not a degree more. Breast meat is lean, so it has very little fat to protect it. Every minute past 165 squeezes out moisture and marches you toward dry, chalky chicken. The window between perfect and overcooked is narrow, which is why guessing does not work.
The single best tool you can own for this is an instant-read thermometer. It costs a few dollars and it removes all the guesswork. Push it into the thickest part of the breast and pull the chicken the moment it reads 165. Stop poking the meat to check if it 'feels done,' stop cutting into it to peek, because both of those let juice escape. The thermometer tells you the truth without wounding the chicken.
Even thickness, which we covered with the pounding step, is your other big ally here. When the breast is the same thickness all over, the whole thing reaches 165 at the same moment, so nothing overcooks while you wait for a thick spot to catch up. This is why pounding and temping work together. Get them both right and dry chicken essentially stops happening in your kitchen.
If you want a little insurance, you can pull the chicken at 162 or 163 and let carryover heat carry it the rest of the way to 165 while it rests. The temperature keeps climbing a few degrees off the heat. That trick gives you the safest, juiciest result. About 5 to 6 minutes per side on a hot surface usually lands you right there, but always let the thermometer, not the timer, make the final call.
Resting and Slicing
Resting is the quiet step everyone wants to skip, and it matters just as much for a chicken breast as it does for a steak. When chicken cooks, the heat drives the juices toward the center of the meat. If you slice into it the instant it leaves the pan, all that liquid that was heading back outward comes pouring onto your board, and your chicken goes dry. A five-minute rest lets the juices redistribute evenly through the meat so they stay in the breast.
Five minutes is all you need for a breast this size. Move the chicken to a clean plate or board, loosely tent it with foil if your kitchen is cold, and walk away. Use that time to finish your salad or plate your sides. Resist the urge to cut in early just to see if it worked. It worked. Patience here is free and it is the cheapest upgrade to juicy chicken you will ever make.
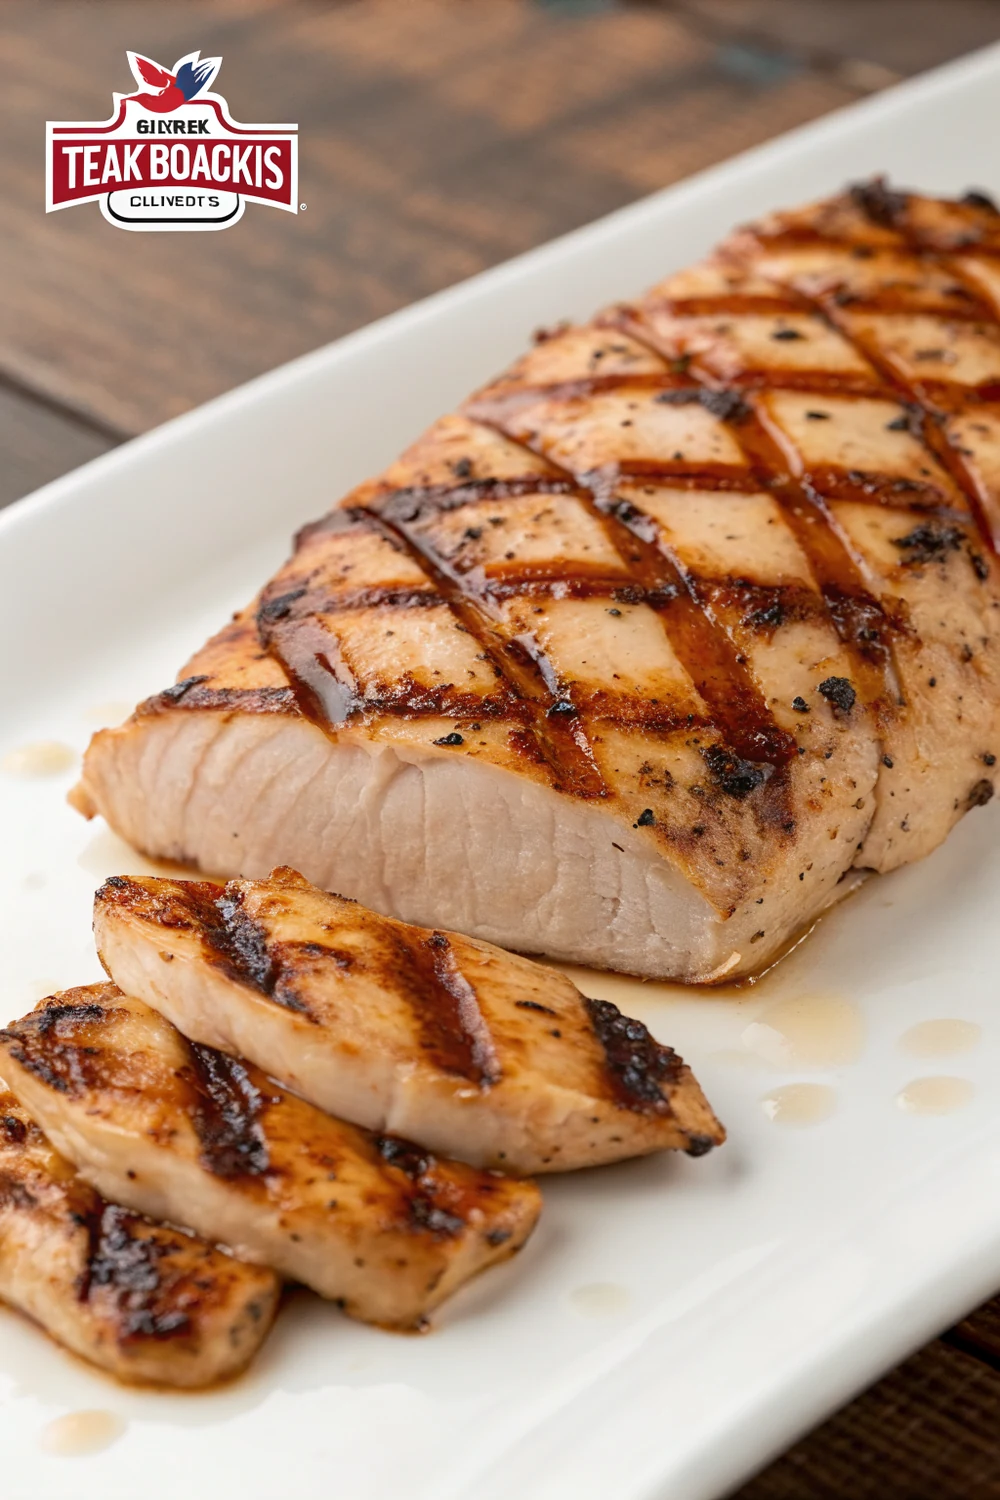
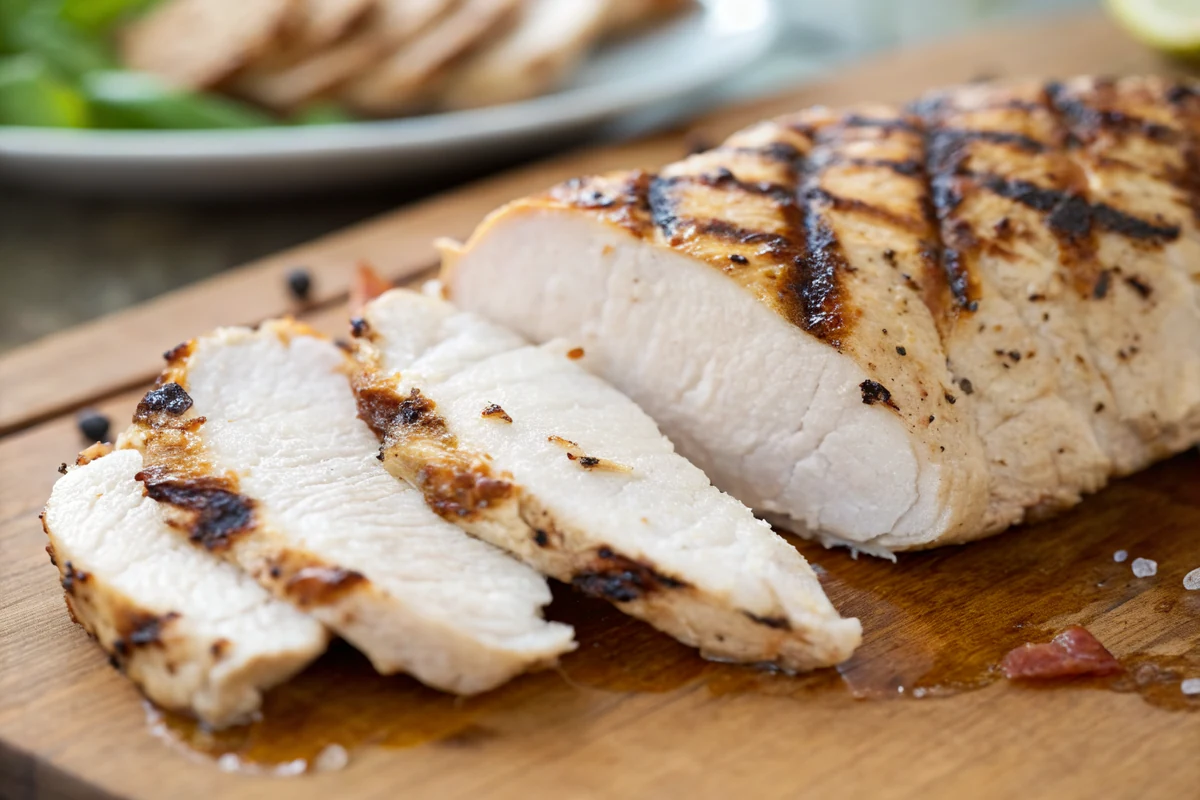
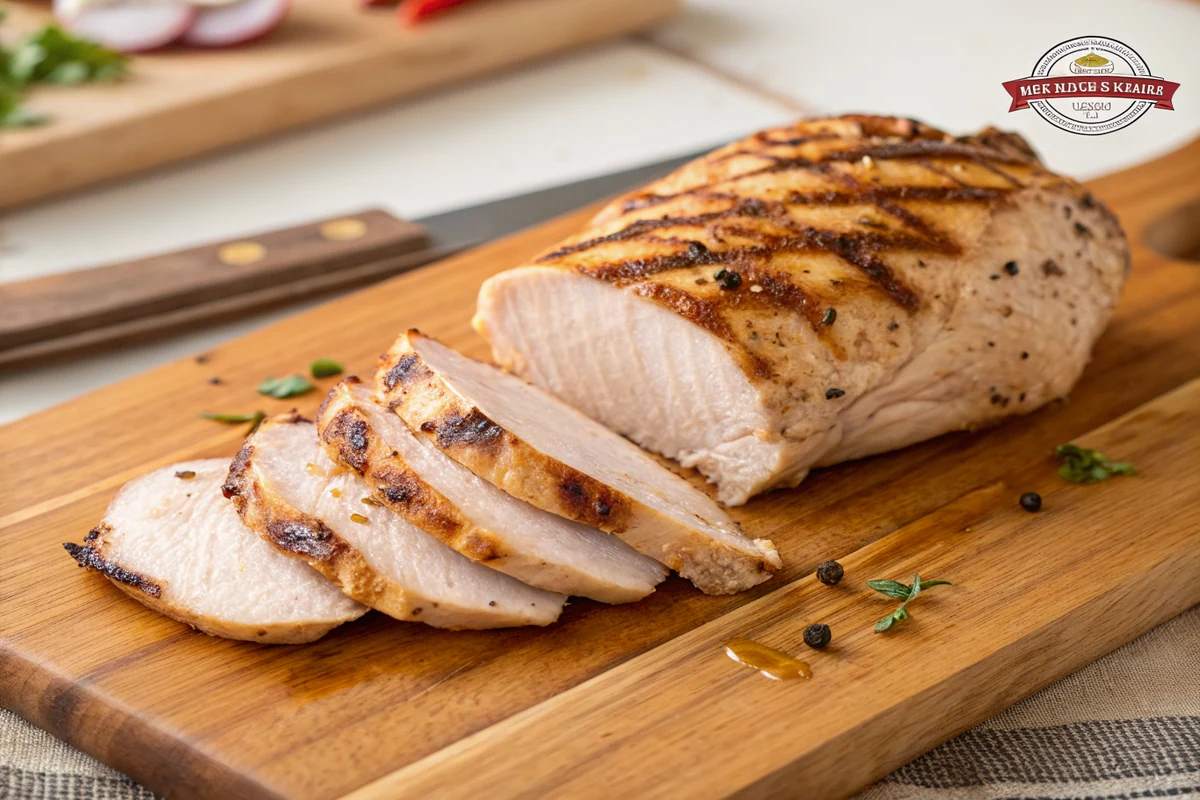
When you do slice, cut across the grain. Look at the direction the muscle fibers run and slice perpendicular to them. Cutting against the grain shortens those fibers so each bite is more tender and easier to chew. This matters a lot for a salad, where you want clean, tender strips rather than long, chewy ropes of chicken. A sharp knife and a quick glance at the grain make all the difference.
If you are serving the chicken whole on a plate rather than sliced, still give it the rest before it goes out. The same logic applies. A rested whole breast holds its juices when someone finally cuts into it at the table. Whether sliced or whole, those five minutes are doing real work, so build them into your plan.
How It Differs From Herb-Crusted and Smothered
This is the question I get most, so let me draw the lines clearly. The chicken in this recipe is the plain marinated grilled breast. It has flavor from the marinade and char from the grill, but no crust and no toppings. It is meant to be clean and versatile, the kind of chicken you can drop on a salad or a plate without it fighting the other flavors. That simplicity is a feature, not a shortcoming.
The herb-crusted version is a different animal. There you press a dry seasoning blend onto the chicken so it forms an actual crust on the outside, giving you a textured, heavily seasoned bite. It is bolder and more aggressively flavored. If that is what you are after, that is its own recipe, and you can get the full method on my Texas Roadhouse herb-crusted chicken. Do not try to make this plain marinated breast stand in for that crusted one, because they are genuinely different dishes.
The smothered version starts from a grilled breast like this one, then gets buried under sauteed mushrooms, sometimes onions, and a blanket of melted cheese, usually Jack and cheddar. It is rich, gooey, and indulgent, a full comfort-food plate. If you want that loaded, cheesy version, I walk through it step by step in my Texas Roadhouse smothered chicken. It is delicious, but it is the opposite of the clean, simple chicken we are making here.
So think of it as a family tree. This marinated grilled breast is the trunk. The herb-crusted chicken adds a crust, and the smothered chicken adds cheese and mushrooms, but both grow out of this same plain grilled base. If you learn to cook this one well, juicy and properly seared, you have the foundation for all three. Pick the version that matches your mood, and know they are not interchangeable.
Serving It on Salads and Plates
The most popular home for this chicken is right on top of a grilled chicken salad, exactly the way the restaurant does it. Slice a rested breast against the grain into thin strips and fan them over a big bowl of crisp greens, tomatoes, cucumber, red onion, shredded cheese, and croutons. A ranch or a honey mustard dressing pulls it all together. The clean, savory chicken is the perfect protein for a salad because it does not overpower the dressing or the vegetables.
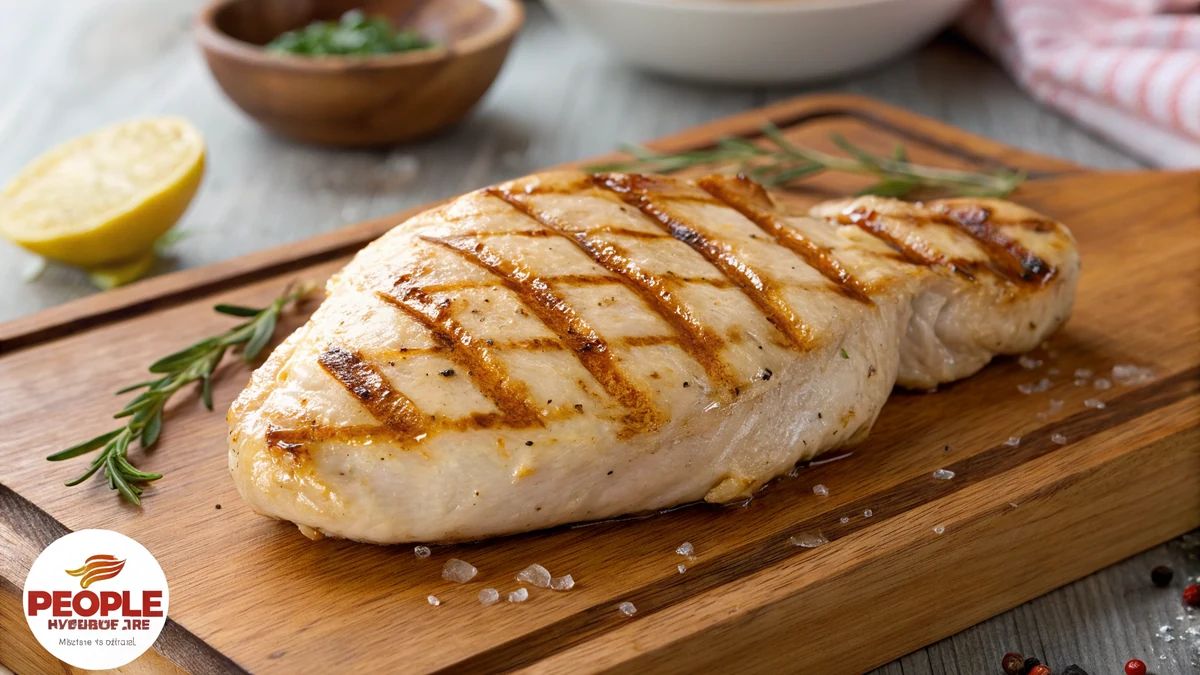
As a grilled chicken plate, this breast is the centerpiece of a classic meat-and-sides dinner. Serve a whole breast next to your favorite Texas Roadhouse style sides and you have a restaurant dinner at home. My top pairing is a big scoop of buttery Texas Roadhouse mashed potatoes, which are smooth and rich and balance the lean, savory chicken beautifully. Add a vegetable or a roll and the plate is complete.
Beyond salads and plates, this chicken is a meal-prep workhorse. Sliced grilled breast goes into wraps, grain bowls, pasta, quesadillas, and sandwiches all week long. Because it is plainly seasoned, it slides into almost any cuisine without clashing. I will grill a batch on Sunday and pull from it for lunches through Wednesday, and it never feels boring because the base flavor is so adaptable. That versatility is the quiet superpower of plain grilled chicken.
For serving, a little freshness on the plate goes a long way. A squeeze of lime over the sliced chicken right before it goes out wakes up the marinade flavors and echoes the citrus already in there. A scatter of chopped parsley or cilantro adds color and a clean herbal note. None of this is required, the chicken stands fine on its own, but these small touches make a simple grilled breast feel a little more finished and intentional.
Storage, Meal Prep, and Common Mistakes
This chicken stores and reheats well, which is part of why it is such a meal-prep favorite. Once it has cooled, keep leftover breasts whole or sliced in an airtight container in the fridge for three to four days. I actually prefer to store them whole and slice as I go, because a whole breast holds moisture better than pre-sliced pieces, which dry out a little faster in the fridge. Keep it whole until you are ready to eat.
Reheating lean chicken is where people go wrong, because high, dry heat turns leftovers into cardboard. The gentlest method is a covered dish in a 300 degree oven just until warmed through, or short bursts in the microwave with a damp paper towel over the plate to hold in steam. Honestly, this chicken is also excellent cold, straight from the fridge on a salad, so you can often skip reheating entirely. For freezing, cooled breasts freeze well for up to three months; thaw overnight in the fridge.
Now the mistakes, because avoiding them is most of the battle. The biggest is not pounding the breasts even, which gives you dry edges and raw centers. The second is overcooking past 165, which dries out lean breast meat fast, so use a thermometer. The third is marinating longer than 4 hours, which lets the acid turn the surface mushy. The fourth is a pan that is not hot enough, which steams the chicken gray instead of searing it.
The fifth common mistake is skipping the rest and slicing immediately, which pours your juices onto the board. And a sneaky sixth one: crowding the pan so the breasts steam each other instead of searing. Fix these and there is almost nothing left to get wrong. Even thickness, a hot surface, pull at 165, a five-minute rest, and do not over-marinate. Do those things and you will get juicy, well-marked, restaurant-quality grilled chicken at home every single time.
Texas Roadhouse Grilled Chicken Copycat Recipe
Ingredients
- For the chicken:
- 4 boneless skinless chicken breasts, pounded to even thickness
- For the marinade:
- 1/4 cup olive oil
- 2 tablespoons fresh lime juice (or lemon juice)
- 1 tablespoon Worcestershire sauce
- 1 teaspoon soy sauce (just a splash)
- 3 cloves garlic, minced
- 1 teaspoon brown sugar (just a little)
- 1 teaspoon smoked paprika
- 1/2 teaspoon onion powder
- 1 teaspoon salt
- 1/2 teaspoon black pepper
Instructions
- Pound the breasts even. Put each chicken breast between two sheets of plastic wrap or in a zip-top bag and pound it with a flat mallet or the bottom of a heavy pan until it is an even thickness, about three-quarters of an inch. Chicken breasts are thick on one end and thin on the other, and that uneven shape is the main reason home cooks end up with dry, rubbery edges and raw centers. Even thickness means the whole breast cooks at the same rate. Do not skip this.
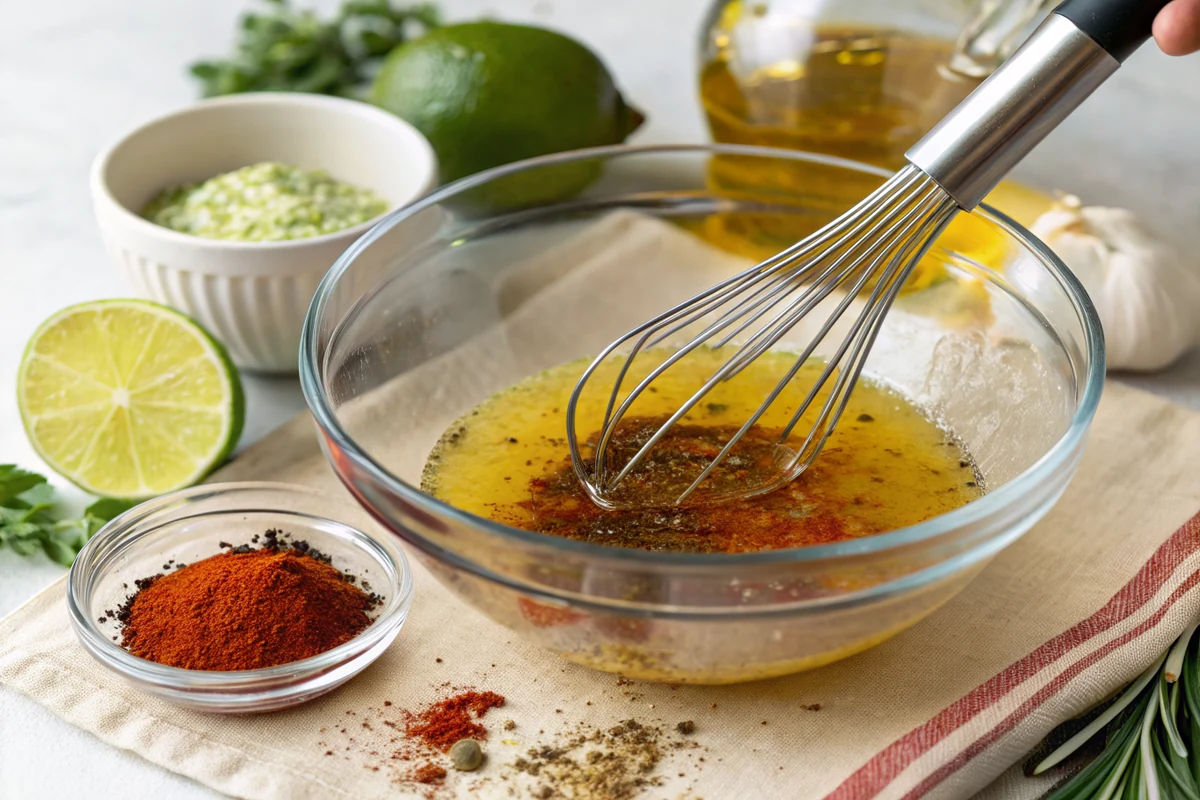
- Mix the marinade. In a bowl or a measuring cup, whisk together the olive oil, fresh lime juice, Worcestershire sauce, the splash of soy sauce, minced garlic, brown sugar, smoked paprika, onion powder, salt, and black pepper. Whisk until the brown sugar dissolves and the marinade looks unified instead of separated. This is a savory, slightly tangy marinade with just a whisper of sweetness from that teaspoon of brown sugar. It should smell like garlic and smoke, not like a sugary glaze.
- Marinate the chicken. Put the pounded breasts in a zip-top bag or a shallow dish and pour the marinade over them, turning to coat every surface. Seal it up and refrigerate for at least 30 minutes and up to 4 hours. Thirty minutes gives you good flavor on the surface; a couple of hours lets it sink in deeper. Do not go past 4 hours, because the acid in the lime juice will start to break down the meat and turn the texture mushy and chalky on the outside.
- Heat the flat-top or grill. Get your flat-top griddle, cast iron skillet, or grill genuinely hot before the chicken goes on. On a stovetop, that means medium-high heat with a thin film of oil shimmering. On a grill, that means a hot zone you can hold your hand over for only a couple of seconds. A hot surface gives you those deep grill marks and a good sear, which is where a lot of the flavor lives. A lukewarm pan steams the chicken instead of searing it.
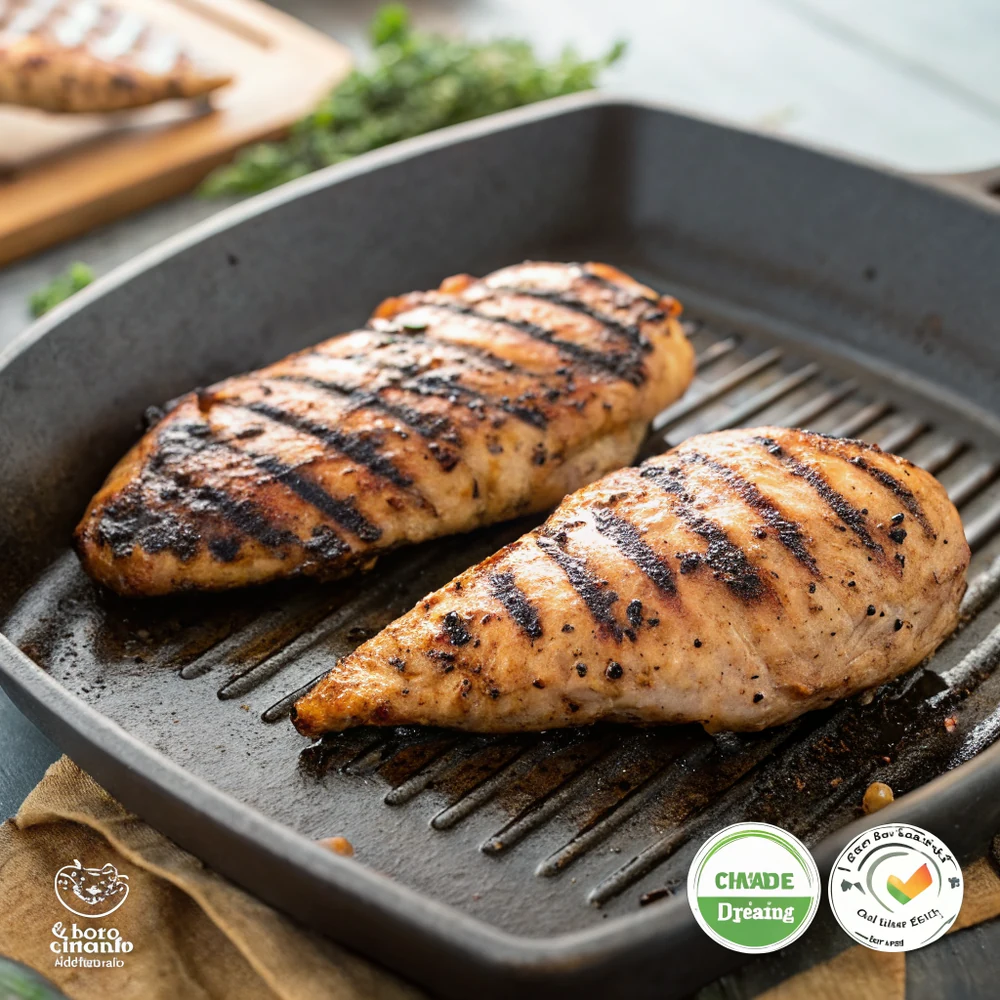
- Cook the first side. Lay the breasts down and leave them alone. Do not poke, flip, or move them for about 5 to 6 minutes. Letting them sit undisturbed is how you build a real crust and clean grill marks. If you keep lifting and peeking, you tear the surface and lose the sear. You will know it is ready to flip when the chicken releases easily from the surface on its own. If it sticks hard, it needs another minute.
- Cook the second side to 165. Flip each breast once and cook the second side another 5 to 6 minutes. Start checking the internal temperature with an instant-read thermometer pushed into the thickest part. You are looking for 165 degrees Fahrenheit, and not a degree more if you can help it. Total cook time runs about 10 to 12 minutes for evenly pounded breasts, but thickness and heat vary, so trust the thermometer over the clock every single time.
- Rest before slicing. Move the cooked chicken to a plate or board and let it rest for a full 5 minutes before you cut or serve it. During cooking the juices push toward the center, and resting lets them settle back through the meat so they stay in the breast instead of running out onto the board. Cut into it the second it comes off the heat and you literally pour your juiciness away. Five quiet minutes is the difference between juicy and dry.
Frequently Asked Questions
What cut of chicken does Texas Roadhouse use for grilled chicken?
It is a plain boneless skinless chicken breast, marinated and grilled on a flat-top. The same grilled breast shows up on their grilled chicken salad and as the grilled chicken plate. At home, pound 4 boneless skinless breasts to an even thickness so they cook evenly, then marinate and grill them. The key is that it is just a simple marinated breast, not a crusted or sauced cut, which is exactly why it is so easy to recreate in your own kitchen.
Is this the same as the herb-crusted chicken?
No, and this is the most common mix-up. This recipe is the plain marinated grilled chicken breast with no crust. The herb-crusted chicken has a dry seasoning blend pressed onto the outside that forms an actual crust, giving it a bolder, more textured, heavily seasoned bite. They are different dishes built on a similar grilled base. If you specifically want the crusted version with the seasoned exterior, that is a separate recipe and a separate technique, so look for the herb-crusted one instead of this plain grilled breast.
How is this different from the smothered chicken?
The smothered chicken starts from a grilled breast like this one, then gets topped with sauteed mushrooms, sometimes onions, and a blanket of melted cheese. It is rich and indulgent. This recipe is the bare grilled breast with no toppings at all, meant to be clean and versatile for salads and plates. Think of this marinated breast as the foundation, and the smothered version as that same chicken loaded up with cheese and mushrooms. They are related but absolutely not the same plate.
How long should I marinate the chicken?
At least 30 minutes and up to 4 hours, no longer. Thirty minutes seasons the surface and gives you good flavor in a hurry, while a couple of hours lets the marinade sink in deeper, which is my favorite window. Do not push past 4 hours, because the lime juice is acidic and prolonged exposure breaks down the surface of the meat, leaving it mushy and chalky. If you need to prep further ahead, marinate without the citrus and stir the lime juice in during the last 30 minutes.
What internal temperature should grilled chicken reach?
Chicken breast is safe and best at 165 degrees Fahrenheit in the thickest part, and you want to hit that number exactly, not exceed it. Breast meat is lean, so every minute past 165 dries it out. Use an instant-read thermometer pushed into the thickest spot and pull the chicken the moment it reads 165. For extra insurance, pull it at 162 or 163 and let carryover heat finish it during the rest. Trust the thermometer over any timer, since thickness and heat always vary.
Can I cook this on the stove instead of a grill?
Absolutely. Texas Roadhouse uses a flat-top griddle, and a cast iron skillet or flat griddle pan on your stove recreates that beautifully. Get the pan genuinely hot over medium-high heat with a thin film of oil shimmering, then cook about 5 to 6 minutes per side to 165 degrees. The big, even contact with hot metal gives you a great sear and clean grill marks. An outdoor grill adds smoke and char if you want it, but the stovetop is my go-to indoors and works just as well.
Why is my grilled chicken dry, and how do I fix it?
Dry grilled chicken almost always comes from one of three things: uneven thickness, overcooking, or skipping the rest. Pound the breasts to an even thickness so they cook at the same rate, use a thermometer and pull them at exactly 165 degrees, and let them rest 5 minutes before slicing so the juices stay in the meat. Also make sure your pan is hot enough to sear rather than steam, and do not marinate longer than 4 hours. Fix those and your chicken will come out juicy every time.