Texas BBQ
Texas Hamburger
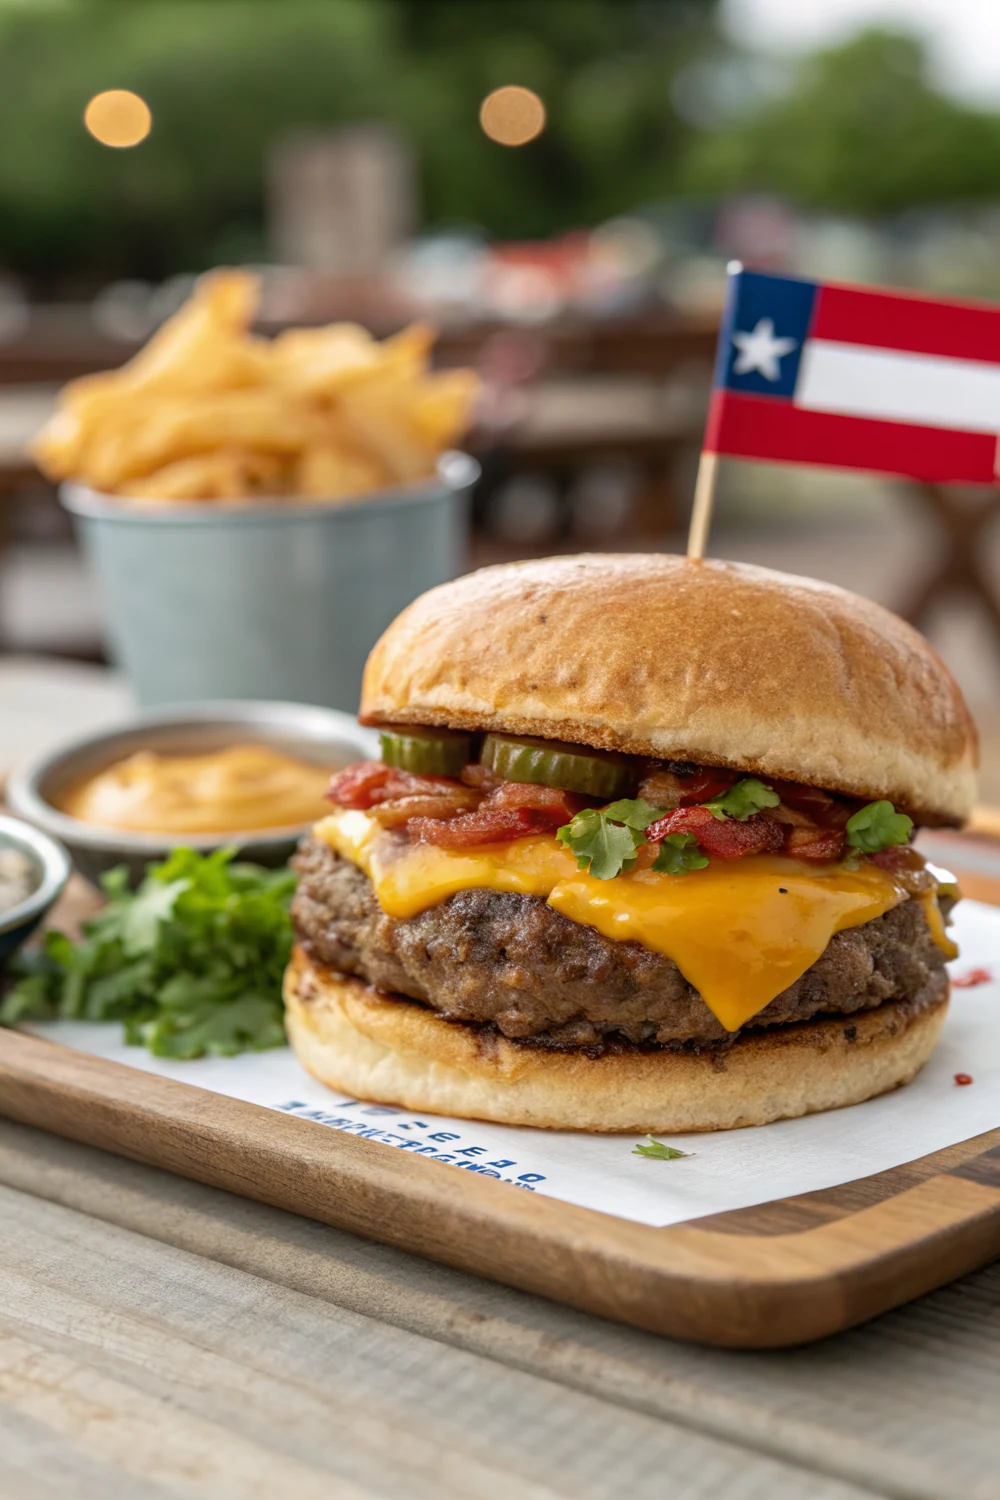
Chef Mia's Texas hamburger recipe: a juicy 80/20 patty seared on cast iron, simply seasoned, toasted bun, classic fixings, with an optional jalapeno twist.
Quick answer: A Texas hamburger is a big, juicy homestyle burger built on an 80/20 beef patty cooked on screaming-hot cast iron. To make it, form 1.5 pounds of ground beef into four 6-ounce patties, press a dimple in the center of each, and season the outside generously with kosher salt, coarse black pepper, garlic powder, onion powder, and smoked paprika. Sear about 3 to 4 minutes per side on cast iron, adding cheese in the last minute to melt. Toast the buns in butter, then build with lettuce, tomato, onion, dill pickles, mustard, and mayo. The optional Texas twist is sharp cheddar with jalapenos. Serves four.
I have made a lot of burgers in my life, and the one I keep coming back to is this simple Texas cheeseburger. It is not fancy and it does not need a long list of sauces or toppings to be great. It is a big, juicy 80/20 patty, seasoned hard on the outside, seared on a screaming-hot cast-iron skillet until the edges are lacy and brown, then stacked on a buttery toasted bun with the classic fixings. This is the burger I cook on a Friday night when folks come over, and it is the one my kids ask for by name. Get the basics right and you will never miss the gimmicks.
I want to be clear about what this is and is not, because there are a couple of other Texas burgers floating around that get confused with this one. This is not the Texas Roadhouse Smokehouse Burger copycat, which is a specific restaurant build with its own sauce and toppings. And it is not a barbecue-sauce burger either. If you want the sticky, sweet, smoky route, go make my easy BBQ burger. This right here is the plain, honest, homestyle Texas cheeseburger, the kind you grew up eating off a paper plate in the backyard. That is the whole point of it.
What Makes It a Texas Hamburger
A Texas hamburger is not about a long list of toppings or a secret sauce. It is about a big, juicy, honest patty done right. The whole identity of this burger is in the beef itself, an 80/20 blend seasoned hard on the outside and seared until it has a deep brown crust. Everything else, the bun, the cheese, the fixings, is there to support that patty, not to cover it up. When I think Texas burger, I think generous, unfussy, and seriously juicy.
The size matters too. These are not thin, smashed sliders, though I love a good smash burger another day. A Texas burger is a substantial 6-ounce patty that gives you a real, meaty bite. It is the kind of burger that needs two hands and a stack of napkins. That heft is part of the Texas character. We do things big down here, and a burger is no exception. You want to feel like you got a proper meal, not a snack.
I also want to draw a clear line, because two other burgers get mixed up with this one. This is not the Texas Roadhouse Smokehouse Burger, which is a specific restaurant copycat with bacon, barbecue sauce, and a particular build. And it is not a barbecue burger, where the sauce is the star. This is the plain homestyle Texas cheeseburger, the backyard classic. Knowing the difference keeps you from wandering into a different recipe by accident.
The last piece is the spirit of the thing. A Texas burger is cooked with confidence and eaten without apology. It is the food of cookouts, of Friday nights, of feeding a hungry crowd off the back porch. There is nothing precious about it. You get a good piece of beef, you season it well, you sear it hot, and you build it with the fixings you love. Simple, generous, and juicy. That is the whole philosophy in one sentence.
Choosing 80/20 Ground Beef
The single most important decision you make for this burger happens at the meat counter. I want 80/20 ground beef, which means 80 percent lean and 20 percent fat. That 20 percent fat is not a flaw, it is the whole point. As the patty cooks, the fat melts and bastes the meat from the inside, keeping it juicy and carrying flavor through every bite. Go leaner than this and you are fighting an uphill battle against a dry, sad burger.
I have watched people reach for 90/10 or 93/7 thinking they are doing themselves a favor, and the result is almost always disappointing. Lean ground beef makes a crumbly, dry patty that tastes like obligation. The fat in 80/20 is doing real work. It gives you juiciness, it helps build that crusty sear, and it makes the burger taste like beef instead of cardboard. For a burger, fat is flavor, plain and simple.
If you can, get ground chuck, which is the classic burger cut and usually lands right around that 80/20 mark with great beefy flavor. A butcher shop grind is even better if you have access to one, because it is fresher and often coarser, which makes for a more tender patty. Whatever you buy, keep it cold until the moment you form the patties. Cold beef holds together better and stays loose instead of smearing into a dense paste.
One more thing on the beef: do not buy it days ahead and let it sit. Fresh ground beef makes a noticeably better burger, with brighter flavor and better texture. I buy it the day I am cooking, or the day before at most. And resist any urge to mix seasonings or egg or breadcrumbs into the meat. This is a burger, not a meatloaf. The beef goes in plain, gets formed, and gets seasoned only on the outside. Keep it pure.
Forming Patties and the Dimple Trick
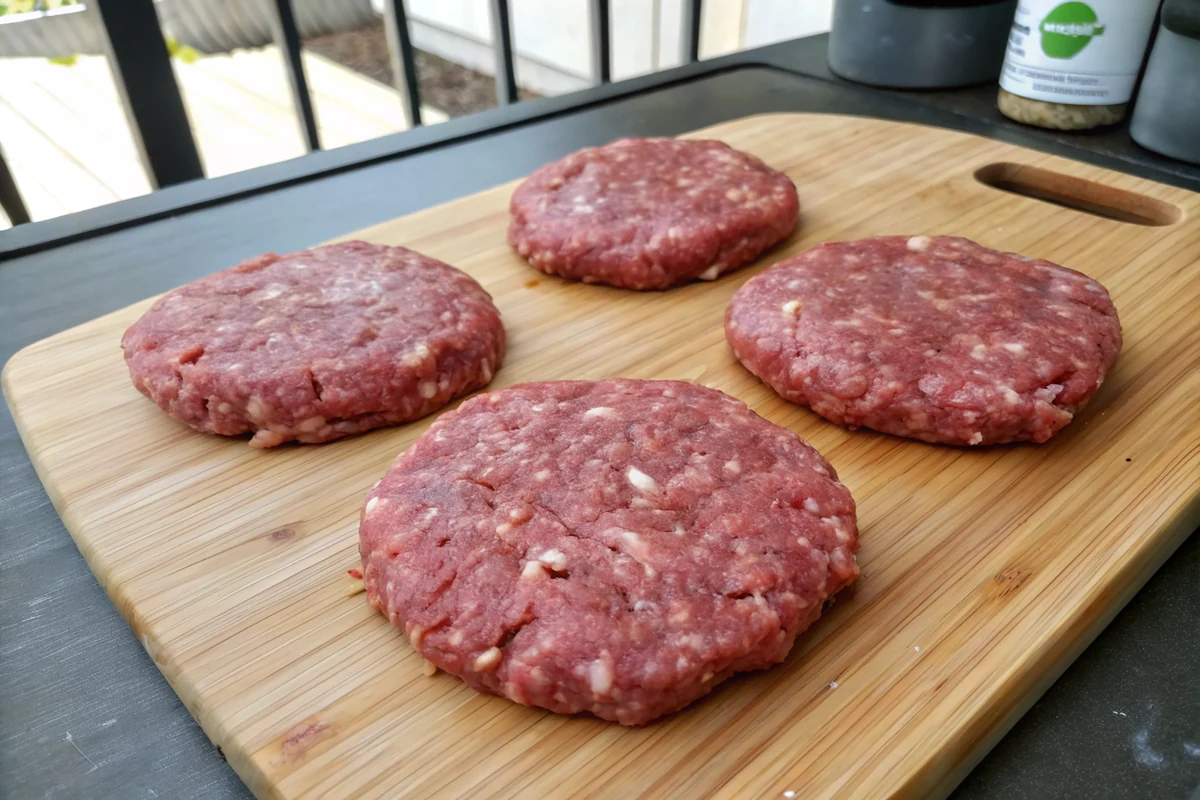
Forming the patties is where a lot of good intentions go wrong, and the fix is simple: handle the meat as little as possible. Divide your 1.5 pounds of beef into four even portions of about 6 ounces. Cup each portion gently and pat it into a patty just wider than your bun, since burgers shrink and tighten up as they cook. The looser and more lightly packed the patty, the more tender the bite. Squeezing and compacting the meat gives you a dense, tough hockey puck.
Now for the dimple trick, which is the one move that separates a flat, even burger from a domed one. Press a shallow indentation into the center of each patty with your thumb, about a half inch deep. As the burger cooks, the muscle fibers contract and the middle wants to puff up into a ball. That dimple gives the center room to swell back to flat instead, so you end up with an even patty that sits right on the bun rather than rolling your toppings off a dome.
Size and thickness are worth thinking about too. I aim for patties a touch wider than the bun and about three-quarters of an inch thick. That gives you enough heft for a juicy interior while still cooking through in a few minutes per side. If you make them too thick, the outside overcooks before the middle is done. Too thin and they dry out fast and lose the meaty bite that makes a Texas burger feel substantial.
A practical tip: form your patties on a sheet of parchment or a plate, and if your kitchen is warm, pop them in the fridge for ten minutes before cooking. Cold patties hold their shape better and sear harder, because the surface is not warmed up and softening before it hits the pan. Keeping the meat cold right up to the moment it cooks is one of those small habits that quietly makes your burgers better every single time.
The Simple Seasoning Philosophy
My seasoning philosophy for this burger is restraint with conviction. The beef is the star, so I season the outside simply and let the meat speak. My blend is kosher salt, coarse black pepper, garlic powder, onion powder, and a little smoked paprika. That is it. The salt and pepper do the heavy lifting, the garlic and onion powder add a savory backbone, and the smoked paprika gives a faint whisper of smoke that makes people think you cooked it over a fire even when you did not.
The most important rule is this: season the outside only, and do it right before the patties hit the pan. Do not mix the seasoning into the meat. A burger is not a meatball, and working salt into the raw beef changes the texture, making it firm and almost springy like a sausage. You want loose, tender beef with a heavily seasoned crust on the outside. Keeping the seasoning on the surface is what gives you that contrast of crusty edges and juicy middle.
Timing the salt matters more than people realize. Salt is hygroscopic, which means it pulls moisture to the surface. If you salt your patties and let them sit for twenty minutes, that drawn-out moisture firms up the meat and works against the juicy texture you want. So I keep the seasoning blend mixed and ready, and I sprinkle it on heavily just as the patties go into the hot pan. Last second seasoning gives you the crust without the toughness.
Be generous with the blend. Because most of it lands on the surface and forms the crust, a timid sprinkle gets lost in a 6-ounce patty. I season both sides until I can clearly see the seasoning sitting on the meat. It looks like a lot in the raw state, but once it sears and you stack the burger with cheese and fixings, it balances out perfectly. Under-seasoning is the most common reason a homemade burger tastes flat, so do not be shy.
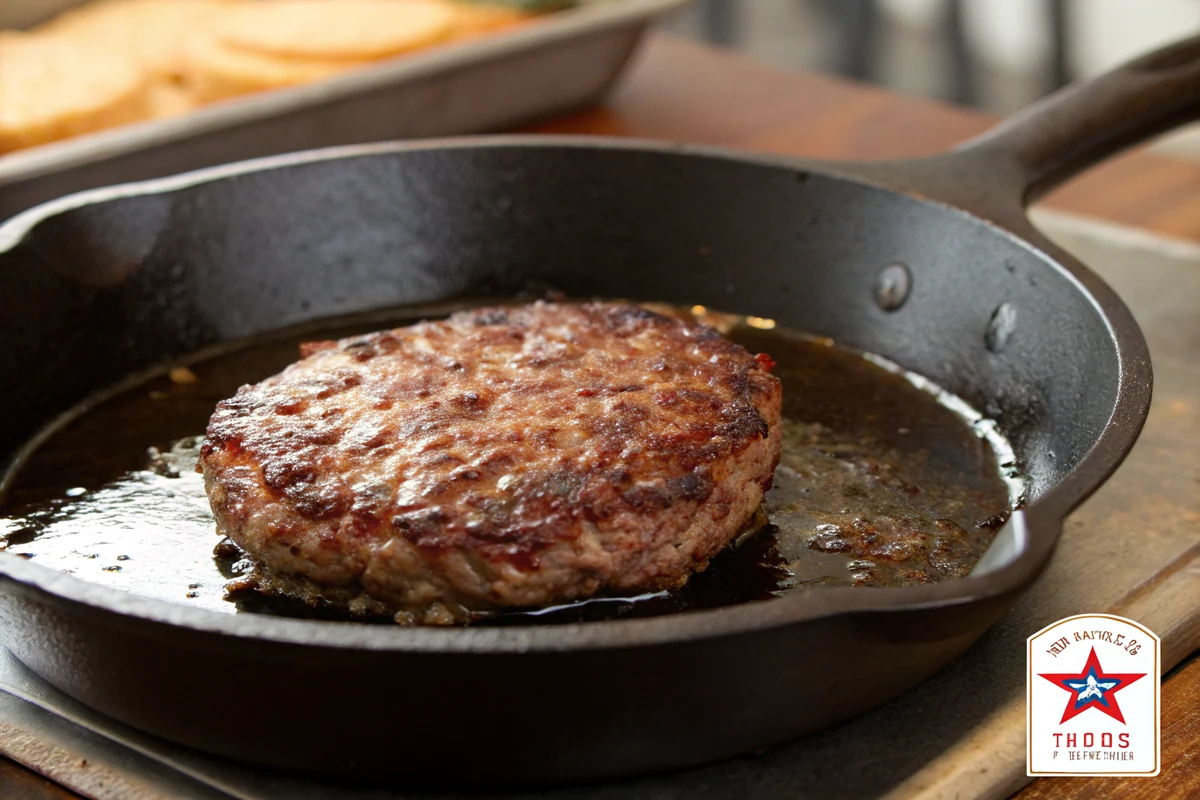
Cast Iron vs Flat-Top vs Grill
You can cook this burger three ways, and I genuinely love all of them, but my default is a cast-iron skillet. Cast iron holds heat like nothing else, so when you lay the patty down it stays hot and gives you that deep, even, edge-to-edge crust. That crust is where so much of the flavor lives. A cast-iron skillet also catches the rendered fat, so the patty almost fries in its own juices, which builds even more browning and flavor. For a kitchen burger, it is hard to beat.
A flat-top or griddle does the same job on a bigger scale, which is why diners and burger joints swear by them. The wide, even surface means you can cook all four patties at once with steady, consistent heat, and you have plenty of room to toast the buns right beside them. If you have a flat-top griddle, indoors or out, it is fantastic for burger night. The principle is identical to cast iron: a hot, flat metal surface that gives you a hard sear and great browning.
The grill is the wild card, and plenty of Texans will tell you a burger belongs over open flame. I will not argue, because grilled burgers have a smoky char that is genuinely wonderful. The trade-off is that a grill lets the fat drip away into the fire, so you lose some of that self-basting juiciness, and the open grates make it harder to get a solid, unbroken crust. If you grill, keep the heat high, the lid handy, and watch for flare-ups from the dripping fat.
My honest take is that cast iron or a flat-top wins for sheer juiciness and crust, while the grill wins for smoky flavor and that backyard feeling. There is no wrong answer. If I want the absolute juiciest, crustiest burger, I reach for the cast-iron skillet every time. If I am already standing over a grill for a crowd and want that char, I happily cook them over the fire. Pick the method that fits your night and the flavor you are after.
The Sear and Doneness Temps
The sear is everything, and the sear depends on heat. Get your cast iron or flat-top truly hot before the meat goes down, about four or five minutes over medium-high. You want it hot enough that a drop of water skitters and evaporates almost instantly. When you lay the patty down, you should hear a loud, aggressive sizzle right away. That sound is the sound of a crust forming. If you hear a quiet, gentle hiss, your pan is too cool and you will steam the meat gray instead of browning it.
Once the patty is down, leave it alone. The biggest mistake I see is people fussing with the burger, sliding it around, and pressing down on it with the spatula. Pressing squeezes out the juices and flattens your crust, which is exactly backward. Let it sear undisturbed for 3 to 4 minutes until a deep brown crust forms and the edges look lacy and crisp. Then flip it once, and only once. A burger you flip a dozen times never builds a proper crust.
After the flip, cook the second side another 3 to 4 minutes and use temperature to judge doneness, not guesswork. For food safety with ground beef, well-done is 160 degrees Fahrenheit in the center, and that is where I cook these. If you like a touch of pink, medium-well runs around 150 to 155, but ground beef carries more risk than a steak, so I steer most folks toward 160. An instant-read thermometer pushed into the side of the patty takes the guessing out of it entirely.
Timing is a guide, but thickness, your pan, and your stove all change the math, which is why the thermometer wins. A three-quarter-inch patty in a properly hot cast-iron skillet usually lands at well-done in about 7 to 8 minutes total, but check rather than assume. Pull the patty the moment it hits your target, because every extra minute on the heat dries it out. Let it rest a minute after cooking so the juices settle back into the meat instead of running out when you bite in.
Cheese and the Jalapeno Texas Twist
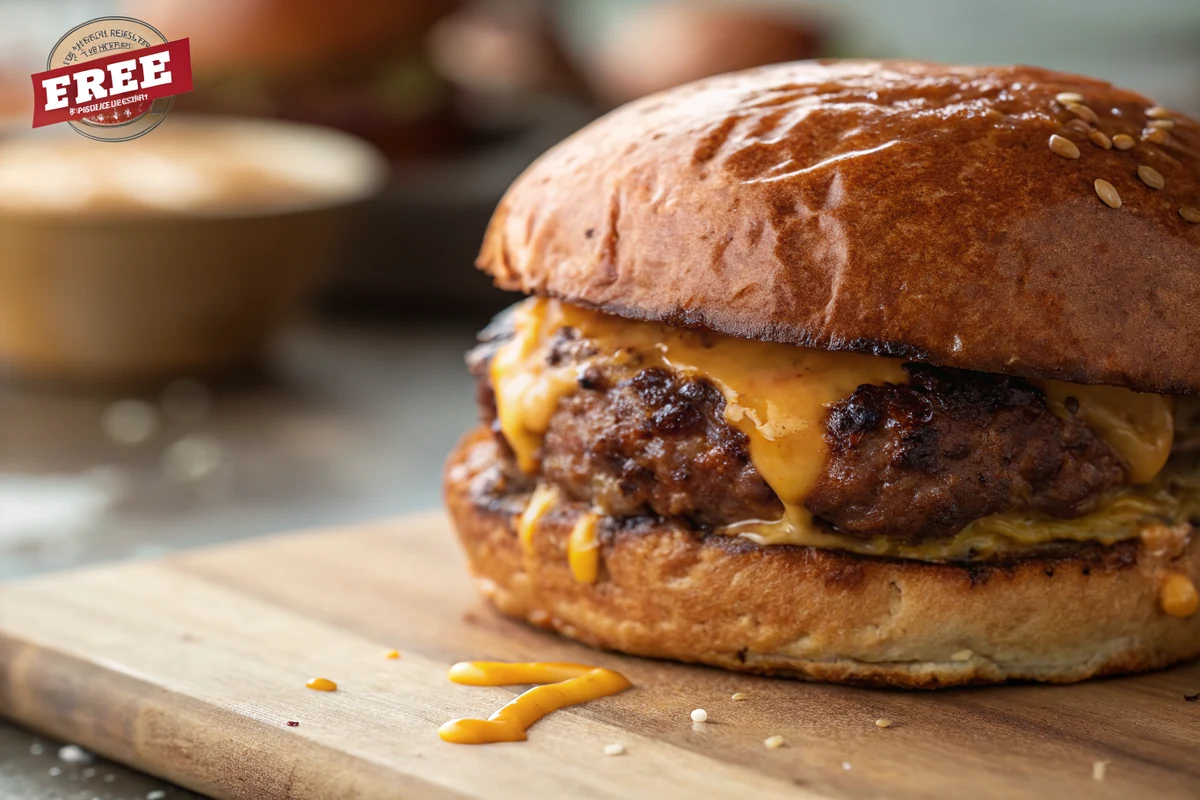
Cheese is not optional in my book, this is a cheeseburger after all. The two classics are American and sharp cheddar, and they each bring something different. American melts into that silky, glossy, gloriously gooey blanket that drapes over the patty, and it is the nostalgic, diner-style choice. Sharp cheddar brings more flavor, a real tang and bite that stands up to the heavily seasoned beef. I go back and forth depending on my mood, but for a Texas burger with attitude, sharp cheddar is my pick.
The trick to melting cheese well is to add it at the right moment and give it a little help. Lay the cheese on the patty in the last minute of cooking, right after the flip. To get a fast, even melt, add a small splash of water to the side of the pan and immediately cover it with a lid for about thirty seconds. The steam trapped under the lid wraps around the cheese and melts it down into the patty without overcooking the meat. It works every time and it looks beautiful.
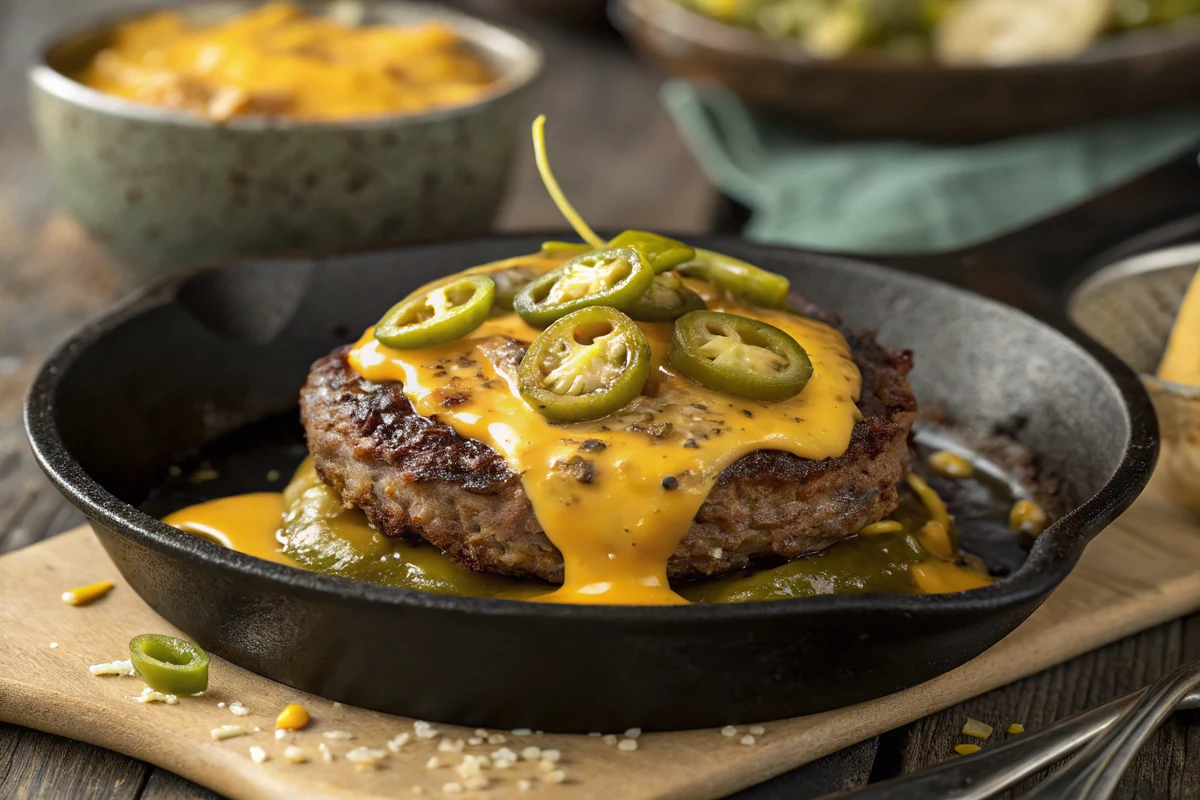
Now for the Texas twist, which is where I let this burger have a little fun. Sharp cheddar plus jalapenos is the move. You can go two ways with the peppers. Pickled jalapenos bring a tangy, vinegary bite that cuts through the rich beef and adds a gentle heat. Fresh jalapeno slices bring a brighter, grassier heat with more punch. Either way, that little kick against the sharp cheddar and the juicy beef is what nudges this from a plain cheeseburger into a Texas one.
If you want to lean harder into the twist, you have options. Char some fresh jalapeno slices in the hot skillet before you cook the patties for a smoky, blistered topping. Or stir a little of the pickled jalapeno brine into your mayo for a spicy spread. None of this is required, and the plain cheeseburger is fantastic on its own, but the jalapeno move is the one I reach for most when I want this burger to taste unmistakably like home. Keep it as a topping, though, not mixed into the meat.
Toasting Buns and the Build Order
People sweat the patty and then ruin the burger with a sad, untoasted bun. Do not be that cook. Toasting the bun is not a fussy extra step, it is essential, and it does two real jobs. First, it adds a little buttery richness and a pleasant crispness that contrasts with the juicy patty. Second, and more important, that toasted surface acts as a moisture barrier so the bun holds up under the juices instead of dissolving into a soggy mess halfway through your meal.
To toast, spread softened butter on the cut sides of the buns and lay them face down on the hot skillet or flat-top for about a minute, until golden and crisp. Watch them, because they go from toasted to burnt fast on a screaming-hot surface. If you cooked your patties in cast iron, toast the buns in the same pan right after so they pick up some of that beefy, seasoned fat. That little bit of flavor in the bun is a detail that makes a real difference.
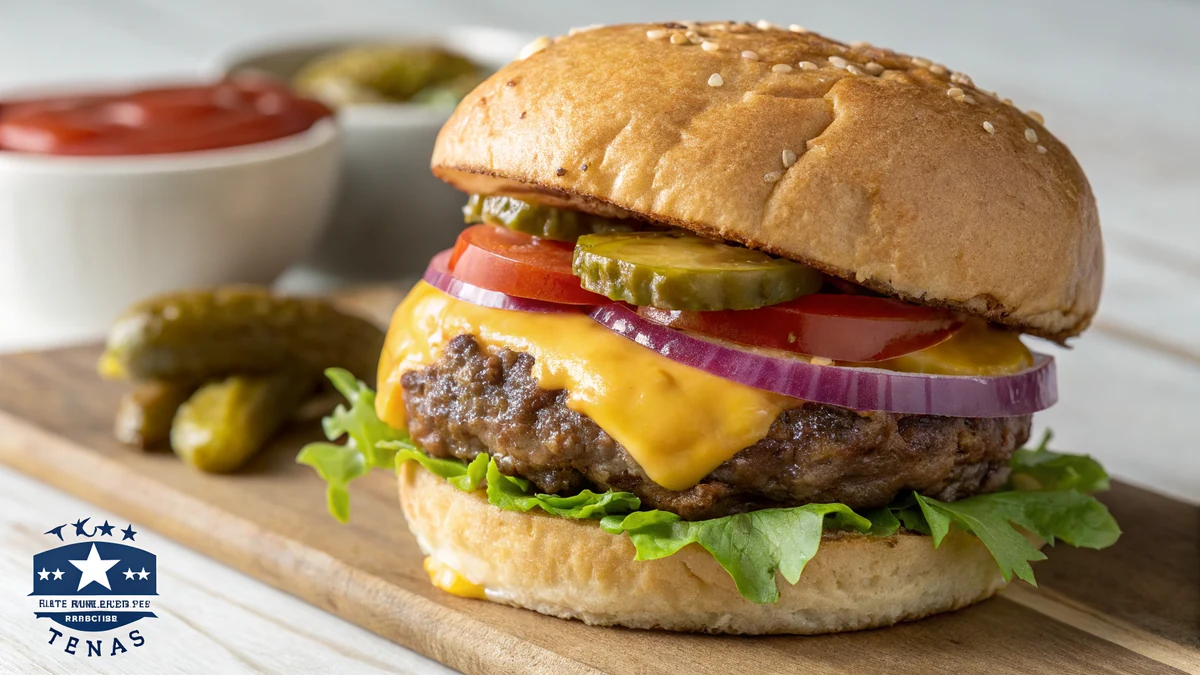
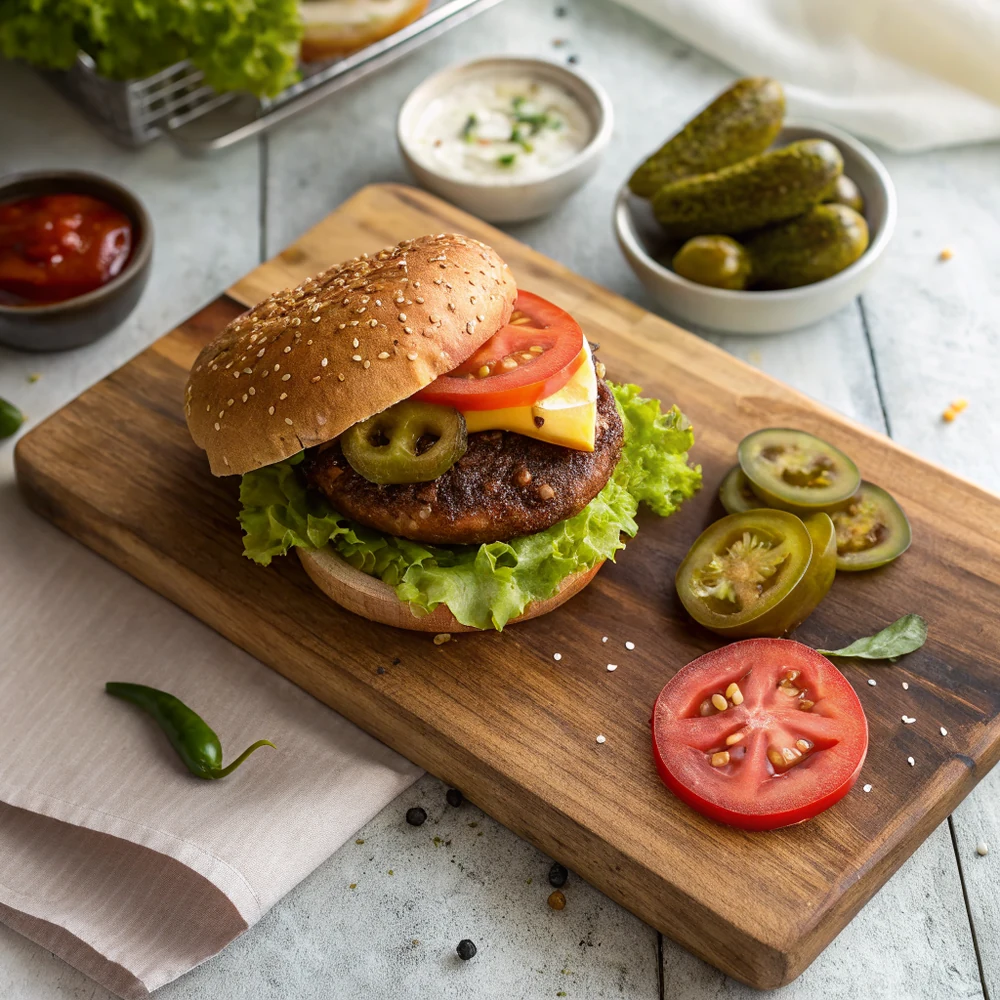
The build order is not random, it is engineering. I start with the bottom bun, spread mustard on it, then lay down lettuce and tomato first. Putting the greens directly on the bottom bun creates a barrier that protects the bread from the hot, juicy patty so the bottom does not get soggy. Then comes the cheesy patty, sitting on that cushion of vegetables. This order keeps everything structurally sound from the first bite to the last.
On top of the patty go the rest of the fixings: onion, pickles, and jalapenos if you are doing the twist. Spread mayo on the underside of the top bun, then cap it off. Building the wet condiments onto the buns and the patty in the middle keeps the layers balanced and stops any one element from sliding out. Give the finished burger a moment to settle so the cheese sets and the juices redistribute, then eat it hot. A well-built burger holds together to the very last bite.
The Fixings and What to Serve
The fixings on a classic Texas burger are simple and fresh, nothing precious. Crisp lettuce, whether green leaf for tenderness or iceberg for crunch, sits on the bottom and protects the bun. A thick slice of ripe tomato adds juicy brightness. Thinly sliced onion, white or red, brings a sharp bite, and you can use it raw or quickly charred in the skillet if you want it sweeter and softer. Dill pickle slices add the tang and crunch that cut through all that rich beef.
For the condiments, I keep it to the classics: yellow mustard and mayonnaise. Mustard adds a sharp, vinegary tang on the bottom, and mayo adds creamy richness on the top. That combination is plenty for a well-seasoned, juicy patty. You do not need a special sauce to make this burger great, the beef and the toasting and the seasoning are already doing the work. If you want heat, the jalapenos are right there. This is a burger that trusts its fundamentals.
On the sides, this burger plays well with everything off a Texas table. Crispy fries or thick steak fries are the obvious and excellent choice. For something more in the spirit of a Texas cookout, I love serving these alongside a spread of Texas BBQ sides like potato salad, coleslaw, baked beans, or grilled corn. A pile of crunchy slaw next to a juicy burger is a perfect balance of cool and rich, and it turns burger night into a real cookout.
Drinks and the little extras round it out. A cold sweet tea, a lemonade, or an ice-cold soda is the right move with a burger like this. And do not underestimate a few simple touches at the table: a bottle of hot sauce, extra pickles, more jalapenos for the heat seekers, and plenty of napkins, because a properly juicy Texas burger is a glorious, messy thing. Set it all out and let people build their plates the way they like. That is the joy of a cookout.
How It Differs From the Smokehouse Burger and a BBQ Burger
I get asked about this a lot, so let me lay it out plainly, because all three are Texas burgers in spirit but they are genuinely different recipes. This homestyle Texas hamburger is the plain, classic backyard cheeseburger: a simply seasoned 80/20 patty, cheese, and fresh fixings. It does not lean on a signature sauce. The flavor comes from the beef, the hard sear, and the seasoning blend. It is the foundational burger, the one everything else builds off of.
The Texas Roadhouse Smokehouse Burger is a specific restaurant copycat, and that matters. It has a defined build that recreates the chain's version, which means barbecue sauce, bacon, cheese, and crispy onion straws stacked in a particular way. It is delicious, but it is a copy of one restaurant's burger, not a generic homestyle one. If you are craving that exact restaurant experience, that recipe is the one to follow, and it is not what we are making here.
A barbecue burger is a third thing entirely, where barbecue sauce is the defining flavor. The sauce gets brushed on the patty or layered into the build, bringing that sweet, smoky, sticky character that reads instantly as barbecue. The beef and the sauce share the spotlight. If that is the burger you want, go make my easy BBQ burger instead, because it is built around that sauce from the start, where this homestyle version deliberately keeps the sauce off the patty.
So why does the distinction matter? Because if you come looking for a plain, juicy, classic Texas cheeseburger and end up following a barbecue or restaurant copycat recipe, you get a different burger than the one you wanted. This page is the simple homestyle version, full stop. Master this one first. Once you can cook a perfect plain Texas cheeseburger, the Smokehouse copycat and the BBQ burger are easy variations to branch into, because the core technique of forming, seasoning, and searing is exactly the same.
Common Mistakes
The first mistake, and the most common one, is choosing lean beef. I will say it again because it is that important: use 80/20. Reaching for 90/10 or 93/7 to feel healthier gives you a dry, crumbly burger that no amount of cheese or sauce can rescue. The fat in 80/20 is what keeps the patty juicy and flavorful as it cooks. If you want to eat lighter, lighten up the sides, not the beef. A burger is the wrong place to cut fat.
The second mistake is overworking the meat and packing the patties too tight. The more you squeeze and compress the beef, the denser and tougher the burger gets. Handle it gently, form loose patties, and do not forget the dimple in the center so they cook flat instead of doming up. And do not mix anything into the meat, no salt, no egg, no breadcrumbs. That turns a burger into a meatball. The beef stays plain and gets seasoned only on the outside.
The third mistake is a pan that is not hot enough, followed by pressing down on the patty with the spatula. A cool pan steams the meat gray and you never get that crucial crust. Get the cast iron screaming hot first and listen for a loud sizzle when the patty lands. And never, ever press down on the burger. That squeezes out the juices straight into the pan, taking your flavor and moisture with them. Leave the patty alone and let it sear in peace.
The last two mistakes go together: overcooking and skipping the toasted bun. Use a thermometer and pull the patties at 160 degrees, because every minute past that dries them out. Guessing by time alone is how good beef gets ruined. And always toast your buns in butter, because an untoasted bun goes soggy under a juicy patty and falls apart in your hands. Avoid these mistakes, get the basics right, and you will turn out a juicy, crusty Texas burger every single time.
Texas Hamburger Recipe
Ingredients
- For the patties:
- 1.5 lb ground beef (80/20)
- 1 1/2 teaspoons kosher salt
- 1 teaspoon coarse black pepper
- 1 teaspoon garlic powder
- 1 teaspoon onion powder
- 1/2 teaspoon smoked paprika
- 1 tablespoon neutral oil or a little butter for the skillet
- For building:
- 4 burger buns
- 2 tablespoons butter, softened, for toasting the buns
- 4 to 8 slices American or sharp cheddar cheese
- Green leaf or iceberg lettuce
- 1 large tomato, sliced
- 1/2 white or red onion, thinly sliced
- Dill pickle slices
- Yellow mustard
- Mayonnaise
- Pickled or fresh jalapenos (optional Texas twist)
Instructions
- Form the patties with a dimple. Divide the 1.5 pounds of beef into four equal portions of about 6 ounces each. Gently shape each into a patty a little wider than your buns, since they shrink as they cook. Handle the meat as little as possible so it stays loose and tender. Press a shallow dimple into the center of each patty with your thumb. That dimple keeps the burger from puffing up into a dome in the middle so it cooks flat and even.
- Season generously, right before cooking. Stir together the kosher salt, coarse black pepper, garlic powder, onion powder, and smoked paprika. Season both sides of each patty generously, and do this just before the patties hit the pan, not earlier. Salt sitting on raw beef for a while pulls out moisture and firms up the surface, which works against the juicy, tender burger you want. A heavy hand on the seasoning is good here, because most of it forms the crust.
- Get the cast iron screaming hot. Set a cast-iron skillet or flat-top over medium-high heat and let it get truly hot, about four or five minutes. Add the oil or a little butter and let it shimmer. The pan is ready when a drop of water dances and skitters across the surface. A hot pan is what gives you that deep brown, crusty sear instead of a gray, steamed patty. Do not rush this part. Patience with the heat pays off in flavor.
- Sear the first side. Lay the patties into the hot pan, dimple side up, and leave them alone. Do not press down on them with the spatula, because that squeezes out the juices you worked to keep in. Let them sear undisturbed for about 3 to 4 minutes, until a deep brown crust forms and the edges look lacy and crisp. You should hear a steady, loud sizzle the whole time. If it goes quiet, your pan was not hot enough.
- Flip and add the cheese. Flip each patty once, carefully, and cook the second side another 3 to 4 minutes for medium-well to well. For well-done, you want 160 degrees in the center. In the last minute, lay a slice or two of American or sharp cheddar on each patty so it melts. If you want it to melt faster, add a splash of water to the pan and cover it for thirty seconds. The steam blankets the cheese and melts it into the patty.
- Toast the buns in butter. While the patties finish, toast the buns. Spread the softened butter on the cut sides and lay them face down in the hot skillet or on the flat-top for about a minute, until golden and crisp. Toasting does two things: it adds a little buttery flavor and, more important, it builds a moisture barrier so the bun does not turn to mush under a juicy patty. A soggy bun ruins a good burger, so never skip this step.
- Build and rest. Spread mayo on the top bun and mustard on the bottom. Stack lettuce and tomato on the bottom bun first, which protects the bread from the hot patty. Add the cheesy patty, then onion, pickles, and jalapenos if you want the Texas twist. Cap it with the top bun. Give the built burger a minute to settle so the juices redistribute and the cheese sets, then serve it hot with plenty of napkins close by.
Frequently Asked Questions
What ground beef is best for a Texas hamburger?
Use 80/20 ground beef, which is 80 percent lean and 20 percent fat. That fat ratio is the key to a juicy, flavorful burger, because it melts as the patty cooks and bastes the meat from the inside. Ground chuck is the classic burger cut and usually lands right at 80/20. Avoid leaner blends like 90/10 or 93/7, which make a dry, crumbly patty. Buy the beef fresh and keep it cold until you form the patties.
Why do you press a dimple in the center of the patty?
The dimple keeps your burger flat instead of puffing into a dome. As the patty cooks, the muscle fibers contract and the center wants to swell up into a ball. Pressing a shallow half-inch indentation into the middle of each raw patty gives the center room to puff back to flat as it cooks. The result is an even, level patty that sits nicely on the bun and holds your toppings, instead of a rounded dome that rolls everything off.
How is this different from the Texas Roadhouse Smokehouse Burger?
They are different recipes. This is a plain homestyle Texas cheeseburger built on a simply seasoned 80/20 patty with classic fixings and no signature sauce. The Texas Roadhouse Smokehouse Burger is a specific restaurant copycat with a defined build that includes barbecue sauce, bacon, cheese, and crispy onion straws stacked a particular way. If you want that exact restaurant version, follow the Smokehouse copycat recipe. This page is the simple, classic backyard burger that everything else builds off of.
What temperature should a hamburger be cooked to?
For food safety with ground beef, cook your burger to 160 degrees Fahrenheit in the center, which is well-done. Ground beef carries more risk than a whole steak because any surface bacteria gets mixed throughout, so I steer most people to 160. If you like a hint of pink, medium-well runs around 150 to 155, but do so knowing the risk. Use an instant-read thermometer pushed into the side of the patty rather than guessing by time, since thickness and heat vary.
Cast iron, flat-top, or grill for the best burger?
For the juiciest burger with the best crust, I reach for a cast-iron skillet or a flat-top griddle. Both hold steady, even heat and catch the rendered fat, so the patty almost fries in its own juices and builds a deep brown sear. A grill gives you wonderful smoky char, but the fat drips away into the fire so you lose some juiciness, and it is harder to get an unbroken crust. Pick cast iron for juiciness and crust, the grill for smoke and that backyard feeling.
Should I season the meat or just the outside?
Season only the outside, and do it right before the patties hit the pan. Do not mix salt or seasoning into the ground beef, because that changes the texture and makes the burger firm and springy like a sausage instead of loose and tender. Salt also pulls moisture to the surface if it sits, so timing matters. Keep your blend of kosher salt, coarse pepper, garlic powder, onion powder, and smoked paprika ready, and sprinkle it generously on both sides just as the patties go down.
What is the optional Texas twist on this burger?
The Texas twist is sharp cheddar plus jalapenos. Where the basic version uses American or cheddar with the standard fixings, the twist swaps in sharp cheddar for more tang and bite, then adds jalapenos for heat. You can use pickled jalapenos for a tangy, vinegary kick or fresh slices for a brighter, grassier heat. For more flavor, char fresh slices in the skillet first or stir some pickle brine into your mayo. It is optional, but it is the move I reach for most.