Texas BBQ
Ribs in an Electric Smoker
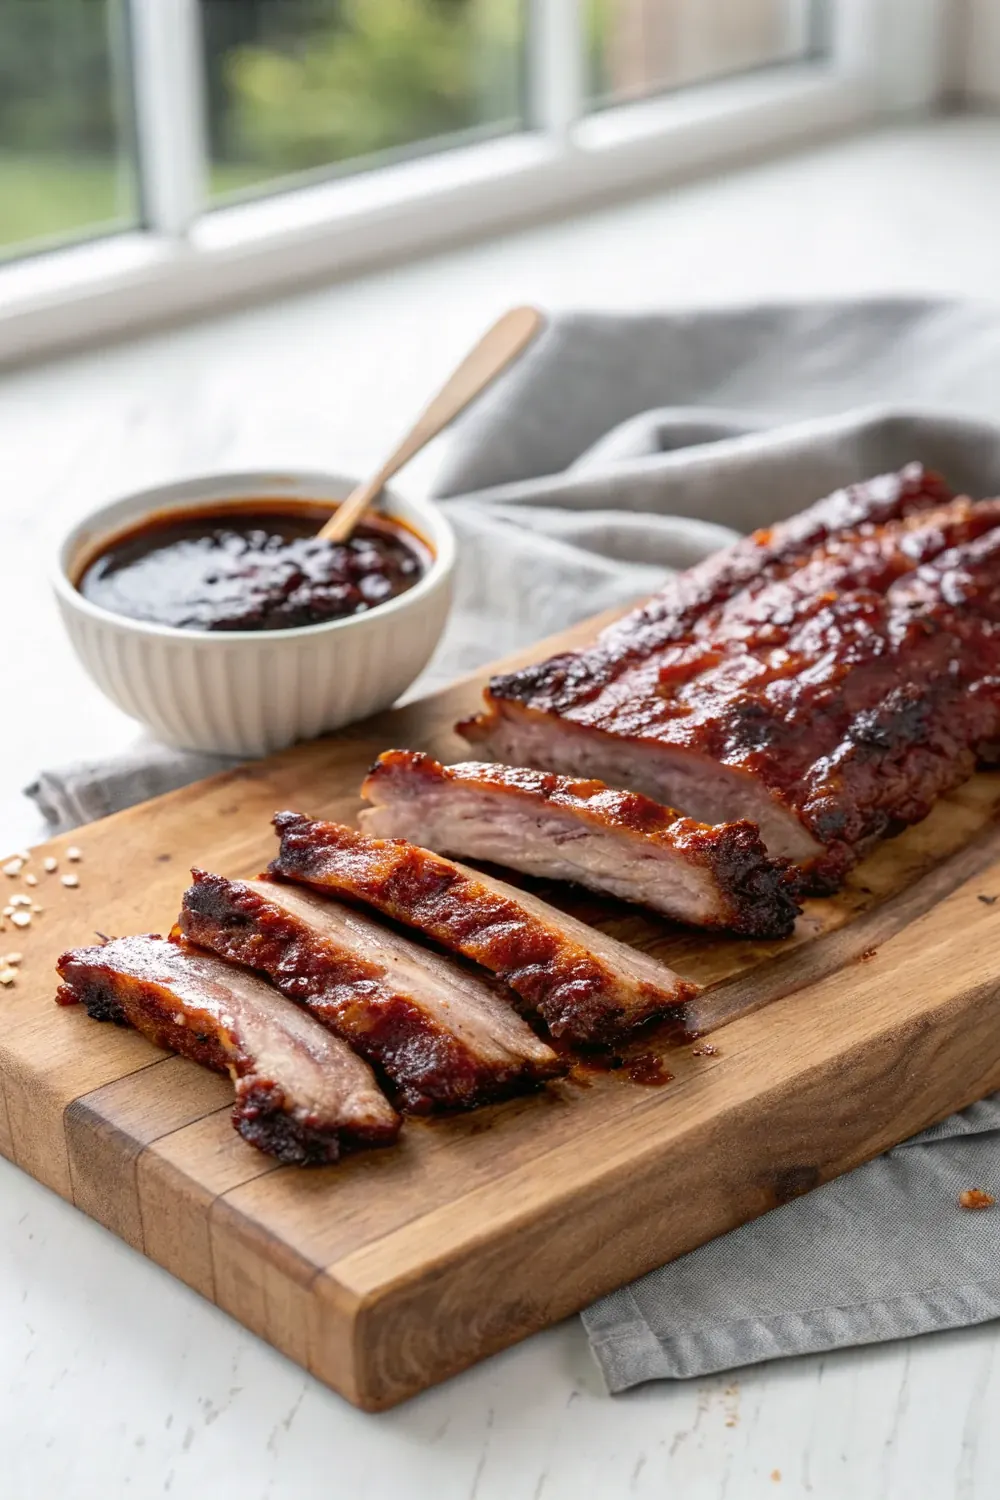
Electric smoker ribs at 225F: baby backs take 4.5 to 5 hours, St. Louis 5.5 to 6. Use a 3-1.5-0.5 wrap, dry chips every 45 minutes, hot water pan.
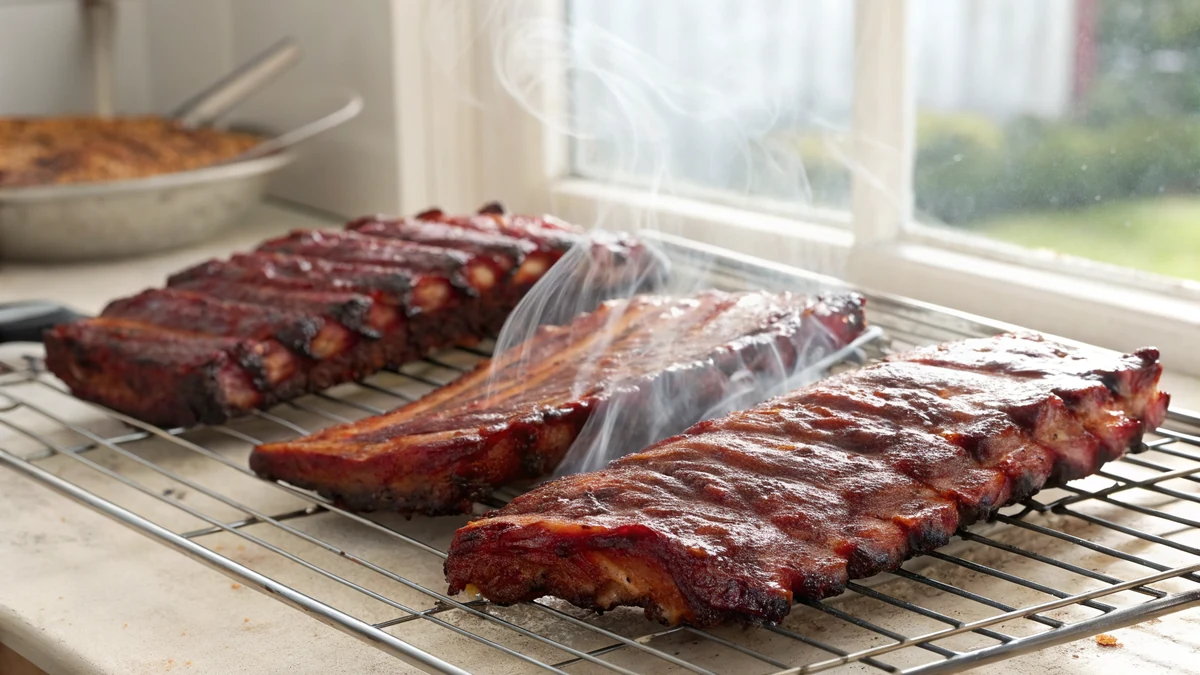
Quick answer: Set the electric smoker to 225F (107C), vent fully open, water pan filled with hot water. Peel the membrane, rub the racks, and smoke them bone side down. Baby backs take 4.5 to 5 hours at 225F; St. Louis cut runs 5.5 to 6. Feed a small handful of dry chips, hickory or pecan, every 45 to 60 minutes for the first half of the cook, and never soak them. Skip the classic 3-2-1: a sealed electric cabinet traps moisture, so the wrap stage works faster and the full schedule turns ribs to mush. Run 3-1.5-0.5 for St. Louis and 2-1.5-0.5 for baby backs: smoke bare, wrap in foil with butter and brown sugar, then unwrap, sauce, and set for the final 30 minutes. The ribs are done when a probe slides between the bones like warm butter at 200 to 203F and the rack cracks at the surface when you lift one end. Rest 15 minutes, slice between the bones, and serve.
I cook on offset smokers for a living, I live in Lockhart, and I am about to spend four thousand words defending an electric smoker, so let us get the confession out of the way early: there is a black electric cabinet on my back porch, it has outlasted two fancier rigs, and it turns out some of the most consistent ribs I make. Not the smokiest. The most consistent. An electric smoker holds 225F (107C) for six straight hours while you mow the lawn, watch the game, or sleep in a lawn chair, and ribs reward that kind of boring, unwavering heat more than any other cut in barbecue.
But here is the thing nobody tells you when you unbox one: an electric smoker is not a small offset. It is a sealed, humid, thermostat-controlled box, and every rib method written for stick burners, especially the famous 3-2-1, needs adjusting before it works in there. This guide is the whole playbook: baby backs and St. Louis cut, the 225F and 250F timing tracks, chip management that actually produces clean smoke, the water pan, the vent, the wrap schedule rebuilt for a cabinet that braises faster than a pit, and the honest chemistry of why your ribs will taste right but look different. Follow it once and the machine does the rest forever.
Why an Electric Smoker Is a Legitimate Rib Machine
Let me deal with the snobbery first, because I have dished out my share of it. An electric smoker is a thermostat, a heating element, a chip tray, and an insulated box. That is it. No fire management, no airflow puzzle, no getting up at 2 a.m. to feed a firebox. The barbecue internet treats this as cheating, and for brisket I will grant the argument has teeth. For ribs, it mostly does not. Ribs want one thing above all: hours of dead-steady low heat, and a decent electric cabinet holds 225F (107C) within a few degrees for the entire cook without you touching anything.
What you trade away is combustion. A stick burner cooks with a live wood fire, which brings deeper smoke flavor and the visual signatures of pit barbecue. An electric element does not burn anything; it heats the box and smolders chips on a tray. The smoke is lighter, the ring is missing, and the bark sets a little softer. Every one of those gaps has a workaround in this guide, and the finished rack, done right, will be tender, smoky, and better than the ribs at most restaurants with a pit out front.
The reference machine for everything on this page is the 30-inch Masterbuilt cabinet style, the smoker more first-time owners have than any other, and the one I keep on my own porch for weeknight cooks. The techniques apply to any electric cabinet: same sealed box, same chip tray, same water pan, same vent. If you are still shopping, my smoker buying guide covers the Masterbuilt MES 140G alongside the pellet and offset options, with my honest take on who should buy which. If the cabinet is already plugged in, keep reading; you own a better rib cooker than you have been told.
Baby Backs or St. Louis: Pick Your Rack
Two cuts matter here, and they cook differently enough that this whole guide gives them separate numbers. Baby backs come off the top of the rib cage where it meets the loin: shorter bones, leaner, more tender meat, racks around 2 to 2.5 lb (0.9 to 1.1 kg). St. Louis cut is a spare rib trimmed square: flatter, fattier, meatier between the bones, usually about 3 lb (1.4 kg) a rack. Baby backs are the crowd default. St. Louis is what I cook when the choice is mine, because that extra fat is insurance in any smoker and flavor in every bite.
For an electric cabinet specifically, St. Louis has a second advantage: forgiveness. Baby backs are lean enough that an extra 45 minutes past done turns them dry and crumbly, while a St. Louis rack shrugs off the same mistake. If this is your first rib cook on the machine, start with St. Louis, learn what done feels like on the probe, then graduate to baby backs once your timing instincts are set. Both racks fit a standard 30-inch cabinet lying flat with room to spare; if you are cooking four racks, use a rib rack to stand them on edge and rotate top to bottom halfway through.
One note on ambition: the St. Louis rack is also the cut where wood-fired barbecue shows off hardest. Once you have the electric version down and want to taste what a live fire adds, my smoked St. Louis style ribs is the classic wood-smoker version of the same cut, same trim, same doneness targets, different engine. Cooking both back to back is the best barbecue education I can prescribe, and the electric rack will hold its head higher than you expect.
Times and Temps: The 225F and 250F Tracks
Here are the numbers this page exists for. At 225F (107C), baby backs take 4.5 to 5 hours start to finish and St. Louis racks take 5.5 to 6. At 250F (121C), baby backs come in around 3.5 to 4 hours and St. Louis around 4.5 to 5. Those windows include the wrap and the final sauce set, and they assume racks straight from the fridge into a fully preheated cabinet. Meat weight moves the needle more than anything else: a skimpy 2 lb baby back rack finishes at the front of its window, a heavy 3.5 lb St. Louis at the back.
Which track should you run? I cook 225F when the afternoon is mine, because the longer render carries a touch more smoke and the fat melts a little silkier. I cook 250F when dinner has a deadline, and I promise no guest has ever called the difference. The one thing you cannot do is split it by feel, because an electric smoker removes the feel; pick a number, set the dial, and let the thermostat be right all day. If you want the genuinely hot-and-fast track, my guide to how long to smoke ribs at 275 covers that with a full timing chart; this page owns the 225F and 250F electric numbers.
Trust tenderness over the clock, always. The times above are honest averages from years of cooks on my own cabinet, but every rack carries its own bone size and fat map, and every cabinet reads a few degrees off its own dial. The clock tells you when to start checking; the probe, sliding between the bones with no resistance at 200 to 203F (93 to 95C), tells you when to stop cooking. Write your own results on the inside of a cabinet door in grease pencil like I do, and after three cooks you will have a timing chart calibrated to your exact machine.
The 3-2-1 Method, Rewired for a Sealed Cabinet
The 3-2-1 method is the most famous rib formula in barbecue: 3 hours of bare smoke, 2 hours wrapped in foil, 1 hour unwrapped with sauce, all at 225F. It was built for offset pits, and on an offset it works, because a stick burner is a leaky, drafty machine that pulls dry air across the meat for the entire cook. The foil stage exists to fight that dryness: sealed in with butter, sugar, and juice, the ribs braise, the collagen melts fast, and two hours of steam undoes six hours of desert wind.
An electric smoker is the opposite machine. The cabinet is gasketed and sealed, the water pan sits inches from the element, and the only exit is one small vent. That box runs humid all day; it is essentially a low, slow steam oven with a smoke supply. So the wrap stage, which is pure braising, works dramatically faster in there. Run the full 3-2-1 in an electric cabinet and you sail past tender into mush: meat that falls off the bone before you pick the rib up, bark gone soft, the texture of pot roast wearing a rib costume. I did exactly this on my first electric cook and served it anyway. My brother-in-law still brings it up.
So here is the schedule rebuilt for the machine: 3-1.5-0.5 for St. Louis and 2-1.5-0.5 for baby backs, both at 225F. Three hours (or two, for baby backs) of bare smoke while the bark builds, 1.5 hours wrapped, then 30 minutes unwrapped to set the sauce. At 250F, trim each stage by about 20 percent and watch the wrap closely. The wrap stage carries the mush risk, so it gets cut hardest; the final stage only needs to tighten sauce, so half an hour does it. Same logic as 3-2-1, same stages in the same order, just recalibrated for a box with built-in humidity.
Membrane, Mustard, and the Rub
Every rack of pork ribs comes with a translucent membrane, the peritoneum, stretched across the bone side, and it has to go. Cooked, it turns into a sheet of leather that smoke cannot cross and teeth cannot politely handle. Removal takes 30 seconds: bone side up, slide a butter knife under the membrane at the second bone, work a corner loose, grab it with a dry paper towel, the dryness is the whole trick, and peel it back in one slow pull. Some grocery racks come with it already stripped; if the bone side looks matte and meaty rather than shiny, the butcher beat you to it.
The mustard is a binder, nothing more. A thin film of cheap yellow mustard holds the rub in place and vanishes completely in the cook; nobody has ever tasted it, and no, it does not make the ribs tangy. My rub for electric cooks leans a touch sweeter than my pit rub, 1/4 cup brown sugar against 2 tablespoons each of coarse salt and black pepper, plus paprika, garlic, onion, and chili powder, because sugar compensates for lighter smoke and 225F is too low to burn it. If you want to go deeper down that road, my Texas BBQ rubs guide has the full lineup, from Dalmatian to sweet.
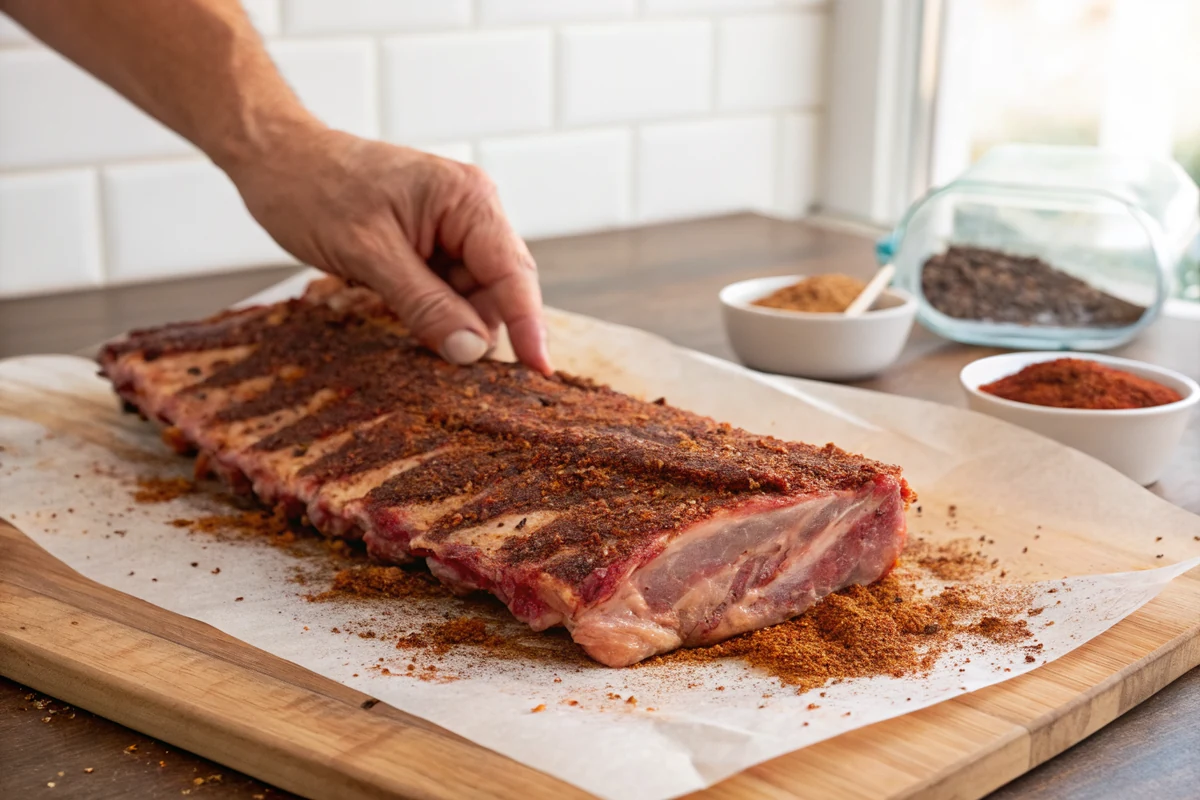
Season heavier on the meat side than the bone side, about 3 tablespoons total per St. Louis rack and 2 per baby back, and press the rub on with a flat palm instead of massaging it around, which just rolls it into clumps. Then give the racks 20 to 30 minutes on the counter while the smoker preheats. You are watching for the rub to change from dusty to wet and glossy as the salt pulls moisture up and dissolves into a glaze. That wet layer is what the smoke sticks to and what dries into bark, and racks that go in dusty come out patchy.
Wood Chips: Small, Dry, and Often
Chip management is the actual skill of electric smoking, because the element does the heat and the vent does itself. The rule is small, dry, frequent: about 1/2 cup of chips in the loader every 45 to 60 minutes, added whenever the smoke thins to a whisper, and only during the bare stage of the cook. Once the ribs are wrapped, foil blocks smoke anyway, so stop feeding the tray and save the wood. Over a 3-hour bare stage you will use 3 to 4 cups total. Resist the urge to load a mountain up front; a packed tray smolders thick, white, and acrid, and bitter creosote is the number one flavor complaint from new electric owners.
Do not soak the chips, ever, and let me kill this myth with numbers. Wood cannot absorb meaningful water in a 30-minute soak; the moisture sits on the surface, and every drop of it has to boil off at 212F (100C) before the wood can reach the 570F (300C) or so where it actually begins to smolder and make smoke. So soaked chips spend their first several minutes producing steam, not smoke, while chilling the tray and dragging out the cycle. The white billow that soakers point to as proof is water vapor. Dry chips light fast, burn cleaner, and give you thin blue-tinged smoke, which is the only smoke you want on meat.
Wood choice matters less than chip discipline, but here is my order for pork ribs: hickory for the classic, assertive backbone; pecan for the same family with rounder edges, and my usual pick; apple when I want a sweeter, lighter profile for baby backs. A 50/50 hickory and apple mix is the crowd-pleaser I use most. If you can find post oak in chip form, and some barbecue suppliers do bag it, that is the Central Texas answer and it is gorgeous on pork. Skip mesquite in an electric cabinet; in a sealed box its sharpness has nowhere to go and it bullies pork in under an hour.
The Water Pan and the Vent
Yes, use the water pan, and fill it with hot water, not cold. The pan does three jobs. First, thermal mass: a quart of water resists temperature change, so the cabinet swings less when the element cycles and recovers faster after every door opening. Second, humidity: moist air keeps the surface of the meat tacky, and smoke compounds bind to a tacky surface far better than a dry one, so a wet pan literally makes the ribs smokier. Third, it catches drippings, which your cleanup schedule will appreciate. Hot water matters because a pan of cold tap water is a heat sink that can hold the cabinet below set point for half an hour while the element fights it.
The vent, the little damper on top of the cabinet, stays fully open for the entire cook. Every new owner wants to choke it down to trap smoke, and it is precisely the wrong move. Smoke is only good for meat while it is fresh and moving; stale smoke sitting in a sealed box goes acrid and paints the ribs with the bitter, ashtray edge that ruins more electric cooks than any other mistake. A wide-open vent pulls a steady draft of clean smoke across the meat and out. You lose a little heat and the element works slightly harder. That is the deal, and it is a good one.
Check the pan when you add chips and top it off with hot water from a kettle whenever it drops below half; over a 6-hour cook it will need one or two refills. And do not get clever by replacing the water with apple juice or beer. At 225F the volatiles boil off in the first 20 minutes and leave nothing behind but a scorched, sticky pan; I have sacrificed both a decent lager and twenty minutes of scrubbing to confirm this for you. Plain hot water does the job. Save the apple juice for the foil, where it actually touches the meat.
The Smoke Ring You Will Not Get, and Why It Does Not Matter
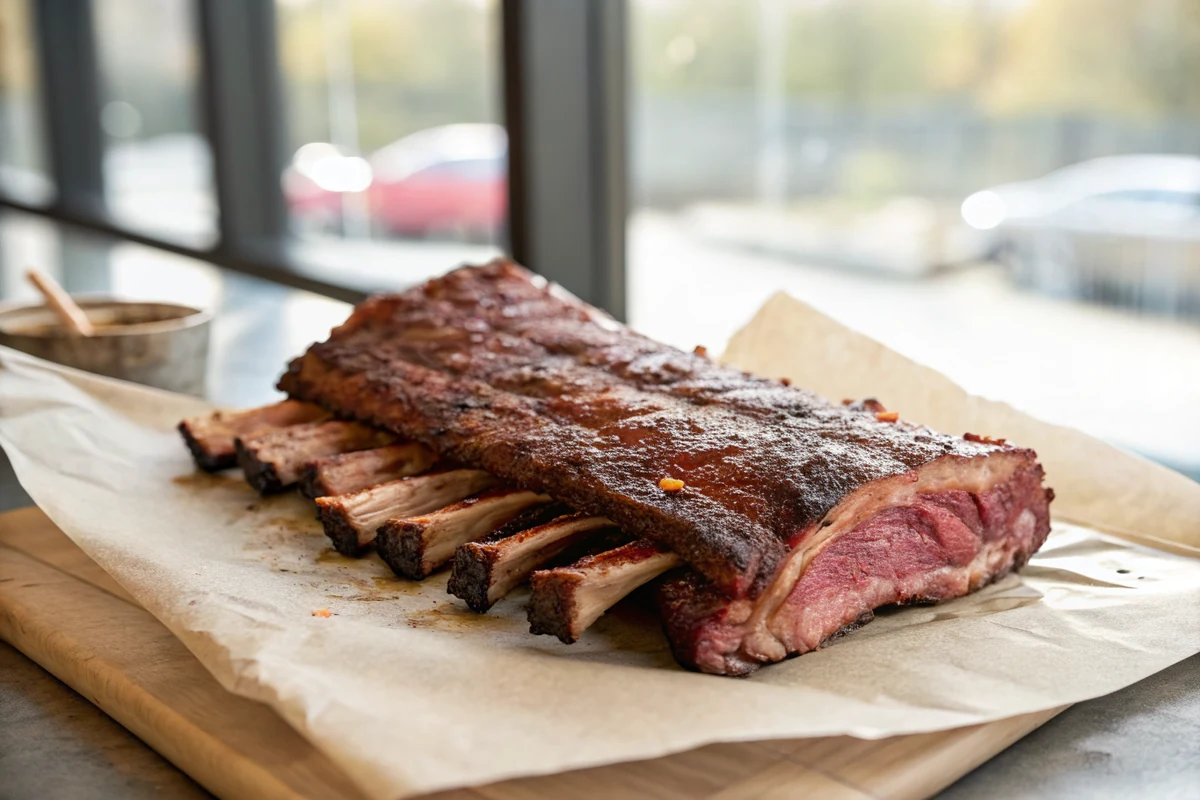
Slice a rib off a wood-fired pit and there it is: the pink crescent under the bark, the smoke ring, barbecue's merit badge. Slice a rib off an electric smoker and the crescent is thin or missing entirely, and I need you to know before you take that personally that nothing went wrong. The ring is chemistry, not flavor. Burning wood and charcoal release nitric oxide and nitrogen dioxide, those gases dissolve into the wet surface of the meat, and they bind with myoglobin, the pigment that makes meat red, locking it pink before heat can turn it gray. It is the same reaction that keeps cured ham and corned beef rosy.
An electric element breaks the chain at the first link: it does not burn anything. Smoldering chips on a tray produce flavorful smoke but only a fraction of the nitrogen gases that open flame combustion creates, so there is not enough nitric oxide in the cabinet to fix the pink. Meanwhile the flavor compounds you actually taste, the phenols and carbonyls that read as smoky on the tongue, come off those smoldering chips just fine. Blind taste tests have embarrassed plenty of experts on this point: the ring is visual, and judges at sanctioned barbecue competitions are explicitly instructed not to score it, because everyone in that world knows it can be faked with curing salt.
So the electric rib eats smoky and looks a shade less dramatic, and you get to decide how much you care. My answer is: not much, and my Lockhart neighbors, men who own more firewood than furniture, have cleaned plates of my electric ribs without one of them noticing in the dark of a porch dinner. If the cosmetics genuinely bug you, a light dusting that includes a pinch of celery seed in the rub nudges some pink back by the same curing chemistry. I skip it. The bark, the pull, and the flavor are the rib; the ring is the outfit.
The Wrap: Foil, Butter, and 90 Minutes
Wrap when the bark says so, with the clock as your backup: about 3 hours in for St. Louis, 2 for baby backs. The bark test is simple. Press a fingertip on the meat side; if the rub smears or feels damp, give it another 30 minutes, but if the surface is dry, set, and deep red-brown, it is ready. Wrapping too early is the worse error, because bark that never set dissolves in the foil steam and cannot be recovered, while a rack wrapped 30 minutes late just picks up a little extra smoke. When in doubt, wait.
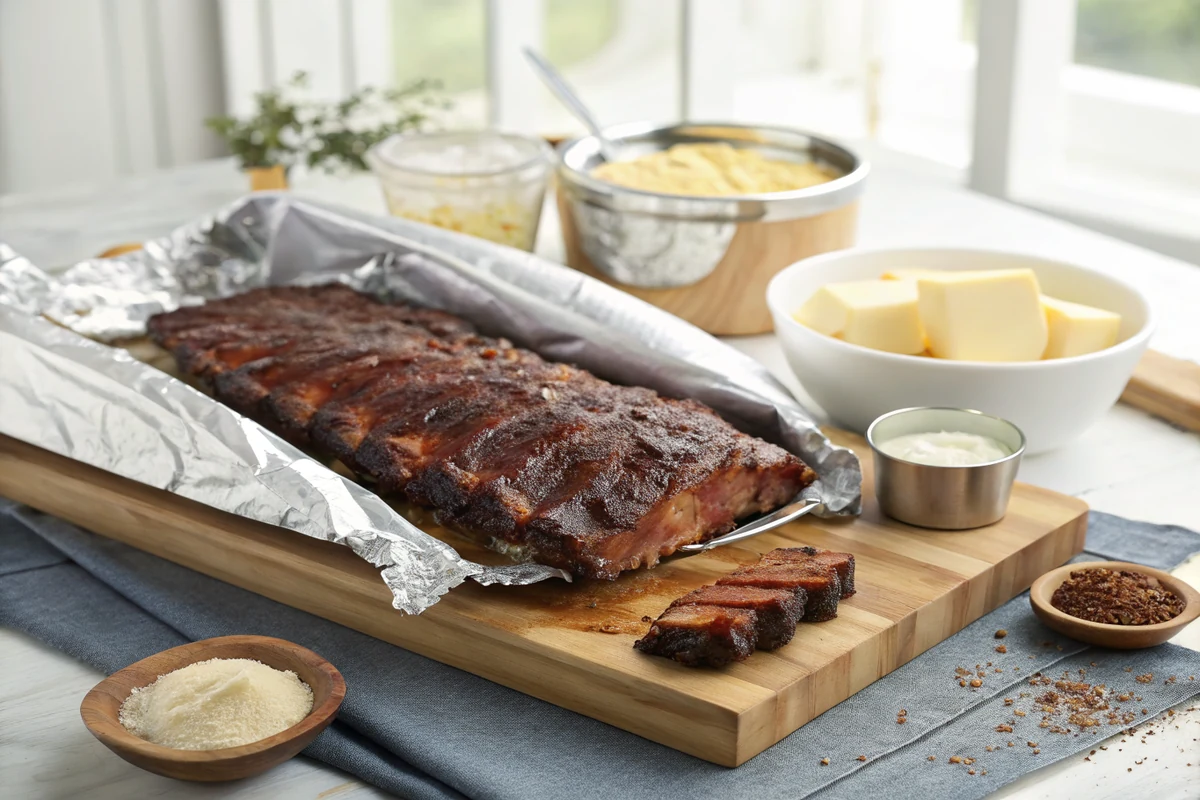
Build each packet the same way every time: a double layer of heavy-duty foil, half the butter pats and brown sugar scattered on the foil, a short splash of apple juice, then the rack laid meat side down so the bark braises directly in the sweet fat. Fold the edges into a tight seal with no gaps; a leaky packet drops its steam and the rib inside stalls while its neighbors finish. Back into the cabinet for 1.5 hours, and stop adding chips from here on. Two racks means two packets; never stack them, because the bottom rack in a stack braises harder and finishes twenty minutes ahead of schedule.
That 90-minute number is the heart of this whole guide, so here is the reasoning one more time: foil braising in an already-humid electric cabinet runs faster than the same stage in a drafty offset, and the classic 2-hour wrap overshoots into mush. At 1.5 hours a St. Louis rack lands at tender-with-a-tug, which is what competition judges and I both mean by perfect. If your crowd genuinely prefers total fall-apart, and plenty of good people do, run the wrap to 2 hours on purpose and skip the apologies. The difference between a texture and a mistake is whether you chose it.
Doneness: The Probe, the Bend, the Sauce, the Rest
Rib doneness is about tenderness, not a magic internal number, but the two travel together closely enough that I give you both. Between the bones, in the thickest meat, a probe should slide in with no more resistance than warm butter, and when it does the thermometer will read 200 to 203F (93 to 95C). That is the range where collagen has fully melted into gelatin. Check at the 90-minute mark of the wrap, and open the packets away from your face; foil steam burns faster than any grill grate. Resistance means reseal and recheck in 20 to 30 minutes, no exceptions and no wishful thinking.
The bend test is the no-thermometer classic and worth learning anyway. Pick the rack up with tongs at one end, a third of the way down, and let the rest hang. A done rack bends into a deep bow and the bark cracks open across the surface; an underdone rack bends shallow and stays smooth. I use both tests on every cook because they check different things: the probe reads the deep meat, the bend reads the whole structure. When they agree, and they will, you are done with the cooking part and 30 minutes from the eating part.
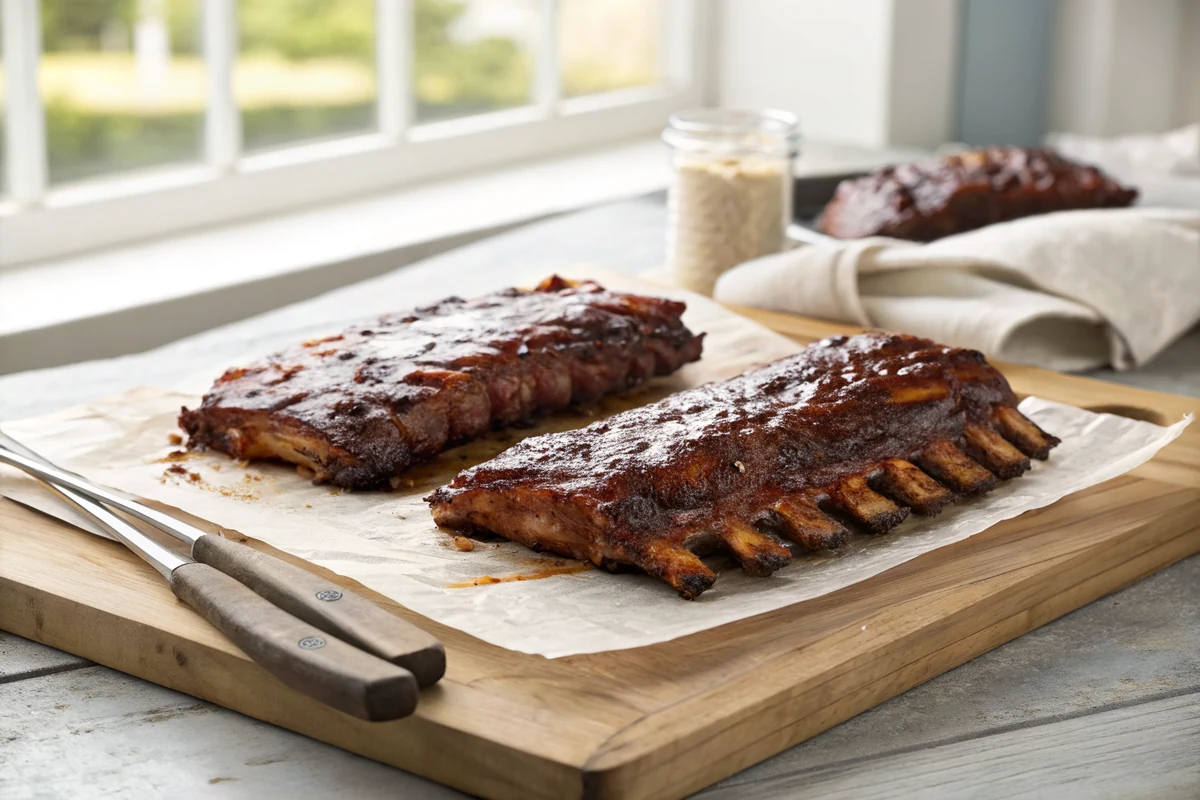
Sauce goes on at the end, always: unwrap, lay the racks meat side up, brush one thin coat over the top, and give them 30 minutes back in the cabinet so the glaze tightens from wet to tacky. Sauce applied earlier just scorches its sugar and slides off. Use a sauce with some vinegar spine to cut the richness; my Texas BBQ sauce is thin, tangy, and built for exactly this job. Then the step everyone skips: rest the racks 15 minutes under loose foil. Slicing hot off the smoker pours the juice onto the board; fifteen patient minutes keeps it in the meat, where it belongs.
The Seven Mistakes That Ruin Electric Smoker Ribs
Mistake one is soaked chips, which we have covered: steam first, smoke later, bitter always. Mistake two is overloading the tray, a full cup or more at once, which smolders thick and white instead of thin and blue; if you cannot see through the smoke leaving the vent, it is too heavy. Mistake three is choking the vent down to trap smoke, which turns the cabinet into a creosote chamber. Those three are all the same sin wearing different hats, more is better thinking applied to smoke, and the fix for all of them is the same: small, dry, frequent, vent wide open.
Mistake four is peeking. Every door opening dumps the cabinet's heat and humidity, and a small element needs 10 to 15 minutes to claw it back, so four curiosity peeks add a real half hour to the cook. Open the door for chips, water, wrapping, and doneness checks, and otherwise trust the thermostat; the entire point of this machine is that it does not need supervision. Mistake five is trusting the built-in dial thermometer, which on most cabinets reads the top corner of the box and can sit 15 to 25 degrees off the grate where your ribs live. A ten-dollar wired probe on the middle rack tells the truth. Calibrate once and you know your machine forever.
Mistake six is running the classic 3-2-1 straight out of a forum post, which in this humid box produces mush, as covered at length above. Mistake seven is the cold start: ribs into an unpreheated cabinet with a cold water pan, which costs the meat its first hour of proper smoke absorption while everything slowly warms. Give the box its full 30 to 45 minutes. And one bonus habit that prevents half of everything: run the empty smoker at 275F with a little smoke for two hours before its first ever cook, to burn off machine oils, and wipe the door gasket after cooks so the seal that makes this whole method work keeps sealing.
Leftovers, the Oven Alternative, and Your Next Cook
Leftover smoked ribs are a gift, and they are also easy to wreck in a microwave. Wrap cooled racks tightly in foil, refrigerate up to 4 days, and bring them back low and slow so the fat softens without the meat drying: a 275F oven, foil-wrapped with a splash of liquid, is the short version. The long version, with the freezer timeline and the method for single ribs versus whole racks, is in my guide to how to reheat smoked ribs. Reheated properly, day-two ribs are 95 percent of day-one ribs, which makes cooking four racks instead of two the smartest math in this article.
If someone at your table loves ribs but you are not ready to buy any smoker at all, there is an honest indoor path. My fall off the bone oven ribs deliver the steakhouse texture with nothing but an oven, foil, and patience, no smoke, no cabinet, no extension cord across the porch. I would rather see you make great oven ribs than mediocre smoked ones, and plenty of households run both methods: oven ribs on a February weeknight, the electric cabinet when the weather and the weekend cooperate.
And when the ribs become routine, and on an electric smoker they will faster than you think, you will feel the pull every cabinet owner feels: the big one. A packer brisket is a 12-hour commitment and a genuine test of the machine, and my Texas BBQ brisket guide walks the whole road, trim to slice. Everything ribs teach you transfers: clean smoke, patience with the wrap, probing for feel instead of numbers, resting like you mean it. Ribs are the semester; brisket is the final exam. Take it when the probe sliding between the bones stops surprising you and starts feeling inevitable. And if what you are actually craving is live fire with the convenience mostly intact, the ceramic route is the classic upgrade: my Big Green Egg beef ribs show what a kamado does with a long cook, real charcoal and all.
Ribs in an Electric Smoker Recipe
Ingredients
- For the ribs:
- 2 racks St. Louis cut spare ribs (about 3 lb / 1.4 kg each), or 2 racks baby backs (2 to 2.5 lb / 0.9 to 1.1 kg each)
- 2 tablespoons (30 ml) yellow mustard, as a binder
- For the rub:
- 1/4 cup (50 g) packed brown sugar
- 2 tablespoons (36 g) coarse kosher salt
- 2 tablespoons (14 g) coarsely ground black pepper
- 1 tablespoon (7 g) sweet paprika
- 2 teaspoons (6 g) garlic powder
- 2 teaspoons (5 g) onion powder
- 1 teaspoon (3 g) chili powder
- 1/2 teaspoon cayenne, optional
- For the wrap and glaze:
- 4 tablespoons (56 g) salted butter, cut into thin pats, divided
- 1/4 cup (50 g) packed brown sugar, divided
- 1/4 cup (60 ml) apple juice, divided
- 1 cup (240 ml) barbecue sauce, for the final 30 minutes
- For the smoker:
- 3 to 4 cups dry wood chips, hickory, pecan, or apple
- Hot water for the water pan
- Equipment:
- Electric cabinet smoker, heavy-duty foil, an instant-read or leave-in probe thermometer, tongs, and a butter knife plus paper towel for the membrane
Instructions
- Preheat with hot water in the pan. Set the smoker to 225F (107C), fill the water pan with hot tap water, and open the top vent all the way. Give the cabinet a full 30 to 45 minutes to preheat and stabilize before the ribs go in. Do not add chips yet; an empty preheat lets the walls come up to temperature so the smoker recovers fast when you open the door.
- Peel the membrane. Flip each rack bone side up. Slide a butter knife under the papery membrane at the second or third bone, lift a corner, grip it with a dry paper towel, and pull it off in one sheet. If it tears, restart at the next bone. Removing it lets smoke and rub reach the meat and keeps the bone side from turning leathery.
- Season the racks. Rub a thin film of yellow mustard over both sides of each rack, then season generously: about 3 tablespoons of rub per St. Louis rack, 2 per baby back, meat side heavier than bone side. Press the rub in rather than rubbing it around, and let the racks sit at room temperature while the smoker finishes preheating, 20 to 30 minutes, until the rub looks wet.
- Start the smoke. Lay the racks bone side down on the middle racks with at least an inch of space around each, and drop your first small handful, about 1/2 cup, of dry chips into the loader. Close the door and leave it closed. At 225F, baby backs will smoke bare for 2 hours and St. Louis racks for 3 hours before wrapping.
- Feed chips every 45 to 60 minutes. Add another 1/2 cup of dry chips whenever the smoke thins out, roughly every 45 to 60 minutes, through the entire bare stage only. Small, frequent, dry loads burn clean; big loads and soaked chips smolder white and turn the meat bitter. Top off the water pan with hot water if it drops below half.
- Wrap at the bark stage. When the bark is deep red-brown and the rub no longer smears under a fingertip, lay each rack meat side down on a double sheet of heavy foil over half the butter pats, half the brown sugar, and a splash of apple juice. Fold the foil into a tight, sealed packet, return the packets to the smoker, and stop adding chips.
- Probe for tenderness at 90 minutes. After 1.5 hours in foil, open a packet carefully, the steam is fierce, and slide a probe into the meat between two bones. It should go in like warm butter with a reading of 200 to 203F (93 to 95C). If there is any resistance, reseal and give the packet another 20 to 30 minutes before checking again.
- Sauce and set the glaze. Unwrap the racks, discard the foil and juices or save them for the sauce pot, and lay the ribs back on the racks meat side up. Brush a thin, even coat of barbecue sauce over the tops and let them ride at 225F for a final 30 minutes, until the sauce tightens from wet to tacky and stops dripping.
- Rest and slice. Pull the racks to a cutting board, tent loosely with foil, and rest them 15 minutes so the juices settle back into the meat. Flip each rack bone side up so you can see the bones, and slice cleanly between them with a long knife. A finished rib holds its shape when lifted, then pulls off the bone with one easy bite.
Frequently Asked Questions
How long do ribs take in an electric smoker?
At 225F (107C), baby back ribs take 4.5 to 5 hours and St. Louis cut ribs take 5.5 to 6 hours, including the foil wrap and the final 30-minute sauce set. At 250F (121C), baby backs finish in about 3.5 to 4 hours and St. Louis in 4.5 to 5. Rack weight is the biggest variable: a light 2 lb baby back rack lands at the front of its window, a heavy 3.5 lb St. Louis at the back. Treat the clock as a guide and tenderness as the verdict; the ribs are done when a probe slides between the bones with no resistance at 200 to 203F.
Does the 3-2-1 method work in an electric smoker?
The stages work; the numbers do not. Classic 3-2-1 was built for drafty offset pits, where the 2-hour foil stage fights constant dry airflow. An electric cabinet is sealed and humid, with a water pan steaming inches from the element, so the foil braise runs much faster and the full schedule overshoots into mushy, falling-apart meat with soft bark. Run 3-1.5-0.5 for St. Louis ribs and 2-1.5-0.5 for baby backs at 225F: same smoke, wrap, and sauce sequence, with the wrap trimmed to 90 minutes. If your crowd loves total fall-off-the-bone texture, extend the wrap to 2 hours deliberately.
Should I soak wood chips for an electric smoker?
No, and the reasoning is simple physics. A short soak only wets the surface of the wood, and all of that water must boil off at 212F before the chips can climb to smoldering temperature, so soaked chips spend their first minutes producing steam instead of smoke while cooling the tray. The thick white cloud they make is water vapor, not extra smoke. Dry chips ignite quickly and produce the thin, clean smoke that flavors meat properly. Add a small handful, about 1/2 cup, every 45 to 60 minutes during the bare stage of the cook, and stop once the ribs are wrapped in foil.
Why is there no smoke ring on my electric smoker ribs?
Because nothing is burning. A smoke ring forms when nitric oxide and nitrogen dioxide from live combustion dissolve into the wet meat surface and bind with myoglobin, fixing it pink before heat turns it gray. An electric element smolders chips without open flame, producing plenty of the phenols and carbonyls that create smoke flavor but very little of the nitrogen gases that create the ring. The result tastes smoky and looks less dramatic, and it is purely cosmetic; competition judges are told not to score the ring because it can be faked with curing salt. Your ribs are not less smoked, just less pink.
Is 225F or 250F better for ribs in an electric smoker?
Both produce excellent ribs, so it is a schedule decision more than a quality one. At 225F (107C) the fat renders a touch silkier and the racks spend longer in smoke, at the cost of roughly an extra hour and a half. At 250F (121C), baby backs finish in 3.5 to 4 hours and St. Louis in 4.5 to 5, and side-by-side most eaters cannot tell the difference. I run 225F on open weekends and 250F when dinner has a deadline. Whichever you pick, shorten every stage by about 20 percent at 250F and let the probe, not the clock, call the finish.
Do I need to use the water pan when smoking ribs?
Yes, filled with hot water, for three reasons. The water adds thermal mass, so the cabinet holds temperature steadier and recovers faster after every door opening. It keeps the air humid, which keeps the meat surface tacky, and smoke compounds bind far better to a tacky surface, so a filled pan genuinely makes smokier ribs. It also catches drippings. Use hot water because a cold panful acts as a heat sink that holds the cabinet below its set point. Refill when it drops below half, and skip juice or beer; the flavor boils off and leaves a scorched mess.
How do I know when ribs are done in an electric smoker?
Use two tests together. First, the probe: slid into the meat between two bones, it should go in like warm butter with no resistance, which lines up with an internal temperature of 200 to 203F (93 to 95C). Second, the bend test: lift the rack with tongs about a third of the way down one end, and a done rack bows deeply while the bark cracks across the surface. An underdone rack bends shallow and stays smooth. If either test fails, reseal the foil and check again in 20 to 30 minutes. When both agree, sauce the racks, set the glaze for 30 minutes, and rest 15 before slicing.