Texas BBQ
Smoked St. Louis Style Ribs
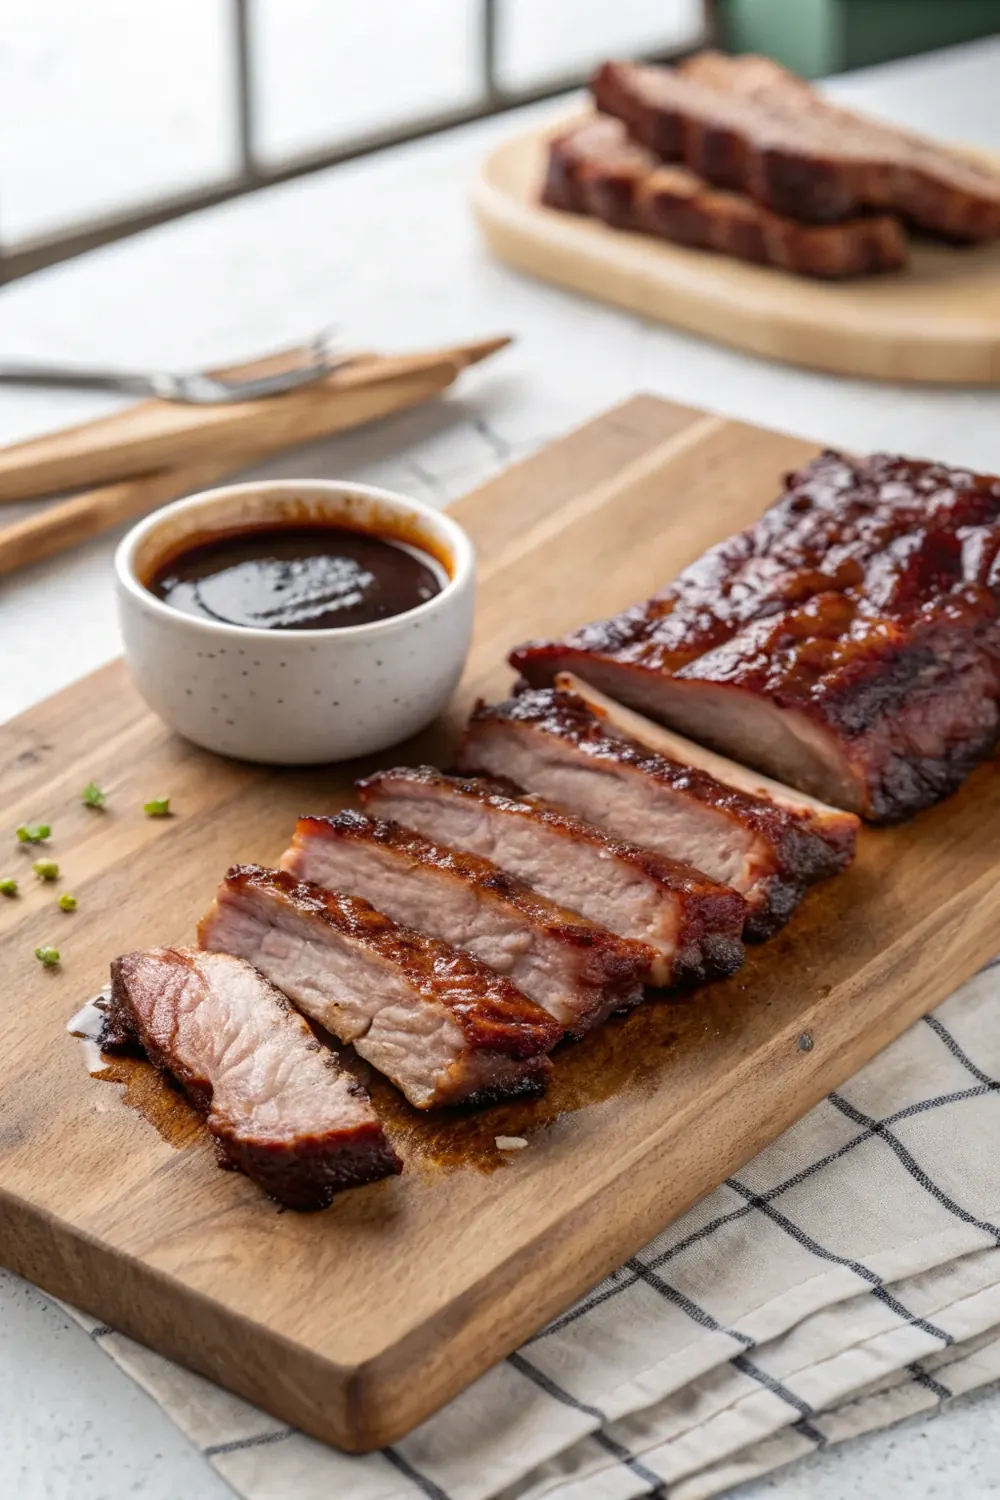
Smoke St. Louis ribs at 250F over post oak for 5.5 to 6 hours: salt and pepper rub, spritz after hour 2, pull at 200-203F when the rack bends and cracks.
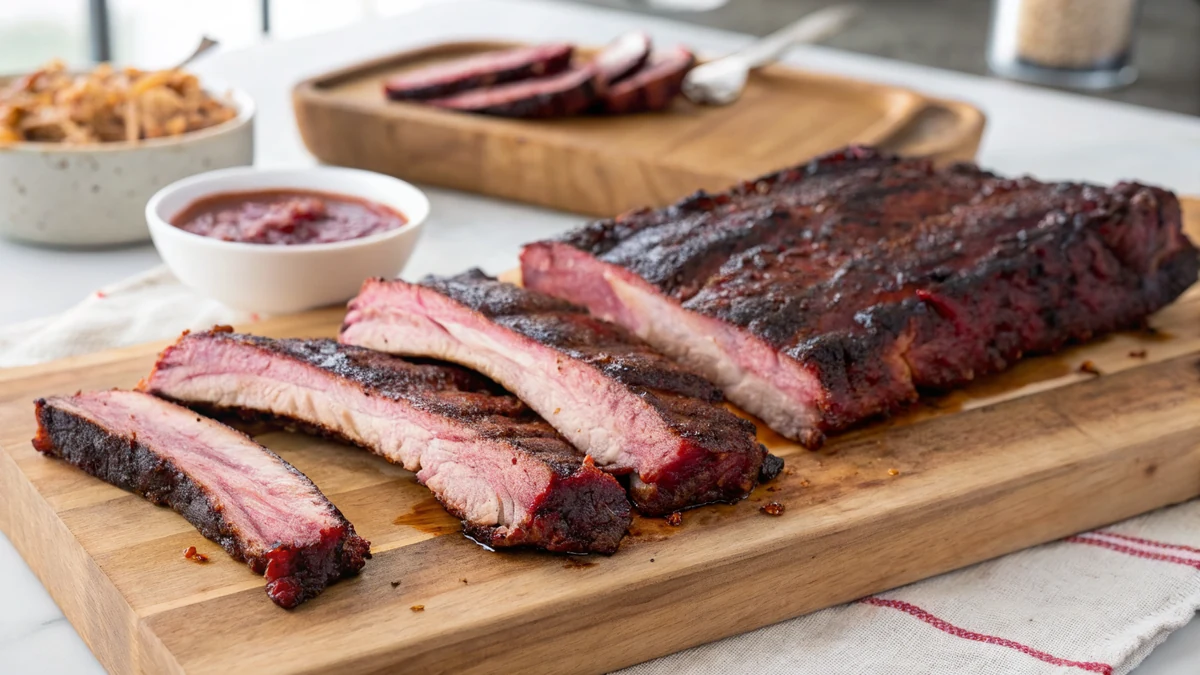
Quick answer: Smoke St. Louis style ribs at 250F (121C) over post oak for 5.5 to 6 hours. Start with a squared-off St. Louis rack, either pre-trimmed or cut down from a full spare rack yourself, pull the membrane off the bone side, and rub it with 2 tablespoons each of coarse kosher salt and 16-mesh black pepper plus a tablespoon of paprika and 2 teaspoons of granulated garlic. Run the ribs bone side down and leave them alone for the first 2 hours, then spritz with a 50/50 mix of apple cider vinegar and water every 45 minutes or so. I cook them naked most days, or wrap in butcher paper around hour 4 if the bark is set and I want to move things along. They are done when a toothpick slides between the bones like warm butter, the meat between the bones reads 200 to 203F, and the rack cracks at the surface when you bend it. Rest 20 to 30 minutes and serve sauce on the side, Central Texas style.
St. Louis style ribs are the cut I reach for when somebody in Lockhart asks me to teach them pork ribs, and it is not close. A full spare rack squared off, rib tips and skirt and sternum cartilage trimmed away, leaving a flat rectangle of meat and bone that cooks even from end to end. Baby backs cook fast and dry out faster. Untrimmed spares taste wonderful and cook like a wedge, thick on one end and thin on the other. The St. Louis cut keeps all the marbling of the spare rib and throws away the geometry problem, which is why it is the cut you see hanging in the pits up and down Highway 183.
This page is the classic method, the one I have run on my offset for twenty-some years: 250F (121C), post oak, salt and pepper doing the heavy lifting, a vinegar spritz after hour 2, and a doneness call made with a toothpick and a bend instead of a clock. I will walk you through trimming your own rack from full spares, because it saves real money and the trimmed rib tips are the best pitmaster snack there is, and I will give you the honest trade-offs on wrapping, because the internet has turned a judgment call into a religion. Give me 6 hours and one rack and you will never buy ribs at a chain again.
What the St. Louis Cut Actually Is
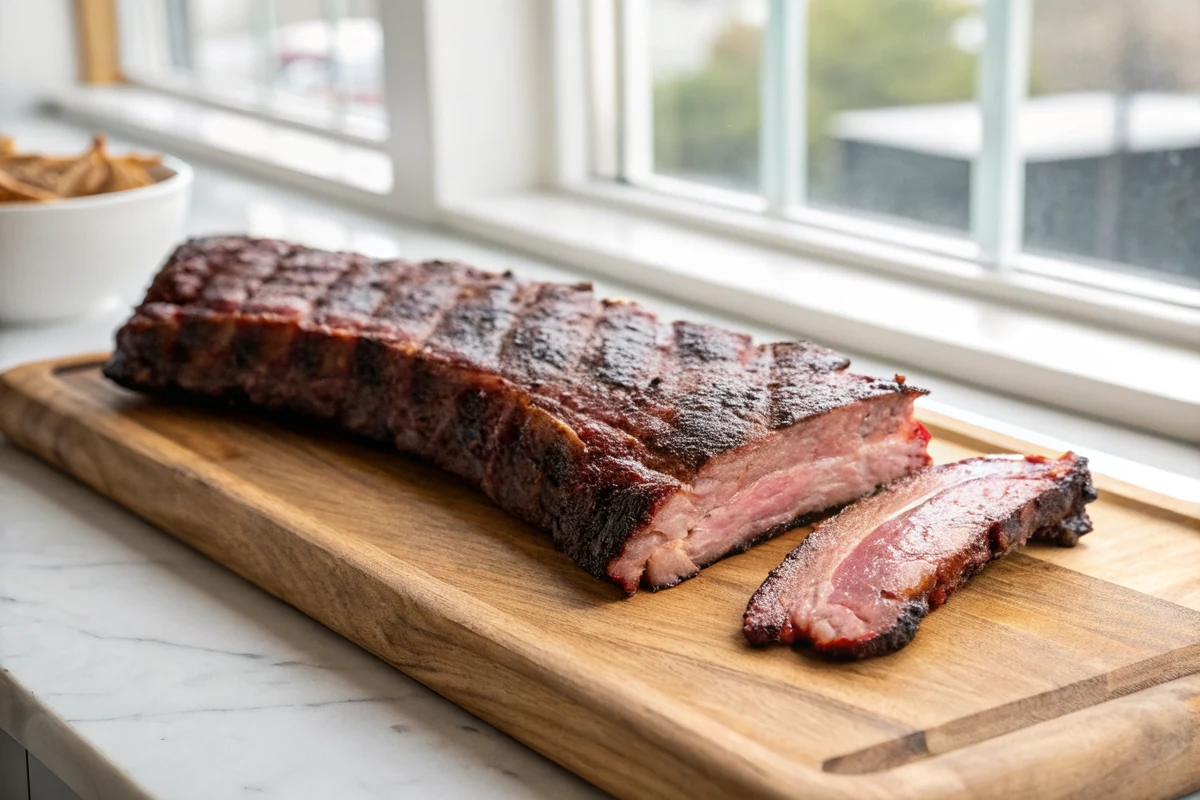
A St. Louis rack starts life as a full spare rib rack, the long slab cut from the belly side of the hog after the loin and baby backs come off. The packing houses in St. Louis started squaring these off decades ago for easier shipping and stacking: the strip of rib tips with its sternum cartilage gets cut away, the flap of skirt meat on the bone side comes off, and both ragged ends get trimmed square. What remains is a flat, rectangular rack of 11 to 13 straight bones, all roughly the same thickness from end to end.
That rectangle is the whole argument. An untrimmed spare rack is wedge-shaped and lumpy, so the thin cartilage end overcooks while the thick shoulder end lags 30 or 40 minutes behind. A St. Louis rack cooks like one piece of meat. It also lies flat on the grate, which means even bark, even smoke, and even color, and it fits on a crowded pit without the tips hanging over the water pan. When you see picture-perfect ribs at a Central Texas joint, you are almost always looking at this cut.
Against baby backs, the case is marbling. Baby backs come from up by the loin, leaner and lighter, usually under 2 pounds a rack, and they dry out if you look at them wrong. Spares, and therefore St. Louis racks, come from the belly, the same neighborhood as bacon, and they carry the intramuscular fat that a 6-hour smoke needs. If you are weighing this cut against the beef side of the menu entirely, my breakdown of beef vs pork ribs settles which rack fits which occasion, but for pork on a stick smoker, St. Louis is the pitmaster's cut.
Trim Your Own or Buy Pre-Trimmed
Both roads work, so let me lay out the math. A pre-trimmed St. Louis rack costs more per pound and you throw nothing away, which makes it the right call for a first-timer or a busy Saturday. A full spare rack costs noticeably less per pound, takes about 5 minutes of knife work, and pays you twice: you get your St. Louis rack, and you get the trimmings, which are not scrap. The rib tips, that strip of meat and cartilage you cut off, are the pitmaster's snack. I season them with the same rub, throw them on the pit next to the rack, and pull them around hour 4. They are gone before the ribs are.
The trim itself is simpler than it sounds. Lay the rack bone side up. At the wide end of the bones you will feel a line where hard bone gives way to flexible cartilage; that is your cut line. Run a sharp boning knife straight across it, one long confident stroke, and the rib tip strip comes free. Flip the skirt, the loose flap of meat running diagonally across the bone side, and slice it off flush. Square the narrow end where the last small bone sits crooked, and trim any hard fat pockets on the meat side down to about 1/4 inch.
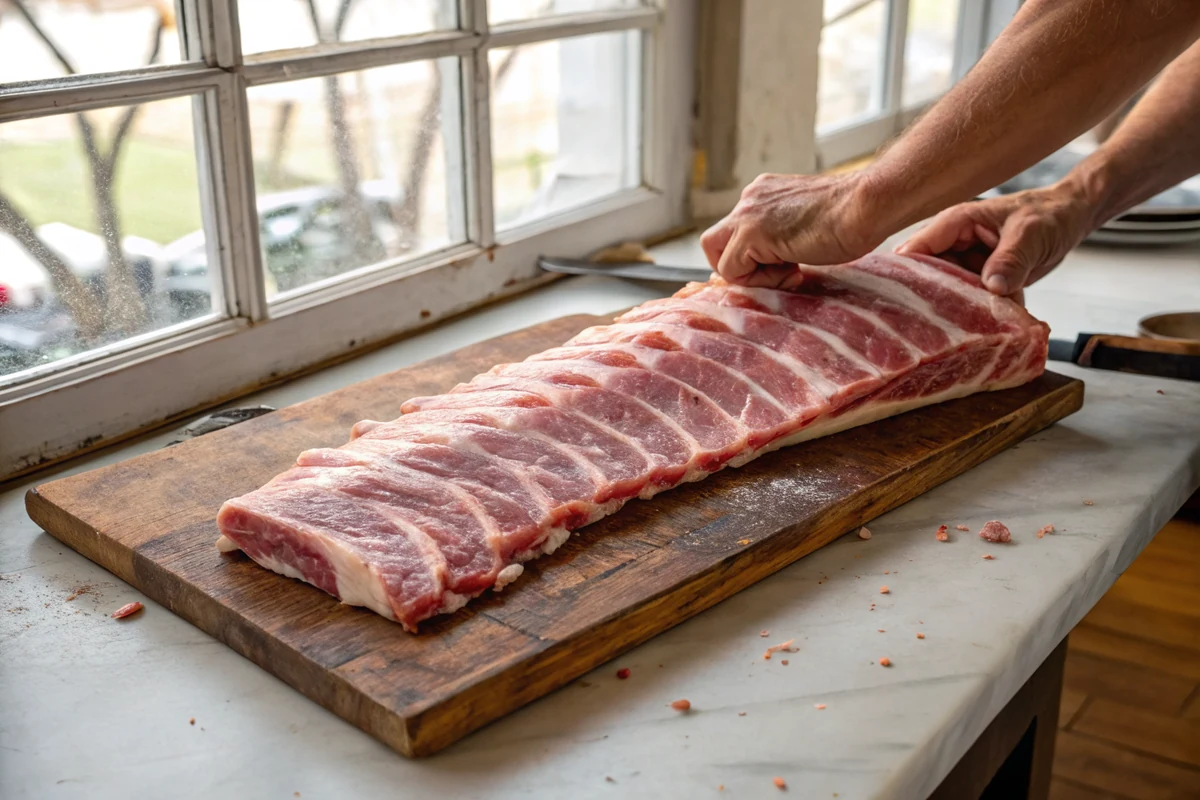
Do not aim for pretty on your first few racks; aim for flat and even. A slightly crooked cut line changes nothing about how the ribs eat. What matters is that the finished rack lies flat and reads roughly the same thickness everywhere, because that evenness is what you paid for with the trim. Save the skirt for the grind bucket or smoke it with the tips, and keep the trimmings honest: if a chunk of hard fat would not render in 6 hours, it comes off now, not onto somebody's plate later.
The Membrane Comes Off, Every Time
Flip any rack of pork ribs bone side up and you will see a silvery, translucent sheet stretched over the bones. That is the membrane, and it does not render, soften, or surrender no matter how long you cook. Leave it on and the bone side of your ribs eats like packing tape, the rub never touches the meat underneath, and smoke bounces off instead of soaking in. Every rack that goes on my pit loses its membrane first, and it takes 90 seconds once you have done it twice.
The technique: slide a butter knife, not a sharp one, under the membrane right at the second or third bone from the end, and wiggle it side to side until a flap lifts. Work a finger into the gap, then grab the flap with a dry paper towel, because the membrane is slick as a wet boat ramp and the towel is the only grip that holds. Pull up and across at a low angle. On a good day it peels off in one satisfying sheet; on a normal day it tears twice and you re-grip and keep going. Either result is fine.
Two notes from the pit. First, some pre-trimmed racks come with the membrane already removed, so check before you go digging; if the bone side looks matte and you can see the meat between the bones clearly, it is already done. Second, if a stubborn patch simply will not come loose at one end, score it in a crosshatch with a knife tip and move on. A scored patch crisps up acceptably. A whole intact membrane is the single most common reason somebody tells me their ribs were tough on the bottom.
The Rub: Salt, Pepper, and Restraint
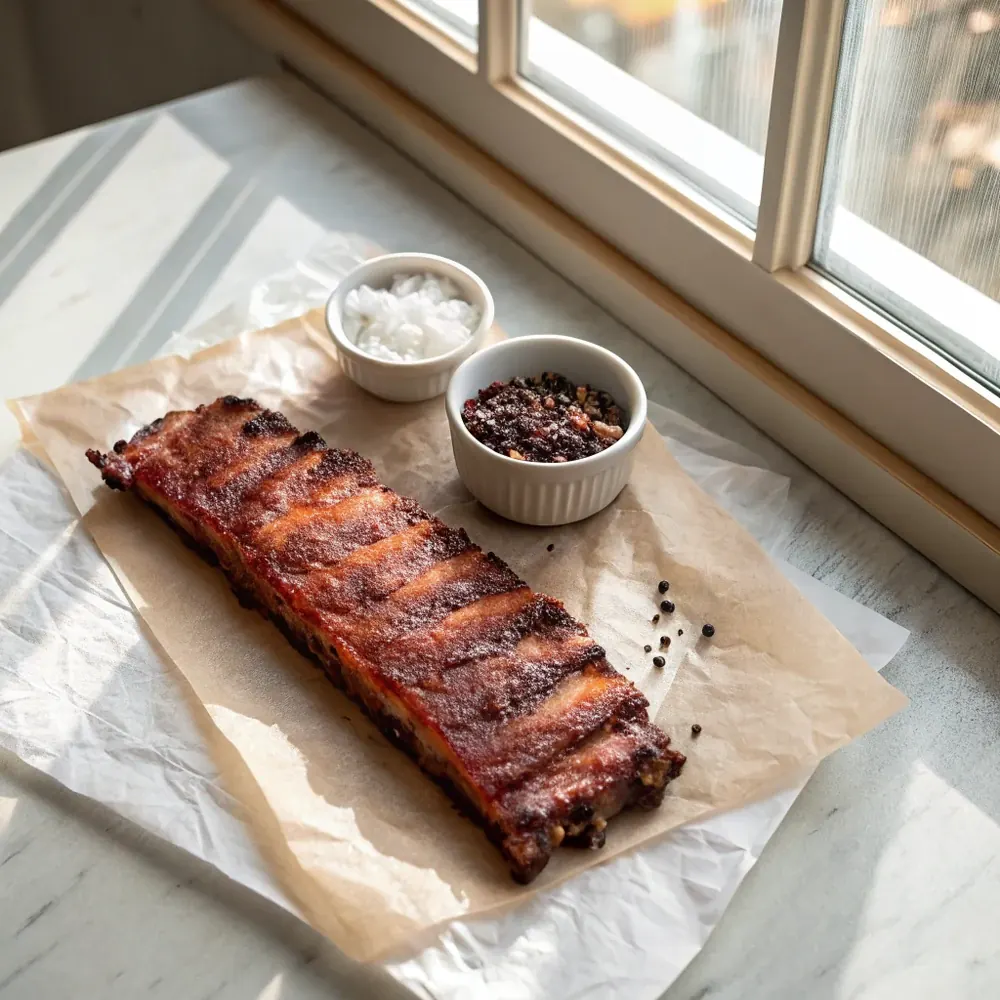
Central Texas rib rub is a short list on purpose: 2 tablespoons coarse kosher salt, 2 tablespoons 16-mesh black pepper, 1 tablespoon sweet paprika, 2 teaspoons granulated garlic. That covers one rack with a little left in the bowl. The 16-mesh grind matters more than any other spec on this page; it is coarse cracked pepper, the texture of coarse sand, and it builds the craggy black-and-mahogany bark that fine table-grind pepper physically cannot. Fine pepper dissolves and turns acrid. Sixteen-mesh toasts.
Salt and pepper are the backbone and the paprika and garlic are seasoning on the seasoning: the paprika deepens the color and brings a quiet sweetness, the granulated garlic rounds out the savory bottom end. What you will not find here is sugar. Brown sugar rubs are a Kansas City instinct, and at 250F over 6 hours they scorch bitter at the edges and turn the bark into candy shell. Pork sweetens itself as the fat renders; it does not need help. If you would rather buy than blend, my rundown of Texas BBQ rubs covers the store-bought options that respect the same philosophy.
Application is half the recipe. Wipe the rack dry, film it with a thin layer of yellow mustard or oil, which flavors nothing and glues everything, and season from 12 inches above so the rub falls like light rain instead of landing in clumps. Bone side first, then the edges, which everyone forgets, then the meat side heaviest. Let the rubbed rack sit while the pit comes up to temperature, 30 to 45 minutes, until the surface turns wet and tacky. That tack is the salt pulling moisture up and dissolving into a glaze that smoke sticks to.
Post Oak and Fire Management
Post oak is the wood of Central Texas barbecue and it earned the job: medium smoke, clean and nutty, strong enough to flavor pork through a 6-hour cook but never bitter the way mesquite turns after hour 2. I burn seasoned post oak splits in the offset, and if you are running a charcoal smoker, a bed of good briquettes with two or three fist-sized post oak chunks added over the first 3 hours gets you most of the way there. If post oak is not sold near you, white oak is the closest cousin, and hickory mixed half-and-half with a fruit wood behaves politely. My BBQ wood pairing tool will match whatever your firewood guy actually has to whatever is on your pit.
The fire matters more than the wood species. You want 250F (121C) measured at grate level next to the meat, not at the dome thermometer, which routinely lies by 25 degrees, and you want thin blue-grey smoke you can barely see. White, billowing smoke means a smothered fire and creosote on your ribs, and no rub can cover that taste. Small fire, burning clean, fed with one split at a time: that is the entire secret, and it is worth 20 minutes of fussing before the meat goes anywhere near the pit.
Drift happens, so manage the band instead of chasing a number. Anywhere from 240 to 265F is a fine cruising range; react when you leave it, not every time the needle twitches. A water pan between the fire and the meat evens out the swings and keeps the cooking air humid, which slows surface drying and buys your spritz schedule some grace. And if your pit is not a stick burner at all, the method translates: my guide to ribs in an electric smoker adapts this same rack, rub, and doneness call for cabinet smokers that hold temperature for you.
The Cook: 250F, Hour by Hour
Ribs go on bone side down, meat side up, thicker end toward the firebox, and then the hardest step of the whole recipe: leave them alone for 2 full hours. The first stretch is when the smoke ring sets, the rub fuses into the surface, and the bark begins. Every lid-lift dumps your heat and adds recovery time, so hang the meat thermometer probe through the vent if you must know things and keep the lid shut. Hours 1 and 2 are the pit's work, not yours.
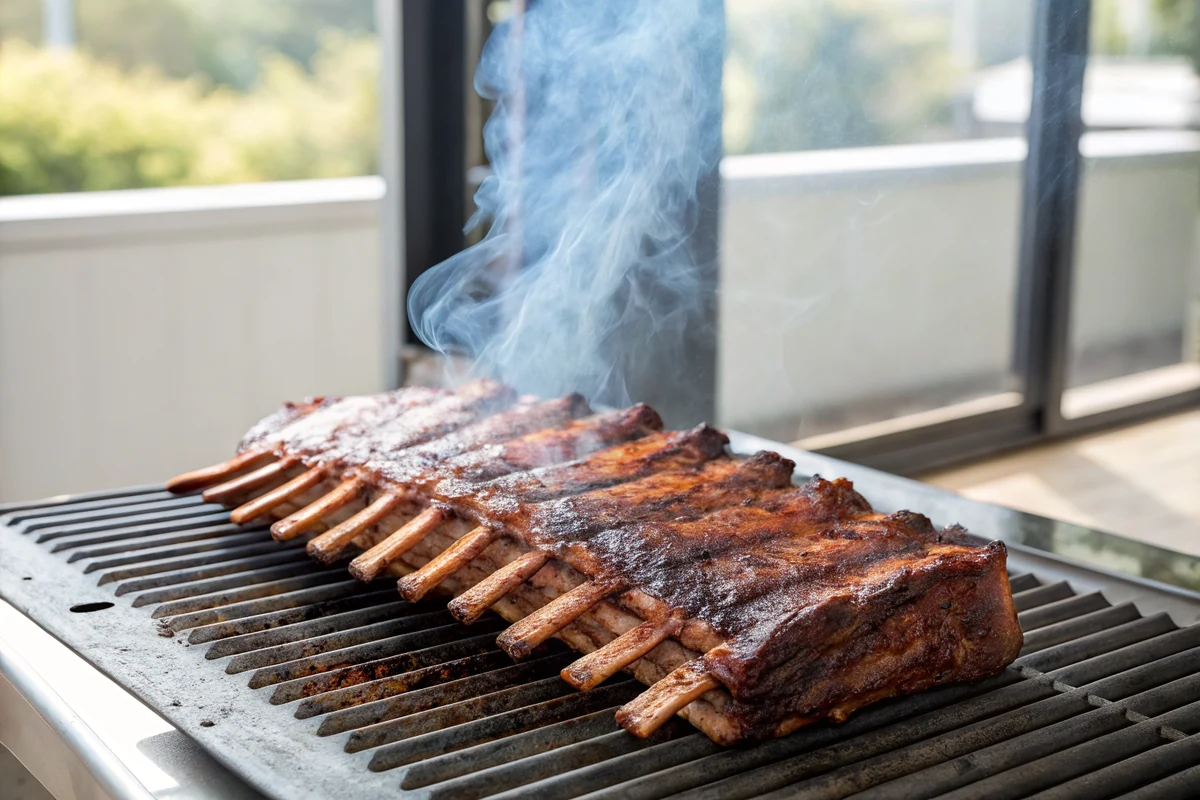
From hour 2, the spritz schedule starts: a 50/50 mix of apple cider vinegar and water, misted over the rack every 45 minutes or so. The spritz is not about flavor, it is about surface management. A lightly damp surface holds smoke better, browns instead of burns at the edges, and keeps the thin outer bones from drying out ahead of the middle. Mist, do not drench; if rub is running off in streaks, you have washed instead of spritzed. Somewhere around hour 3 to 4 the internal temperature will stall in the 160s as evaporation fights the fire. That is normal physics, not a broken pit. The rack pushes through on its own.
The full ride at 250F runs 5.5 to 6 hours for a typical 2.5 to 3 pound trimmed rack, a little longer for a heavyweight, and the clock is only ever a suggestion; the doneness tests below are the actual finish line. If you need them done faster, my guide to how long to smoke ribs at 275 has the full hot-and-fast timing chart. This page owns the classic low ride, and the low ride is worth owning: more smoke time, deeper bark, and a wider margin for error on a pit that swings.
The Wrap Decision: Naked, Paper, or Foil
Around hour 4, once the bark is set, deep mahogany, and dry enough that it does not smudge under a knuckle, you have a decision to make, and I will give it to you without the dogma. Naked, meaning no wrap at all, produces the best bark on the planet: crisp, craggy, black-red, with maximum smoke. The costs are time, since an unwrapped rack rides the stall longest, and exposure, since the edges and end bones take the most weather. On a well-managed pit with a water pan, naked is how I cook most racks, and it is the purest version of this recipe. The complete naked-rack playbook, spritz schedule, stall strategy, and timing deltas included, lives in my no-wrap smoked ribs method.
Pink butcher paper is the compromise I actually recommend for most backyard cooks. Paper breathes, so steam escapes and the bark stays 90 percent intact, while the wrap shields the edges, speeds the back half of the stall by 45 minutes or so, and catches the rendering fat so the rack braises lightly in its own drippings. Wrap tight at hour 4, seam down, back on the pit, and start doneness checks at 5.5 hours as usual. If my daughter is asking when dinner is, the paper comes out.
Foil is the third door and I will be honest about it: foil is a steamer. It crushes the stall, and it is the fastest route to fall-off-the-bone tenderness if that is genuinely what your table wants, but it softens the bark to pot-roast texture and can carry ribs past tender into mush in 30 unattended minutes. The old 3-2-1 foil method was built for a different pit and a different goal. If you use foil, use it late, use it briefly, and open it for the last 30 minutes to let the bark recover. Competition tricks like butter and sugar in the wrap belong to Kansas City. Not here.
Doneness: Bend, Probe, 200 to 203F
Ribs are done when they are done, and you have three tests that agree with each other when the moment is right. First, the bend test: pick the rack up from one end with tongs and let the far end hang. A done rack bends deep, past 45 degrees, and the bark cracks open across the surface between the middle bones. An underdone rack bends shallow and stiff, like a plank with opinions. Second, the probe: slide a toothpick or your thermometer probe into the meat between two middle bones. Done feels like probing warm butter; any squeak or resistance means another 30 minutes.
Third, the number: 200 to 203F (93 to 95C) in the meat between the bones, never touching bone, which reads hot and lies. Understand what the number means, though. Pork ribs are safe to eat at 145F; they are nowhere near tender there. The 200-degree range is where the collagen webbing between the bones has fully melted into gelatin, which is what tender actually is. The thermometer confirms what the toothpick already told you. When all three tests agree, and they will within the same 15-minute window, pull the rack.
Your eyes get a vote too. The meat pulls back 1/4 to 1/2 inch from the bone ends as it renders, leaving clean bone tips showing, and the surface fat glistens instead of looking waxy. What you are not looking for is meat falling off the bone. Fall-off-the-bone means overcooked at every barbecue judging table in Texas; the standard is a clean bite that leaves a perfect half-moon in the rib while the rest of the meat stays put. Competition bite, we call it, and 200 to 203F with a butter-soft probe is exactly where it lives.
Rest, Slice, and Sauce on the Side
Straight off the pit, a rack of ribs is a construction site: juices thin and racing, fat still moving, bark fragile. Rest it 20 to 30 minutes on a cutting board, loosely tented with foil or rewrapped in its butcher paper, and everything settles. The juices thicken and redistribute so they stay in the meat instead of on the board, the carryover heat finishes the last stubborn corner, and the bark firms up enough to slice clean. Skip the rest and you will watch a puddle form that used to be your ribs' best quality.
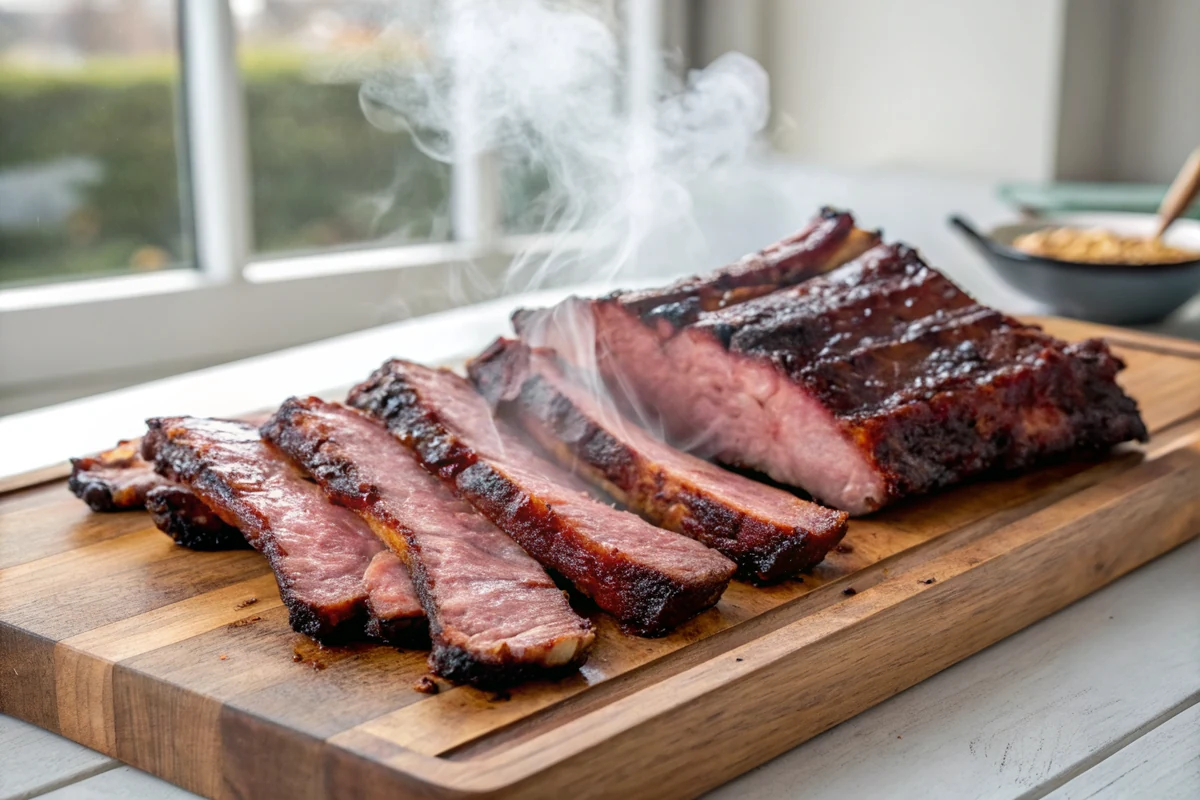
Slicing has one trick: flip the rack bone side up. From the top, the bones hide under bark and every cut is a guess; from underneath, the bones map themselves and you can run the knife straight down the middle of each gap. Use a long slicing knife and one confident stroke per rib rather than sawing, which shreds the bark you spent 6 hours building. Even-width ribs on a board, cut faces showing that pink smoke ring, is the money shot, and it takes 60 seconds when the bones are facing you.
Sauce goes on the table, not on the rack. That is the Central Texas position and I hold it firmly: a rib that needs sauce to be good was not cooked right, and a rib this good deserves to be tasted before it is dressed. Warm a bowl of Texas BBQ sauce, thin and vinegar-forward, and set it next to the board for dipping. Half the table will use it, half will not, and both halves will be right. What nobody gets to do is paint a sticky glaze over that bark while I am watching.
Serving, Leftovers, and Reheating
A rack of St. Louis ribs serves 3 to 4 people as the centerpiece, and the plate around it should follow barbecue-joint logic: things that cut richness and things that catch drippings. Pinto beans, tangy slaw, pickles, raw onion, and a slice of white bread is the classic Lockhart tray, and my full lineup of Texas BBQ sides has the recipes ranked by how well they hold up next to smoke. If the smoker is already lit, throw the trimmed rib tips and a link or two of sausage on with the rack and the tray builds itself.
Leftover ribs are a genuine prize, not a consolation. Slice what you will not eat, let the ribs cool, and wrap them airtight; they keep 3 to 4 days in the refrigerator and 3 months in the freezer, vacuum-sealed if you have the machine. The smoke flavor actually deepens overnight as it migrates inward, which is why day-two ribs from my fridge disappear faster than day-one ribs from my pit ever did. Cold smoked rib meat pulled off the bone is also the start of outstanding beans, fried rice, and breakfast tacos.
Bringing them back to life is its own small craft, because the microwave turns bark to leather and meat to rubber. The short version is low oven, a splash of moisture, foil for most of the ride, and a hot finish to re-crisp the surface; my full guide to how to reheat smoked ribs covers the oven, air fryer, grill, and sous vide routes with times and temperatures for each. Reheated right, a rib from Tuesday is 95 percent of the rib from Sunday, and 95 percent of these ribs still beats 100 percent of most others.
Smoked St. Louis Style Ribs Recipe
Ingredients
- For the ribs:
- 1 full spare rib rack (4 to 5 lb / 1.8 to 2.3 kg), or 1 pre-trimmed St. Louis rack (2.5 to 3 lb / 1.1 to 1.4 kg)
- 1 tablespoon (15 ml) yellow mustard or neutral oil, as a binder
- For the Texas rub:
- 2 tablespoons (18 g) coarse kosher salt
- 2 tablespoons (14 g) 16-mesh black pepper
- 1 tablespoon (7 g) sweet paprika
- 2 teaspoons (6 g) granulated garlic
- For the spritz:
- 1 cup (240 ml) apple cider vinegar
- 1 cup (240 ml) water
- Equipment:
- Offset or charcoal smoker, post oak splits or chunks, a boning knife, paper towels for the membrane, pink butcher paper (optional), a food-safe spray bottle, and an instant-read thermometer
Instructions
- Trim the rack St. Louis style. If you bought a full spare rack, lay it bone side up on a butcher block. Find the longest bone, follow the line where the bones end and the cartilage begins, and cut straight across with a boning knife to remove the rib tip strip. Trim off the flap of skirt meat on the bone side and square up both ends. You should be left with a flat, even rectangle. Pre-trimmed St. Louis racks skip this step entirely.
- Pull the membrane. Slide a butter knife under the papery membrane on the bone side at one corner, lift until you can get a finger under it, then grip it with a dry paper towel and peel it off in one sheet if you can, in patches if you cannot. Leaving it on gives you a tough, leathery layer that blocks smoke and rub from the bone side.
- Rub the rack. Rub a thin film of mustard or oil over both sides as a binder. Mix the salt, 16-mesh pepper, paprika, and granulated garlic in a small bowl and season the bone side first, then the edges, then the meat side, holding your hand 12 inches up so the rub falls evenly. Let the rack sit at room temperature while the smoker comes up, about 45 minutes; the rub will turn wet and tacky.
- Run the smoker to 250F. Build a clean fire and settle the smoker at 250F (121C) at grate level, burning post oak splits or charcoal with post oak chunks. Wait for the smoke to run thin and blue-grey, not white and billowing, before the meat goes on. A water pan near the firebox helps hold the temperature steady and keeps the cooking air moist.
- Smoke 2 hours untouched. Lay the rack bone side down, meat side up, with the thicker end toward the fire. Close the lid and do not open it for 2 hours. This is when the bark starts setting and the smoke ring forms, and every peek costs you 10 to 15 minutes of recovery time.
- Spritz from hour 2 onward. Starting at hour 2, spritz the rack with the 50/50 cider vinegar and water mix every 45 minutes, a quick misting over the surface and edges. The moisture cools the surface slightly, helps smoke keep sticking, and keeps the edges from drying into jerky. Do not soak the rack; you are misting, not washing off the rub.
- Make the wrap call at hour 4. Around hour 4, check the bark. If it is deep mahogany and does not smudge when you press it with a knuckle, you can wrap the rack in pink butcher paper to push through the stall faster and protect the edges, or leave it naked for maximum bark. Foil works too but softens the crust. Return the rack to the smoker either way.
- Test for doneness at 5.5 to 6 hours. Start testing at 5.5 hours. Slide a toothpick or thermometer probe into the meat between the bones; it should go in with almost no resistance, like probing warm butter, and the meat between the bones should read 200 to 203F (93 to 95C). Pick the rack up from one end with tongs; it should bend deeply and the bark should crack across the surface. The meat should have pulled back 1/4 to 1/2 inch from the bone ends.
- Rest, slice, and serve. Rest the rack 20 to 30 minutes on a cutting board, loosely tented or wrapped in paper. Flip it bone side up so you can see the bones, and slice between them with one long stroke per rib. Serve with warm sauce in a bowl on the side, never painted on, and let the bark speak first.
Frequently Asked Questions
What is the difference between St. Louis style ribs and spare ribs?
Same rack, different amount of knife work. Spare ribs are the full slab from the belly of the hog, including the rib tips, sternum cartilage, and skirt flap, which makes them wedge-shaped and uneven. A St. Louis rack is that same slab squared off: tips, cartilage, and skirt trimmed away, leaving a flat rectangle of 11 to 13 straight bones with even thickness. The meat and marbling are identical; the St. Louis cut just cooks evenly from end to end and looks cleaner on the board. You can buy it pre-trimmed or cut your own from full spares in about 5 minutes and smoke the trimmed tips as a snack.
How long do St. Louis ribs take to smoke at 250F?
Plan on 5.5 to 6 hours at a steady 250F (121C) for a typical 2.5 to 3 pound trimmed rack, and a bit longer for a heavy one or an unwrapped cook on a swinging pit. Wrapping in butcher paper around hour 4 shaves roughly 30 to 45 minutes off the back end. Treat every number as a window, not a promise: start testing at 5.5 hours with a toothpick between the bones and the bend test, and pull the rack when the meat probes like warm butter at 200 to 203F. The rack decides when it is done. The clock just narrows down when to start asking.
Should I wrap ribs in butcher paper or foil?
Paper if you wrap at all, and only after the bark sets around hour 4. Butcher paper breathes, so it speeds the stall and protects the edges while keeping most of the bark's texture; it is the honest middle ground and what I hand to most backyard cooks. Foil is a steamer: fastest route to fall-apart tenderness, but it softens the bark to pot-roast texture and can overshoot into mush quickly, so use it late and briefly if you use it. Naked, no wrap, gives the deepest bark and smoke at the cost of the longest cook. On a well-run pit with a water pan, naked is my default.
What temperature are St. Louis ribs done?
Pull them when the meat between the bones reads 200 to 203F (93 to 95C), measured with the probe in meat only, never touching bone. That range is where the collagen between the ribs has fully melted into gelatin, which is what tenderness actually is; pork is technically safe at 145F but eats like a tire there. Confirm the number with feel: a toothpick should slide between the bones with almost no resistance, the rack should bend deeply and crack at the surface when lifted from one end, and the meat should have pulled back 1/4 to 1/2 inch from the bone ends.
Do I really need to remove the membrane from ribs?
Yes, every rack, every time. The membrane is a sheet of connective tissue on the bone side that never renders or softens; leave it on and the underside of your ribs eats tough and papery, and it blocks both the rub and the smoke from reaching the meat below it. Removal takes about 90 seconds: lift an edge with a butter knife near one end, grip the flap with a dry paper towel for traction, and peel it across the rack. If a patch refuses to let go, score it in a crosshatch and move on. Some pre-trimmed racks come with it already removed, so check first.
What is the best wood for smoking St. Louis ribs?
Post oak, if you can get it. It is the signature wood of Central Texas barbecue: a clean, medium, nutty smoke that flavors pork through a 6-hour cook without ever turning bitter. White oak is the nearest substitute and behaves almost identically. Hickory works but runs stronger, so I blend it half-and-half with a fruit wood like apple or cherry for ribs. Fruit woods alone read a little light for a rack this size, and mesquite burns hot and sharp and will bully pork by hour 3, so I keep it away from ribs entirely. Whatever you burn, keep the fire small and the smoke thin and blue.
Is the 3-2-1 method good for St. Louis ribs?
It works, but I do not use it: 3-2-1 was designed as training wheels for 225F cooks, and its 2-hour foil stage steams the ribs past the competition-bite standard into fall-off-the-bone territory while dissolving the bark you built in the first 3 hours. At 250F it overshoots even worse, because every stage runs hotter than the formula assumes. Cooking to feel beats cooking to a formula: bark set by hour 4, optional paper wrap, toothpick-tender between the bones at 200 to 203F around hour 5.5 to 6. If your table genuinely loves fall-apart ribs, foil late and briefly gets you there with less collateral damage.