Texas BBQ
Big Green Egg Beef Ribs
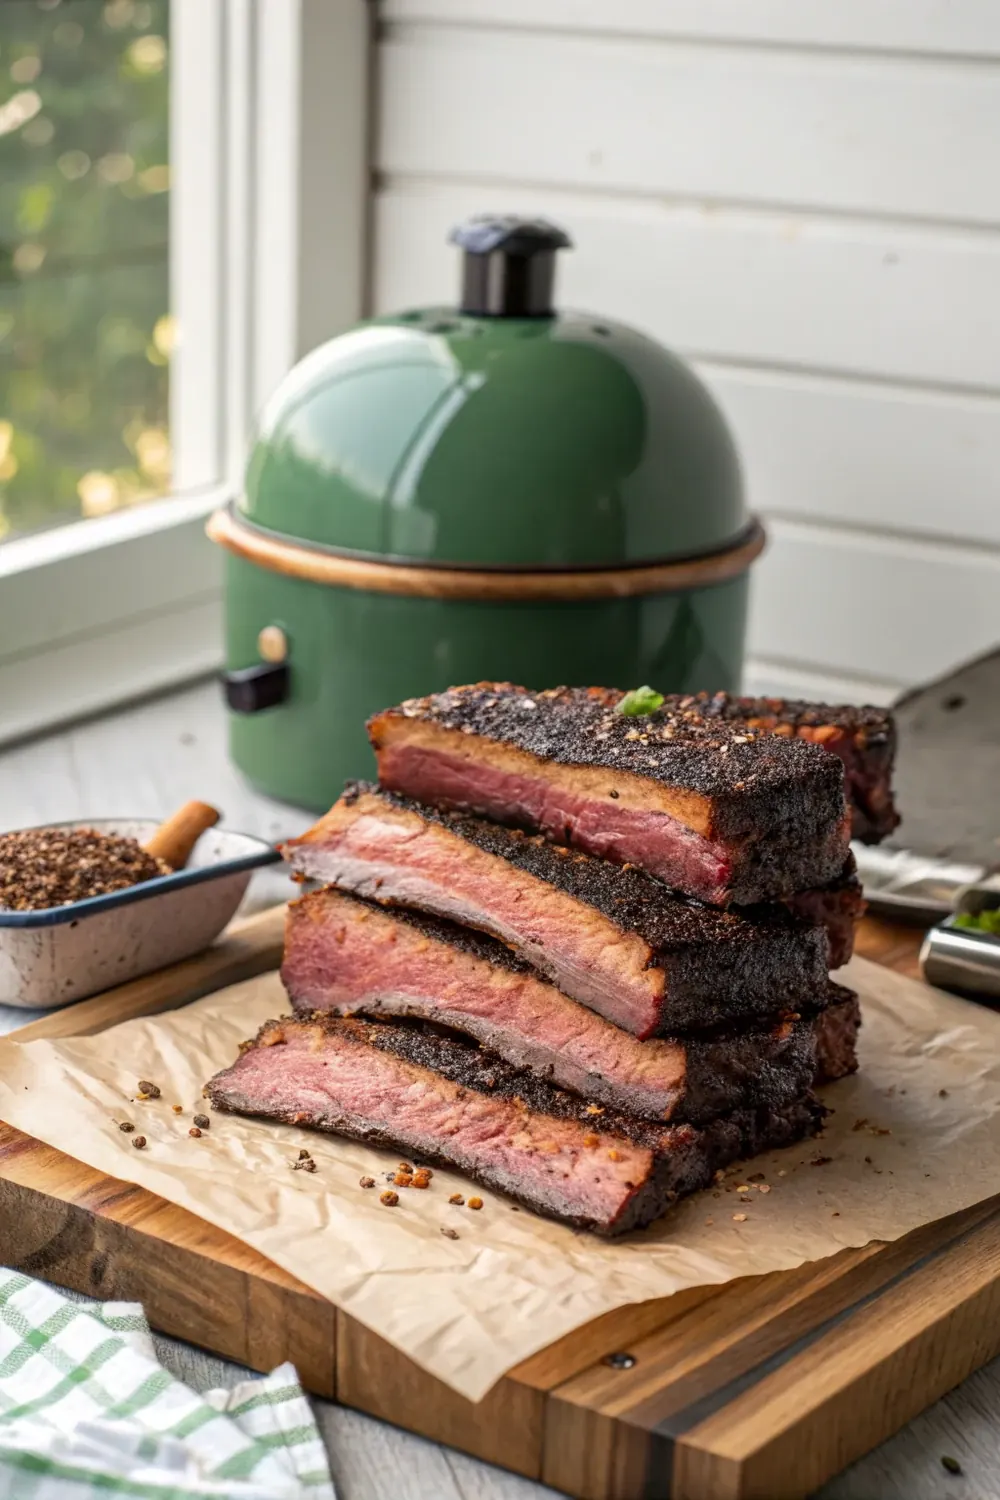
Beef ribs on the Big Green Egg: plate setter in, lump and post oak chunks, 275F on the dome, 6 to 8 hours to probe-tender at 203-210F. No water pan needed.
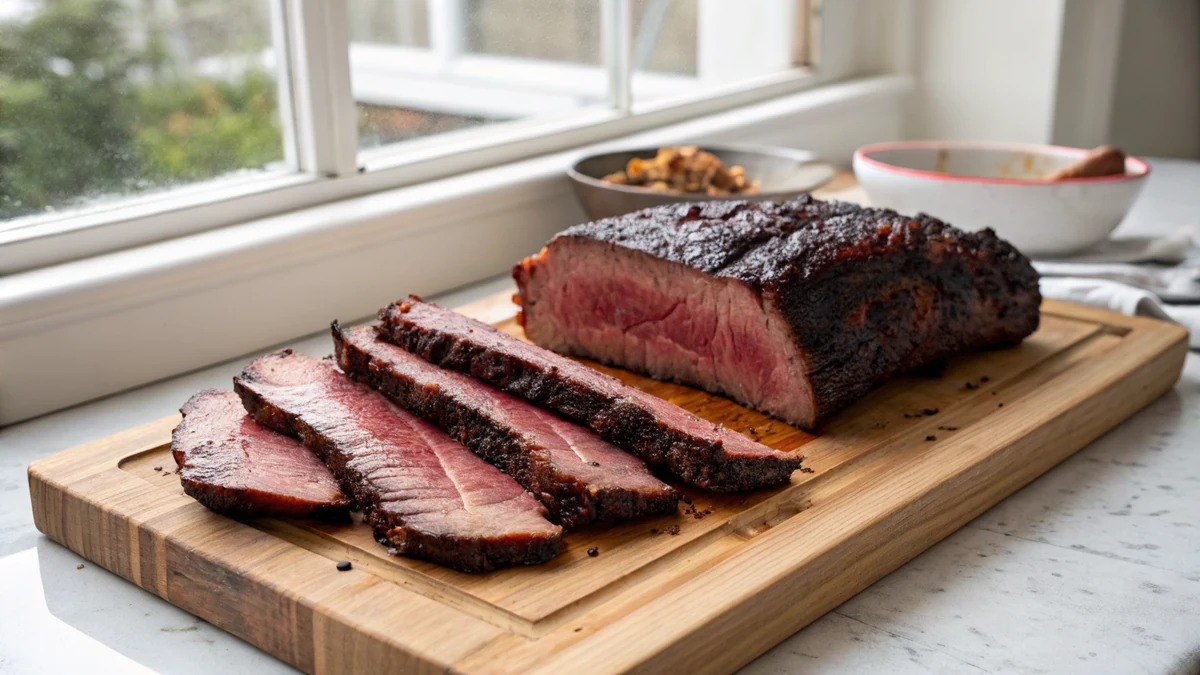
Quick answer: Beef ribs on a Big Green Egg run indirect at 275F for 6 to 8 hours. Fill the firebox with lump charcoal, bury 3 fist-size post oak or hickory chunks in the top third, and set the ceramic plate setter (conVEGGtor) legs-up under the grate. Open the bottom draft door about an inch and the top daisy wheel to a sliver, and stabilize at 275F before the meat goes on; a kamado approached slowly holds that number all day on one load of fuel. Season a 4 to 5 pound plate rack with salt and coarse black pepper, set it bone side down, and leave the dome shut. No water pan and little spritzing needed: the ceramic traps moisture, so the cook runs naturally humid. Skip the wrap. The rack is done when a probe slides between the bones like warm butter at 203 to 210F, usually hour 7. Rest 30 to 45 minutes, slice into single colossal bones, and serve.
The first time I cooked beef ribs on a friend's Big Green Egg, I spent the whole afternoon waiting for the part where I had to work. I had learned beef ribs on an offset, where an 8-hour cook means 8 hours of feeding splits, chasing temperature swings, and topping off a water pan. The Egg just sat there, dome shut, holding 275F like it was carved into the ceramic, sipping lump charcoal while the ribs rode along inside a naturally humid little kiln. Around hour five I stopped checking on it out of guilt. The ribs came off probe-tender, mahogany-barked, and I had done roughly forty minutes of actual labor. I bought my own Egg that winter.
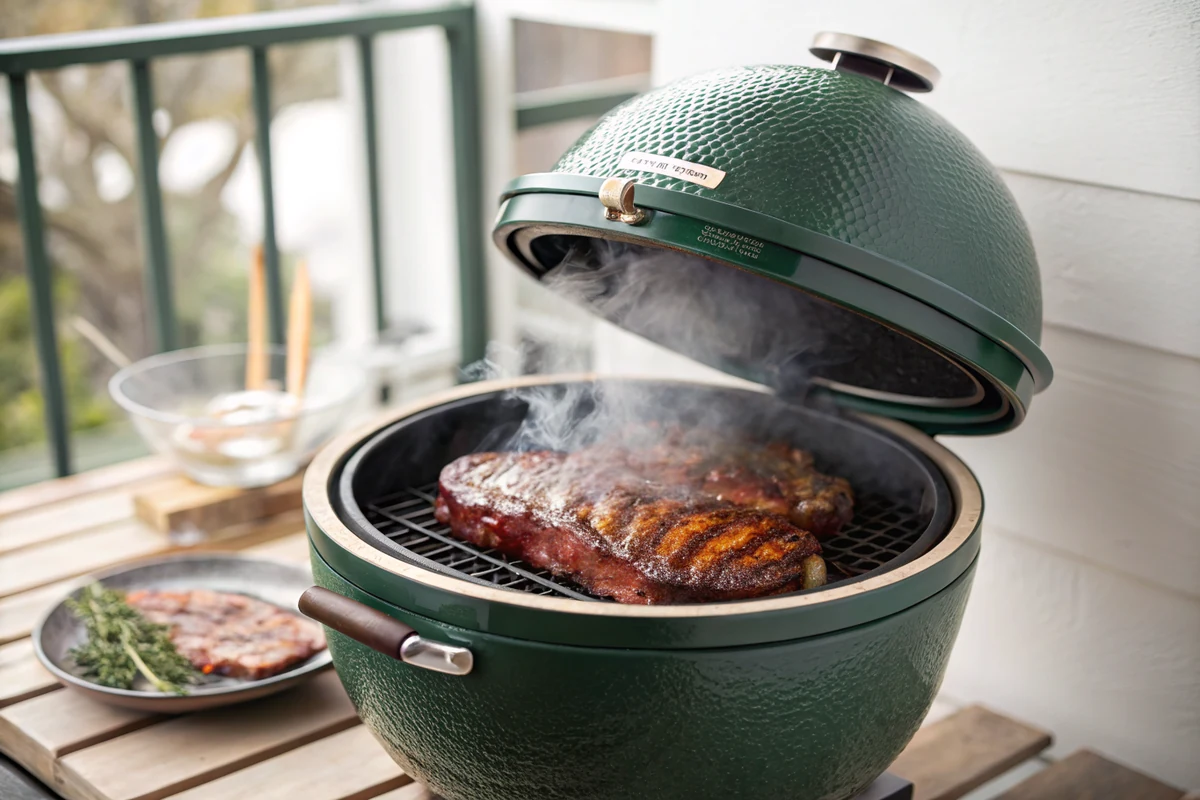
A kamado is a different machine from every other smoker on my deck, and beef ribs, big, fatty, forgiving slabs that they are, might be the single best cook for learning what the ceramic can do. The thick walls hold heat so efficiently that one chimney of lump runs eight hours with fuel to spare. The sealed dome recycles moisture, so the humidity that offset cooks chase with water pans and spritz bottles is simply the default weather inside. And the airflow system, a draft door below and a daisy wheel on top, gives you temperature control precise enough to set and genuinely forget.
This guide is the complete kamado beef rib playbook: which rack to buy, the fire build and vent settings that hold 275F all day, why the plate setter changes everything, the humidity math that lets you skip the water pan and the wrap, doneness calls on a cut that finishes higher than most, and what the Egg trades away against an offset, because it does trade something. Everything here applies to any ceramic kamado, Kamado Joe, Primo, the lot; the Egg is just the one on my deck.
Why a Kamado Is a Beef Rib Machine
Every smoker has a cook it was born for, and I would argue the kamado was born for beef ribs. The case rests on three properties of thick ceramic. First, thermal mass: once those walls soak at 275F, they hold it with swings of five degrees instead of fifty, which is exactly the steadiness an 8-hour render wants. Second, efficiency: the sealed body and restricted airflow burn lump so slowly that a single load outlasts the longest rib cook with fuel left for tomorrow, no split-feeding, no 2 a.m. alarm. Third, and most underrated, humidity: almost no airflow means almost no evaporation, so the moisture cooking out of a fatty rack stays in the chamber and bastes the cook from the air itself.
Beef ribs meet that machine perfectly because they are the cut that wants everything the ceramic gives: long, steady, humid heat with no intervention. The plate rib's enormous internal marbling does the basting an offset cook does with a spritz bottle, and the ceramic keeps whatever escapes. The result is the rare barbecue cook where the equipment and the cut are both trying to do the same easy thing.
The honest asterisk: an offset burning post oak still produces a bolder smoke profile, because a stick fire simply moves more smoke across the meat than a restricted kamado draft ever will. The Egg's flavor is cleaner and gentler, real smoke, softer voice. I will take that trade nine cooks out of ten for the labor difference, but I will not pretend it is not a trade; my tested smoker buying guide scores that whole matchup category by category if you are still choosing your machine.
Choosing the Rack: Plate, Chuck, or Back
Beef ribs come off the steer in three grades of glory, and the kamado handles all of them. Plate ribs, the short ribs from the belly, are the trophy cut: three colossal bones, 4 to 5 pounds, two inches of marbled meat on top, the dinosaur rib of barbecue photography. One plate rack fills a large Egg's grate almost exactly, which feels like destiny. Chuck short ribs, from further forward, run smaller, four bones and a bit leaner, but cook nearly identically on a shorter clock and cost meaningfully less at the counter.
Back ribs, the bones from under the ribeye, are the ones to buy with open eyes: butchers leave most of the meat on the ribeye side, so the reward lives between the bones rather than on top of them. They cook fine on this method in about 4 to 5 hours, but they are a different, humbler eating experience, party food rather than centerpiece.
Wherever you land, buy by thickness and marbling: a flat, evenly thick rack with visible fat seams beats a dramatic tapering one, because the ceramic's even heat rewards even meat. For the full anatomy lesson on these cuts, and the classic offset version of the big rack, my smoked beef ribs guide is the companion piece to this one; same animal, different engine.
The Fire Build: Lump, Chunks, and One Light Point
Kamado fire-building is its own small craft, and beef ribs want the long-burn build. Start with natural lump charcoal, never briquettes, whose binders smolder badly in a low-airflow ceramic, and fill the firebox generously to the top of the fire ring: an underfilled kamado is the number one cause of a 3 a.m. temperature crash, and unburned lump is simply next cook's fuel. Big pieces toward the bottom, medium up top, so the airway stays open through the burn.
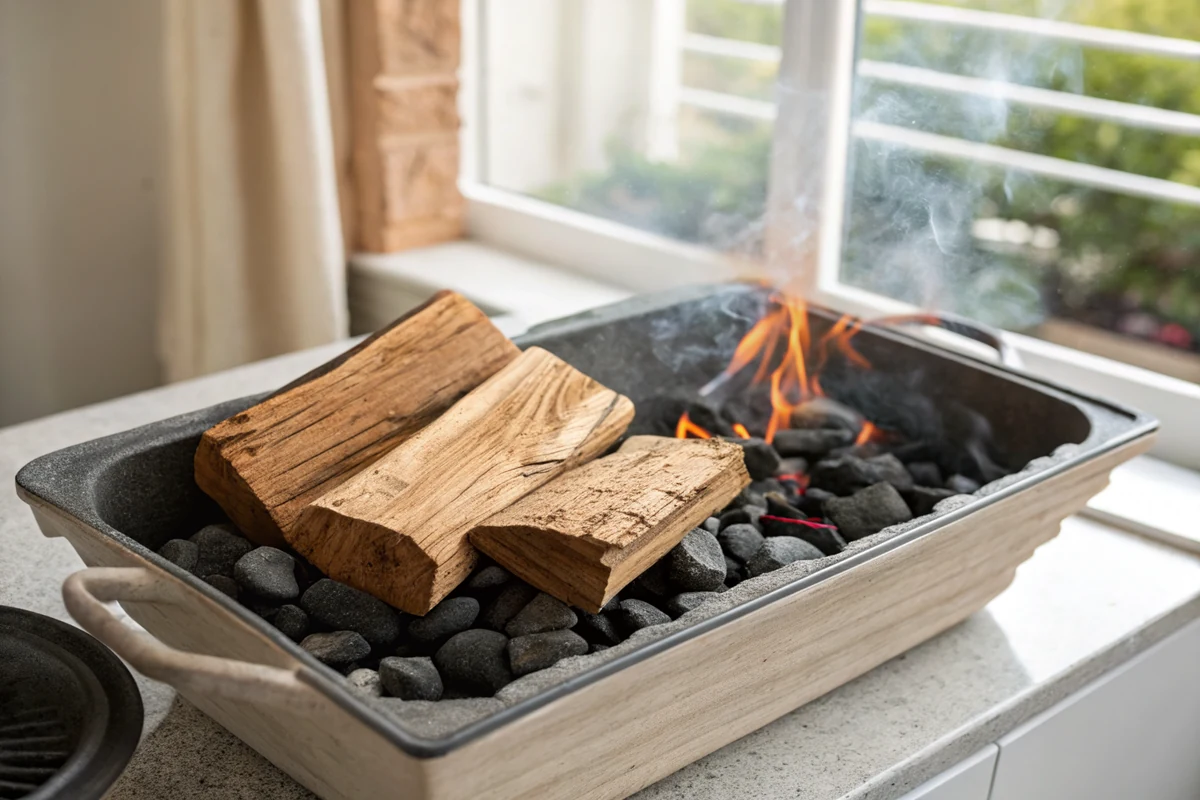
Smoke wood goes in as fist-size chunks, not chips, and placement is the trick: bury three of them in the top third of the lump, spaced a few inches apart, so the fire reaches them one at a time across the first hours of the cook, exactly the window when the meat takes on smoke best. Post oak is the Texas answer for beef; hickory runs stronger, pecan sweeter. Then light one single spot in the center with a starter cube. One light point burns outward slowly like a cigar; lighting three spots is how you build a 400F searing fire, which is a great skill on steak night and a disaster before an 8-hour hold.
Vent Control: The Slow Approach to 275F
Everything about kamado temperature control follows from one fact: ceramic remembers. Those thick walls absorb heat slowly and give it back for hours, which makes the machine gloriously stable at its target and infuriatingly stubborn past it. Overshoot to 350F while you fiddle with something else and choking the vents will claw back maybe 20 degrees an hour. So the cardinal rule is to sneak up from below: vents generous while the fire establishes, then progressively tighter as the dome needle climbs, arriving at your target slowly with the vents already near their cruising set.
For 275F on my large Egg, cruise settings land at a bottom draft door open about one inch and the daisy wheel's petals open a sliver with the main disc shut. Every kamado, gasket, and altitude runs slightly different numbers, so treat those as a starting map, make one small adjustment at a time, and give each change 15 minutes to speak before touching anything again. The bottom vent is your throttle; the top is fine trim.
Once stable, a healthy kamado holds its number for the whole cook with essentially no attention, and the biggest threat to that stability is you. Every dome lift dumps the hot, humid air and feeds the fire a gulp of oxygen, costing 15 minutes of recovery and a temperature spike in the same breath. The machine's deepest lesson is the same one the meat teaches: if you are looking, you are not cooking.
The Plate Setter and the Shape of Indirect Heat
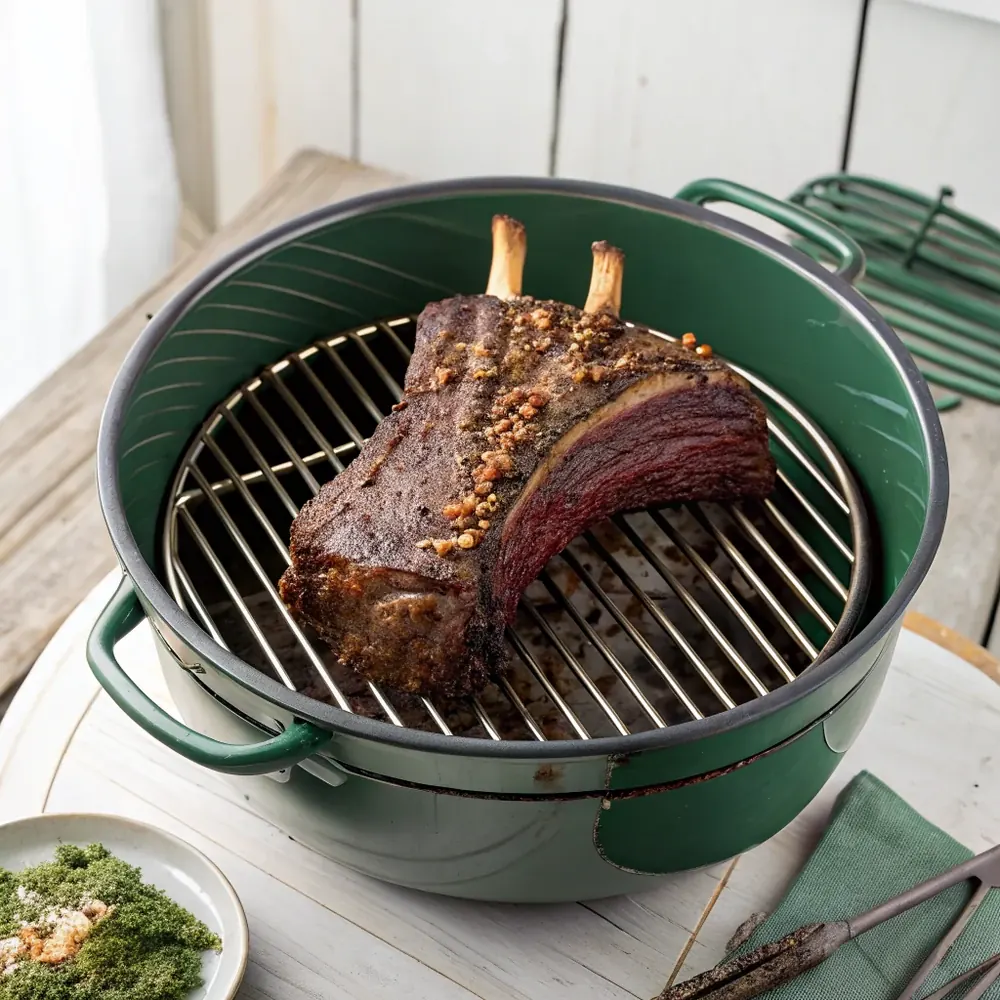
The plate setter, conVEGGtor in current Big Green Egg catalog language, is the ceramic shield that turns a charcoal grill into a smoker, and on a beef rib cook it is non-negotiable. Legs up, grate on top: the fire's radiant blast hits ceramic instead of meat, and heat reaches the rack only by convection, flowing up around the plate's edges and curling over the dome. That flow pattern is why the kamado cooks so evenly; the whole chamber becomes a gentle, circulating oven with a fire in the basement.
Two placement details earn their sentences. First, the edges of the grate directly above the plate setter's leg gaps run a little hotter than dead center, so center the rack and, if it overhangs toward a gap, point the thick end that way. Second, slide a drip tray, with a little air gap, or a sheet of foil on the setter under the meat; eight hours of beef tallow baked onto bare ceramic is a smell that outlives several future cooks. Do not wrap the setter tight in foil, which traps heat against the ceramic unevenly.
That is the entire hardware conversation. No water pan between setter and grate, no gadget thermometers through the dome, no fan controllers, though the aftermarket will happily sell you all three. A beef rib cook on a stable Egg is the strongest argument in barbecue for hardware minimalism.
Humidity: Why There Is No Water Pan in This Recipe
Offset cooks reading this keep waiting for the water pan step, and it never comes, because the kamado carries its own weather. Water pans exist to fight evaporation in pits that exchange air constantly; a ceramic cooker at cruising vents exchanges almost none. The moisture rendering out of a fatty plate rack, and there is a lot of it, largely stays in the chamber as humidity, slowing surface drying, softening the stall, and keeping the bark supple while it builds. The machine does passively what an offset cook does with a pan, a mop, and a spritz bottle on a timer.
The practical consequences are lovely. Spritzing drops from a 45-minute discipline to a hour-4 judgment call that usually answers itself with a shrug; I mist the edges maybe one cook in three, and skip it otherwise. The stall runs noticeably gentler than an offset's, often just a long slow lean rather than a full flat line, because evaporative cooling never gets the dry airflow it feeds on.
And the wrap becomes fully unnecessary. Wrapping exists to trap moisture and force through the stall; the kamado has already done the first and softened the second, and a plate rib's marbling handles the rest from inside. Running these naked is not a purist flex on this machine, it is just the correct reading of the conditions, though if you enjoy the reasoning, my no-wrap ribs method makes the full bark-first argument for open pits, where going naked actually costs something. On the Egg it costs nothing. Take the free win.
The Cook, Hour by Hour
Hour zero: rack on, bone side down, centered, dome shut, 275F on the needle. Hours one through three belong to smoke and chemistry, and your job is a closed dome and an occasional glance at the thermometer from a lawn chair. The buried chunks catch in sequence, the surface dries and browns, and by hour three the rub has become a young bark somewhere between russet and mahogany.
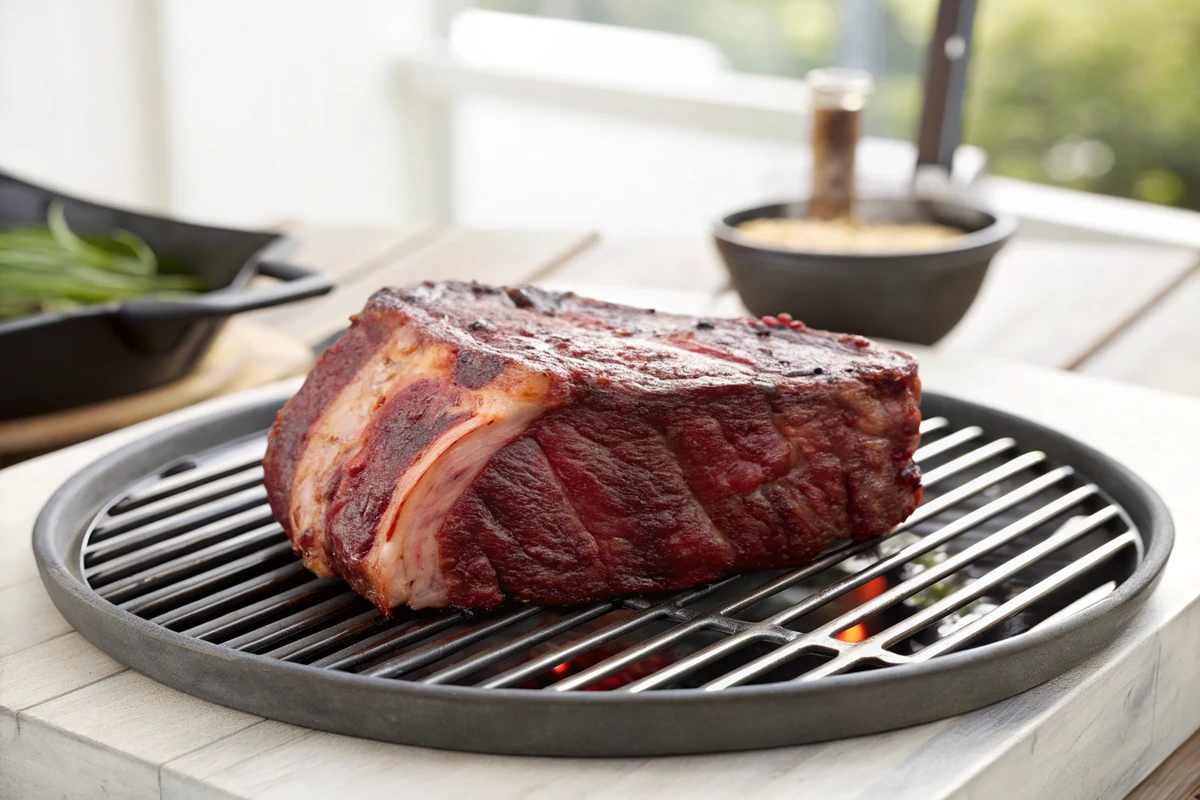
Hour four is the one sanctioned look: confirm the bark has set, dry to a fingertip, no smearing, and spritz only if the edges genuinely look parched. Hours five and six are the render: internal temperature climbs slowly through the 180s and 190s while collagen dissolves and the meat plumps against the bones. Somewhere in hour six or seven, the probe starts sliding in easy. There is no wrap stage, no rotation, no mopping. A friend watching me cook one of these asked when the barbecue part happens. It already happened, at the vents, two hours before the meat showed up.
Doneness on a Big Cut: 203 to 210F and the Butter Probe
Beef ribs finish by feel, and on a kamado the feel arrives with unusual honesty because the cook has been so even. Start probing at hour six, straight down into the meat between the bones, avoiding the bone itself, which reads hot and lies. Done is the probe sliding in like the meat is soft butter, everywhere, including the stubborn center of the rack. The number attached to that feel is higher than pork cooks expect: 203 to 210F, with big plate racks often happiest at the top of that range. Trust the slide, not the digits.
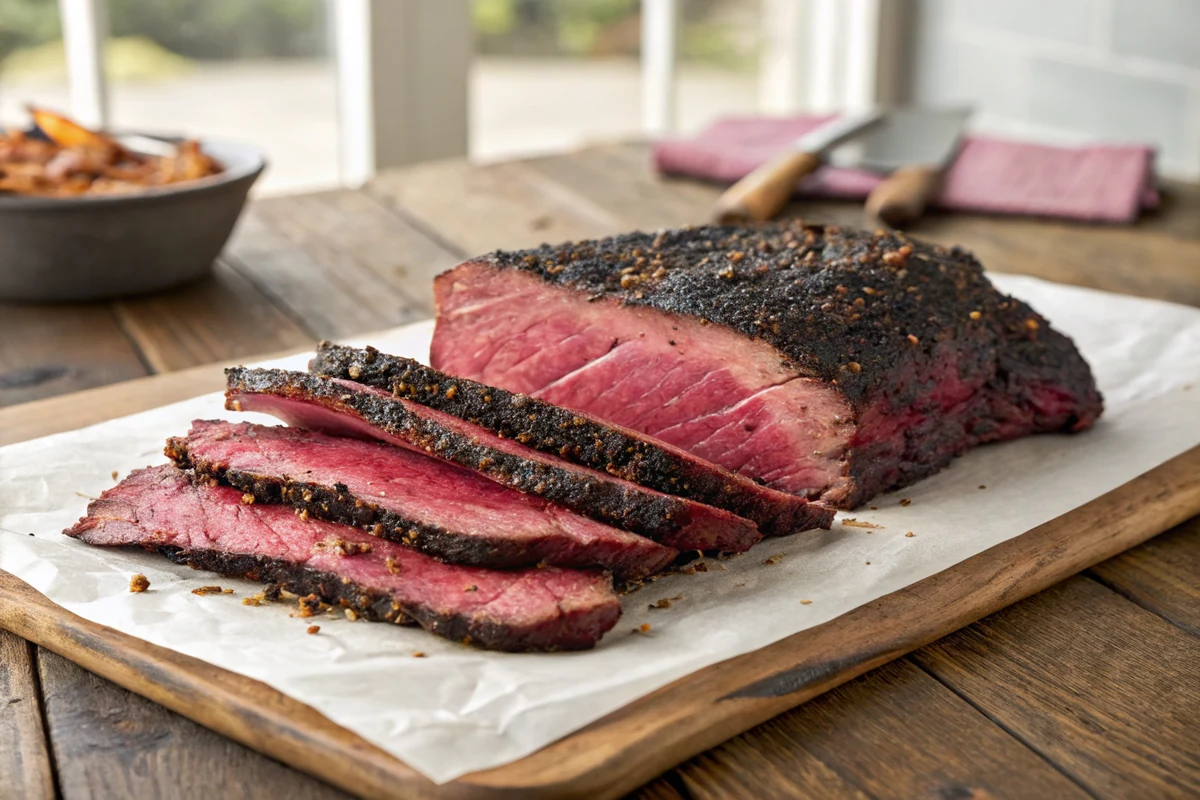
The visual evidence agrees when the moment is right: meat pulled back to expose a half inch of bone at the ends, the rack jiggling like a set custard when nudged, surface fat fully glassy. If the probe still gives a rubbery push-back at 203F, the collagen is not finished; give it another 30 to 45 minutes and ask again. An underdone beef rib is a chew you cannot apologize your way out of, and the difference is never more than an hour of patience.
Then the rest, and on this cut the rest is scripture: 30 to 45 minutes tented loose in butcher paper on a board. That pause lets the rendered gelatin thicken from broth back into silk and drops the meat to a serving temperature where the fat eats rich instead of molten. Slice between the bones into single ribs, each one a small roast with a handle, and watch the table go quiet.
Kamado Missteps: The Six That Cost Cooks Their Cook
Mistake one is the overshoot: letting the dome sail to 350F during setup and expecting to reel it back. Ceramic does not do quick descents; approach from below, always. Mistake two is briquettes, whose fillers and binders turn a low-draft ceramic chamber acrid; lump only. Mistake three is wood chips scattered on top of the fire, which flare and finish inside 20 minutes; buried fist-size chunks are the kamado's pacing mechanism.
Mistake four is dome-lifting: every unnecessary peek costs recovery time, humidity, and temperature stability in one motion, and beef ribs need exactly one look before the probing begins. Mistake five is skimping the firebox because eight hours sounds like half a load of lump; fill it every time and inherit the remainder next cook. Mistake six is closing the vents to snuff the fire while the meat rests, then wondering about the off taste next cook, from smothered, half-burned lump. Snuff after the food is off and resting indoors, and open everything to burn clean for ten minutes at the start of the next fire.
None of these are exotic. Every one of them is a habit imported from a different machine, an offset, a kettle, a gas grill, applied to a ceramic that plays by kiln rules. The Egg forgives the cook who does less and punishes the one who helps too much, which makes it, now that I think about it, a very Texan piece of equipment.
Beyond the Plate Rack: What This Setup Unlocks
Once the indirect-275F setup is in your hands, you own the kamado's entire low-and-slow catalog, because the setup barely changes across cuts. The same fire build and vent settings run pork ribs, where the schedule shifts shorter and the debate about wrapping actually gets interesting; my smoked St. Louis style ribs translates nearly verbatim, minus about an hour. Brisket runs the identical configuration over a longer night, and the Egg's fuel efficiency makes it one of the best overnight brisket machines money buys, a case I score in detail in the smoker buying guide.
It also puts the kamado into honest context in a multi-smoker world. Against the offset: less labor, less smoke intensity, better weather resistance, no romance of the stick fire. Against the pellet grill: more flavor and more involvement, less push-button convenience. Against the electric cabinet, the machine my electric smoker ribs guide is built around: the Egg gives real live-fire flavor and a true bark at the cost of learning actual fire management, while the cabinet gives repeatability a thermostat can promise. Different machines for different Saturdays; the ceramic's Saturday is the long, lazy, excellent one.
And when the cook is over and the ribs are gone, close the vents, let the fire suffocate, and the remaining lump waits for next weekend. The Egg is the only smoker I own that ends the day by saving you money. Pair the leftovers, if there are any, with the reheat technique in my reheating smoked ribs guide; thick beef ribs come back on day two better than almost anything else off the pit.
Big Green Egg Beef Ribs Recipe
Ingredients
- 1 rack beef plate ribs (3 bones, 4 to 5 lb), or 2 racks chuck short ribs
- 2 tablespoons coarse black pepper (16-mesh)
- 1 tablespoon kosher salt
- 2 teaspoons garlic powder (optional)
- 1 tablespoon yellow mustard or hot sauce, as a binder
- Natural lump charcoal, a full firebox
- 3 fist-size chunks post oak or hickory
- 1 cup beef broth or water with a splash of cider vinegar, for an optional late spritz
Instructions
- Build the fire. Fill the firebox with lump charcoal to the top of the fire ring. Bury 3 fist-size post oak or hickory chunks in the top third of the lump, spaced apart so they catch one after another. Light one spot in the center with a starter cube and leave the dome open 10 minutes.
- Set up indirect. Once the center coals glow, set the plate setter in legs-up, put the grate on top, and close the dome. The ceramic barrier turns the kamado into a true indirect smoker; the meat never sees direct flame.
- Stabilize at 275F, from below. Open the bottom draft door about 1 inch and the daisy wheel petals to a sliver. Let the dome thermometer climb slowly to 275F over 30 to 40 minutes and hold there for 15 minutes before the meat goes on. Always approach from below: a kamado that overshoots to 350F takes an hour to come back down.
- Trim and season the rack. Peel or score the membrane on the bone side, trim surface fat to a quarter inch, and pat dry. Rub with a thin film of mustard, then season heavily with the salt, pepper, and garlic on every face. Big cut, big seasoning.
- Smoke, dome shut. Set the rack bone side down, centered over the plate setter, and close the dome. Hold 275F and leave it alone; no peeking before hour four. The ceramic recycles the meat's own moisture, so the cook self-bastes.
- Check bark, spritz only if needed. At hour 4, look: bark should be set and deeply browned. If the edges look genuinely dry, mist lightly with the broth-vinegar spritz; most Egg cooks never need it. Close the dome and keep riding at 275F.
- Probe from hour 6. Start testing at hour 6: slide a probe into the meat between the bones. Done is warm-butter resistance at 203 to 210F, usually around hour 7 for a full plate rack. Chuck ribs finish sooner, in the 5 to 6 hour range.
- Rest and slice. Rest the rack 30 to 45 minutes on a board, loosely tented in butcher paper. Slice between the bones into single massive ribs and serve with pickles, onions, and white bread. Sauce optional, and honestly unnecessary.
Frequently Asked Questions
How long do beef ribs take on the Big Green Egg?
At 275F indirect, a full 4 to 5 pound beef plate rack takes 6 to 8 hours, most often landing near hour 7. Chuck short rib racks run 5 to 6 hours, and leaner back ribs 4 to 5. The clock is only a planning tool: the rack is done when a probe slides into the meat between the bones like warm butter, typically at 203 to 210F internal. The kamado's steadiness means less variation cook to cook than an offset, but the probe still outranks the timer.
What temperature should I run the Big Green Egg for beef ribs?
275F on the dome thermometer is the sweet spot: hot enough to render a big rack in an afternoon, gentle enough for deep bark and full collagen breakdown. Cruise settings on a large Egg land around a 1-inch bottom draft opening with the daisy wheel petals open a sliver, adjusted in small moves. 250F works on a longer clock for maximum tenderness insurance. Always approach the target from below; ceramic that overshoots takes an hour or more to come back down.
Do I need the plate setter for beef ribs?
Yes. The plate setter (conVEGGtor) set legs-up under the grate is what makes the cook indirect: it shields the meat from the fire's radiant heat so the rack cooks in circulating convection instead of scorching from below. Without it, the underside of the ribs chars long before the collagen renders. Add a drip tray or foil sheet on the setter, with a small air gap, to catch eight hours of beef tallow, but do not wrap the setter tightly in foil.
Do you use a water pan for ribs on a kamado?
Generally no, and this recipe skips it. A kamado's sealed ceramic body exchanges very little air, so the moisture rendering out of the meat stays in the chamber as humidity, doing the job a water pan does in a drafty offset. The cook runs naturally moist, the stall is gentler, and spritzing becomes an occasional judgment call instead of a schedule. If you run a small, lean cut or cruise hotter than 300F, a small pan is cheap insurance, but a fatty beef rack at 275F does not need one.
Should I wrap beef ribs on the Big Green Egg?
No. Wrapping exists to trap moisture and push through the stall, and the kamado's humid chamber plus a plate rib's heavy internal marbling already handle both. Naked ribs on the Egg build a better bark and lose nothing in tenderness. If serving time is tight, a butcher paper wrap after hour 5 speeds the finish by 45 minutes or so with modest bark cost, but treat it as a scheduling tool, not a quality one.
How much charcoal do beef ribs take on a kamado?
Fill the firebox with lump to the top of the fire ring every time, roughly what a large bag calls half its contents. A full load at 275F burns 8 to 10 hours with fuel left over, and whatever survives gets reused: close both vents after the cook, the fire suffocates, and the remaining lump lights again next weekend. Never run a long cook on a half-filled box; a fuel crash at hour six is the most common kamado overnight failure, and it is entirely preventable.
What wood is best for beef ribs on the Big Green Egg?
Post oak, in fist-size chunks, is the Texas standard: clean, balanced smoke that seasons big beef without shouting over it. Hickory runs stronger and suits heavy pepper bark; pecan is sweeter and gentler. Use 3 chunks buried in the top third of the lump, spaced so the fire reaches them in sequence across the first hours. Skip chips, which flare out in minutes, and skip mesquite for a cook this long; it turns acrid past the early hours.
Can I cook this on a Kamado Joe or other ceramic grill?
Entirely. Every step here, the full lump load, buried chunks, ceramic deflector legs-up, slow approach to 275F, no water pan, no wrap, probe-tender at 203 to 210F, translates directly to a Kamado Joe, Primo, Vision, or any thick-walled ceramic. Kamado Joe's Divide and Conquer racks even make the drip tray setup slightly easier. Vent geometries differ, so your exact cruise settings will drift from mine; find them once, write them on a card, and that card is your machine's recipe forever.
Why did my kamado temperature spike when I opened the dome?
A closed kamado runs a small, oxygen-starved fire in a sealed chamber; lifting the dome feeds it a rush of fresh air and the fire surges within seconds. Burp the dome instead: crack it two inches, pause a beat while pressure equalizes, then open fully. Expect the needle to jump after any long open period and settle back within 10 to 15 minutes without vent changes on a stabilized Egg. The deeper fix is opening it less; a beef rib cook needs one look at hour four and probing from hour six.