Southern Comfort Food
Sous Vide Beef Short Ribs
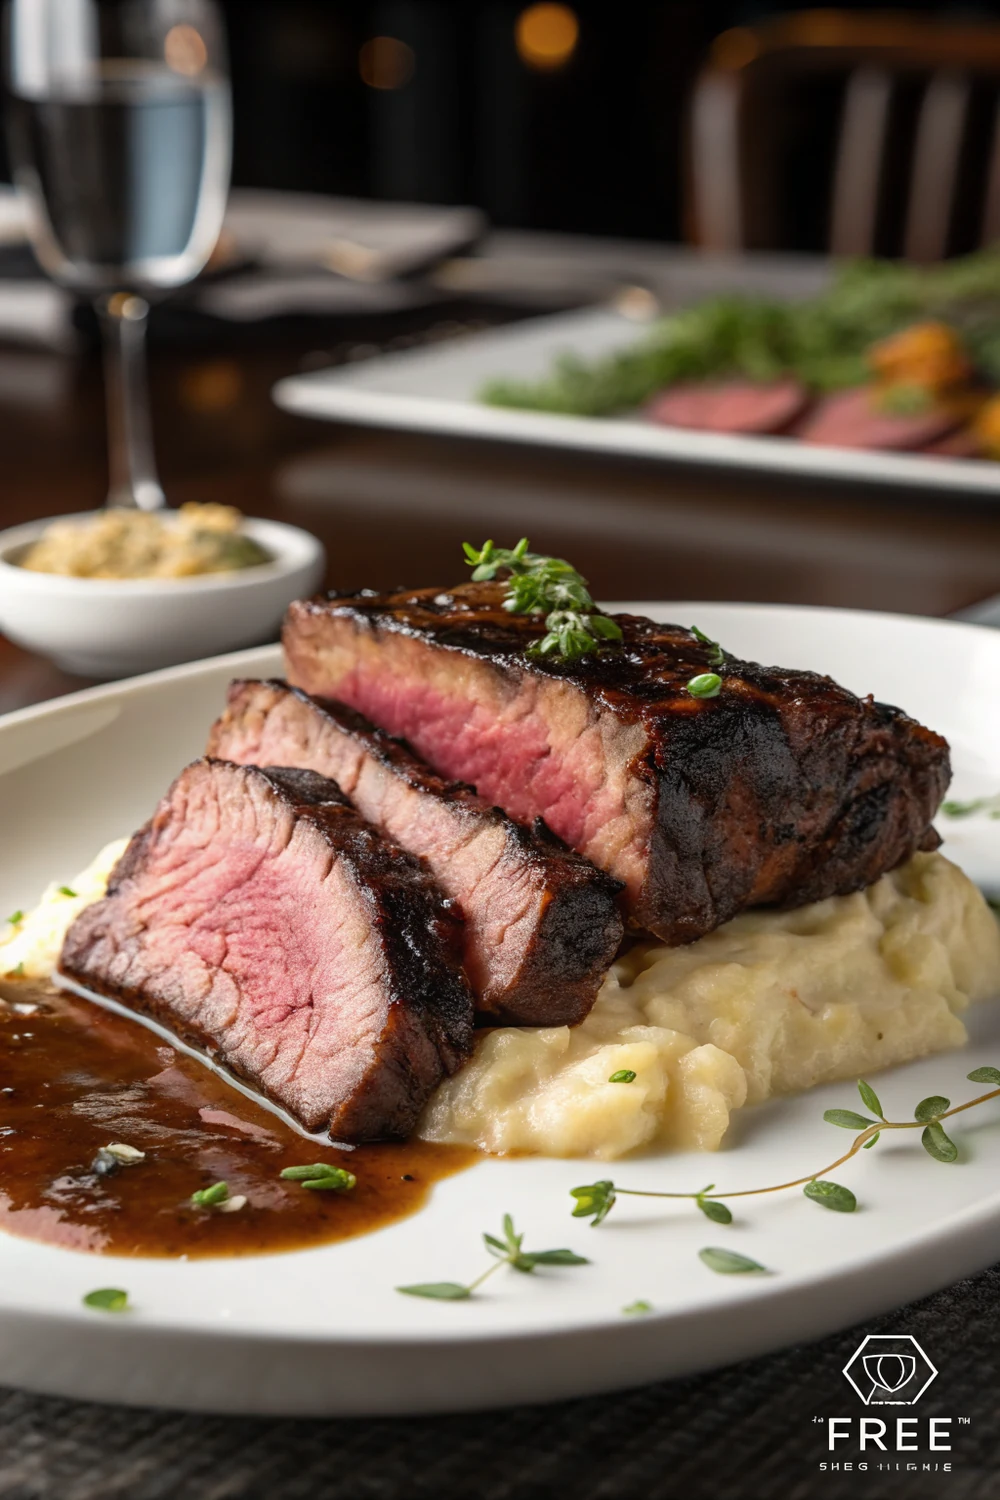
Chef Mia's sous vide beef short ribs: 72 hours at 131F for steak-like tenderness, or 24 hours at 165F for braised texture, then a hard sear and pan sauce.
Quick answer: Sous vide beef short ribs cook in a precise water bath so you control the exact texture. For a steak-like, rosy, fork-tender result, cook them 72 hours at 131F. For a softer, fall-apart braised texture, cook 24 hours at 165F. Either way, you finish with a hard sear in a screaming-hot cast iron pan to build a crust. The water bath does the slow tenderizing work hands-off, so the short ribs come out edge-to-edge perfect with no guessing and no risk of drying out.
Sous vide is the one technique that genuinely changed how I cook beef short ribs at home. A smoker gives you that incredible bark and post oak flavor, and I love it, but it asks you to babysit a fire for hours and read the meat by feel. Sous vide flips that. You set a precise temperature, the water bath holds it exactly, and time does the rest while you go live your life. The result is short ribs cooked perfectly edge to edge, every single time.
The magic of this method is that temperature and time become two separate dials you control independently. Hold short ribs at a steak temperature for long enough and the collagen melts while the meat stays rosy and tender, something no oven or grill can do. That is why I can promise you a short rib that eats like the most tender ribeye you have ever had, with a clean rosy interior, and a deep seared crust on the outside.
This is the modern, indoor counterpart to my smoked beef short ribs, which run low and slow over post oak for that classic Texas bark. For the smoked version, head over there. Here, I am going to walk you through the water bath approach, the two temperature paths, the all-important sear, and a quick pan sauce that ties it together. There is a third road too: my boneless beef short ribs in the slow cooker trade the precision for a leave-at-7am, eat-at-6pm schedule. And the fourth is the oldest one in the book: beef short ribs in the oven, the wine-and-broth braise that makes its own sauce.
Why Sous Vide Is Made for Short Ribs
Beef short ribs are a tough, collagen-rich cut, and that is exactly why sous vide suits them so well. Normally, to break down all that connective tissue, you have to cook the meat well past 160F, which also squeezes out moisture and gives you that classic braised, shreddy texture. That is delicious, but it means you can never have a tough cut like short ribs cooked to a rosy medium-rare. The fibers would still be chewy.
Sous vide breaks that rule. Because you can hold the meat at a precise low temperature for a very long time, collagen slowly converts to gelatin even at steak temperatures, given enough hours. Hold a short rib at 131F for 72 hours and you get the impossible combination: a clean, rosy, medium-rare interior with the fork-tender softness you usually only get from a long braise. No grill, oven, or smoker can pull that off.
The other gift is consistency. The water bath holds your target temperature within a fraction of a degree, so the short ribs cook evenly from edge to edge with zero gray band and zero guesswork. There is no probing, no carryover anxiety, no rushing to pull at the right second. You set it, the machine holds it, and the meat simply cannot overcook past the temperature you chose.
Boneless vs Bone-In Short Ribs for Sous Vide
Both boneless and bone-in short ribs work in the water bath, and the choice mostly comes down to presentation and what your butcher has. Boneless short ribs are the easiest to handle. They lie flat in the bag, sear evenly on every side, and slice cleanly against the grain into tidy medallions. If you want an elegant plated dinner, boneless is the way I go. And if you are weighing beef against pork for the rack itself, my beef vs pork ribs breakdown explains why beef ribs run richer and meatier.
Bone-in chuck short ribs, the thick English-cut pieces, give you a more dramatic, rustic presentation and a little extra flavor from the bone. They take up more room in the bag, and you may need to sear them in stages to hit every surface, but the payoff is a hearty, steakhouse-looking plate. Just make sure the bones do not puncture a zip-top bag; a proper vacuum bag is safer for bone-in cuts.
Whichever you choose, look for thick, well-marbled pieces. Avoid the thin flanken cut, which is sawed across the bones for quick grilling and does not benefit from this long, slow approach; save those strips for my flanken beef short ribs, where the hot fire treats them right. If you love a big bone-on slab with a smoky bark instead, that is the territory of my smoked beef short ribs, which take a completely different path to tenderness.
131F vs 165F: Choosing Your Texture
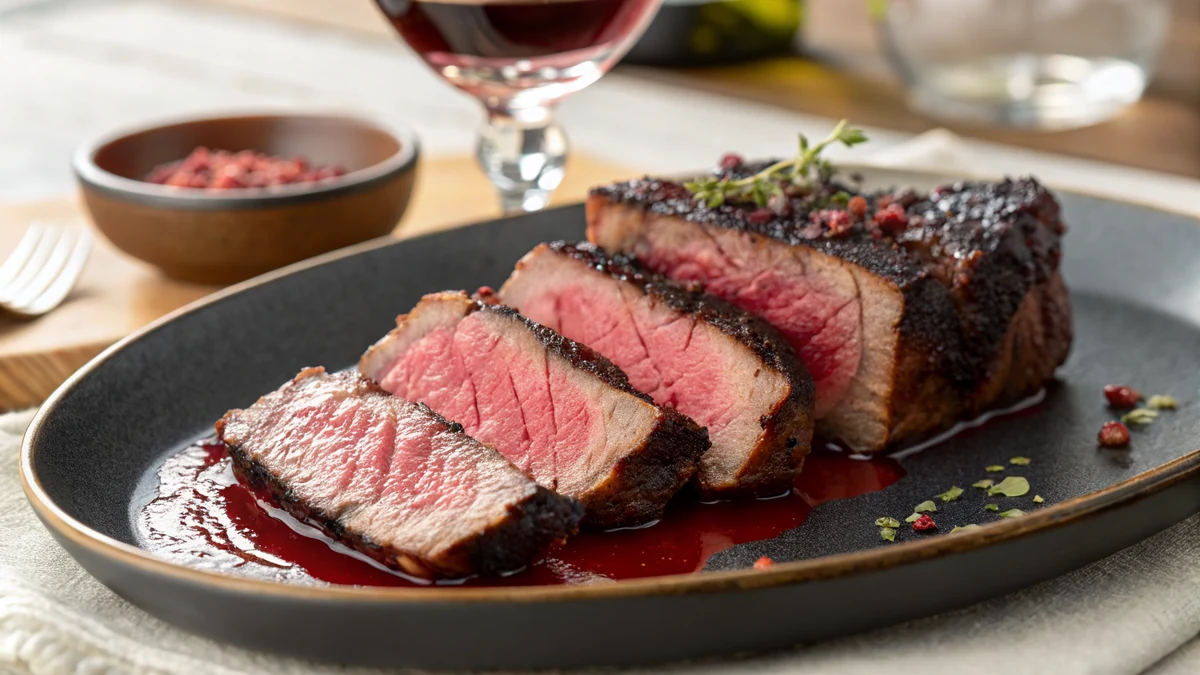
This is the most important decision in the whole recipe, and it is genuinely a matter of taste, so let me lay out both clearly. At 131F for 72 hours, the short ribs come out rosy and medium-rare, sliceable, and tender like an unbelievably good steak. The fibers hold together, the color is pink edge to edge, and the bite is firm but yielding. This is my favorite, the version that makes people ask how it is even possible.
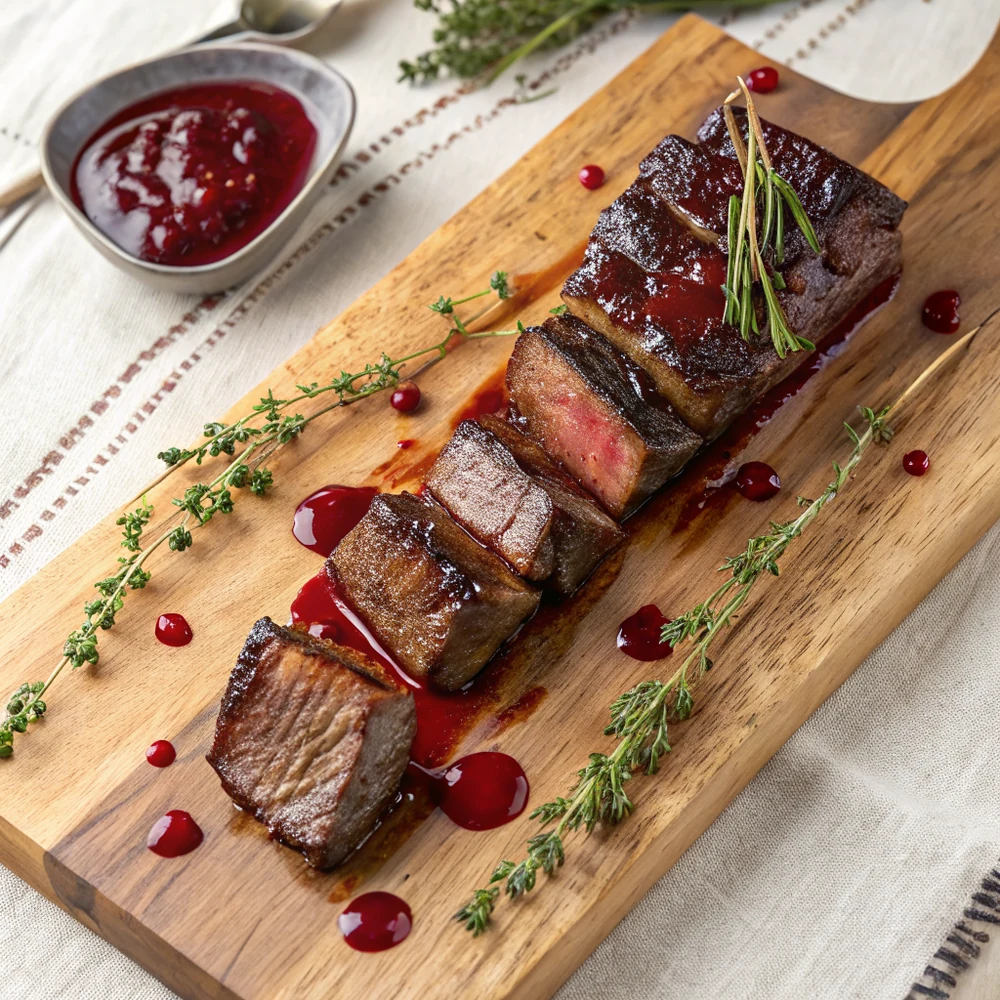
At 165F for 24 hours, you get a different but equally lovely result: a soft, fall-apart, braised texture much closer to a classic pot-style short rib. The meat is more brown-gray than rosy because the higher heat sets the proteins, and it pulls apart into tender shreds. If you are serving this over mashed potatoes or polenta and want that cozy, spoon-tender comfort, 165F for 24 hours is the move.
There are middle options too. 140F for 48 hours splits the difference, giving a tender medium with a hint of rosy color and a faster turnaround than the 72-hour bath. None of these are wrong; they are just different destinations. The beauty of sous vide is that you pick the exact texture you want in advance and the machine delivers it, instead of hoping you pull a braise at the right moment.
Bagging and Sealing the Right Way
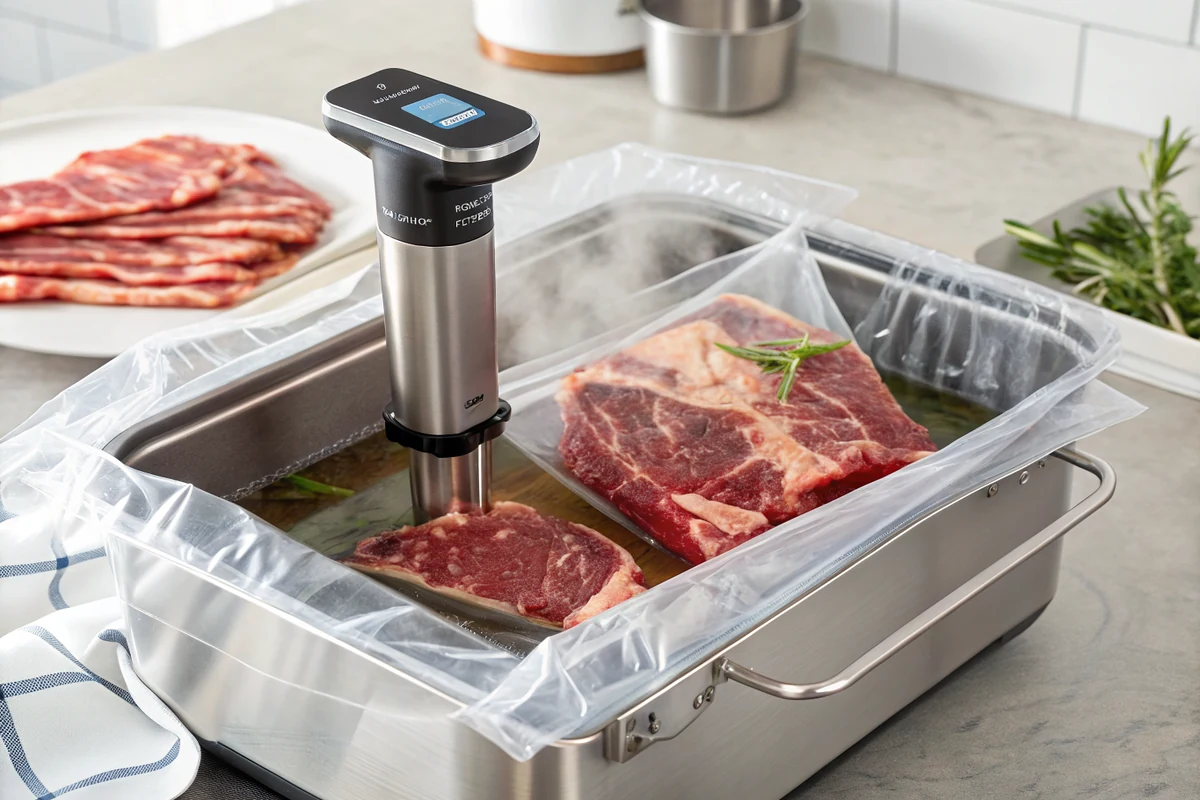
Getting a good seal matters, because air in the bag insulates the meat and can make it float out of the water, leading to uneven cooking. A chamber vacuum sealer is ideal, but a clamp-style vacuum sealer works fine for short ribs too. Season the meat, lay it in a single layer without overlapping, add your aromatics, and seal. Try not to let liquid seasonings get into the seal channel, or the bag will not close properly.
No vacuum sealer? The water displacement method works beautifully and is what I used for years. Put the seasoned ribs in a sturdy zip-top freezer bag, leave one corner of the zipper open, and slowly lower the bag into the water bath. The water pressure pushes the air out through the open corner; when the air is gone, seal that last corner above the waterline. It is simple, free, and reliable.
Keep aromatics minimal. A sprig or two of thyme and the garlic in the seasoning is plenty. Over the course of a long bath, herbs and especially raw garlic can turn harsh and dominate the beef, so a light hand wins. I salt the meat before bagging, which seasons it deeply over the long cook, almost like a dry brine working from the inside out.
Food Safety for Long Cooks
Long sous vide cooks are safe when you respect a couple of rules, and I want to be straight about them because we are talking about 72 hours in warm water. Pasteurization is about both temperature and time, and at 131F held for many hours, the meat is held well within the pasteurization zone, so it is made safe over the cook. The USDA and food-science guidance both support holding times like these at this temperature.
The temperature you must avoid lingering in is the danger zone below 130F, where bacteria multiply. That is why I never cook short ribs below 130F, and why you should bring the bath fully up to temperature before the meat goes in and keep it there the entire time. Do not start a cook, turn the machine off overnight, and resume. Keep the circulator running continuously for the whole bath.
For temperature references on beef, the USDA keeps a clear chart you can check at the FSIS safe temperature chart. If you ever plan to cook and chill for serving later, drop the sealed bag straight into an ice bath to cool it quickly, then refrigerate. Done correctly, sous vide is one of the most controlled, food-safe ways to cook there is.
The Sear: Where the Crust Comes From
The water bath cannot brown meat, so the sear is not optional; it is where all the roasted, savory crust flavor comes from. After the bath, the single most important step is drying. Pat the short ribs almost violently dry with paper towels, because any surface moisture has to boil off before browning can start, and that wasted time overcooks your perfect interior. A bone-dry surface sears fast and dark.
Get a cast iron skillet truly hot, with a thin film of high-smoke-point oil like avocado or grapeseed, until it just starts to smoke. Lay the ribs in and sear only 45 to 60 seconds per side. You are after color and crust, nothing more, since the inside is already cooked exactly how you want it. Add a knob of butter at the end and spoon the foaming butter over the meat for extra richness and browning.
Work fast and do not crowd the pan, or you will steam instead of sear. If you chilled the ribs in an ice bath first, you have even more margin, because the cold interior gives you longer to build a crust before the center heats up again. A torch also works for an even sear on awkward bone-in pieces. However you do it, the goal is a deep, dark crust in under two minutes total.
A Quick Pan Sauce From the Bag Juices
Do not throw away the liquid in the bag. It is concentrated, intensely beefy jus, and it makes the base of a restaurant-quality sauce in about five minutes. After searing, pour off the excess fat, toss a minced shallot into the hot pan, and let it soften for thirty seconds in the fond left behind by the sear. That browned residue is pure flavor.
Pour in a splash of dry red wine to deglaze, scraping up every browned bit stuck to the pan, and let it reduce by half to cook off the raw alcohol. Add the beef broth and the reserved bag juices and simmer until the sauce is glossy and lightly coats a spoon. Off the heat, swirl in a tablespoon of cold butter to give it a silky shine and body. Taste and adjust the salt.
That is the whole sauce, and it elevates the dish from very good to special-occasion. Spoon it over the sliced short ribs right before serving. If you want to keep things simpler, the bag juices reduced with a little butter and nothing else still make a fine glaze. This is the kind of finish that makes a home dinner taste like it came out of a steakhouse kitchen.
What to Serve With Sous Vide Short Ribs
Rich, tender short ribs want something smooth and starchy underneath to soak up the sauce. Creamy mashed potatoes are the classic and, in my house, the most requested. Soft polenta, celery root puree, or buttered egg noodles all play the same comforting role. The plate is built around the contrast of that silky base against the deep, beefy meat and glossy sauce.
You also want something fresh and acidic to cut the richness, because short ribs are a heavy, fatty cut. A crisp green salad with a sharp vinaigrette, quick-pickled onions, or a pile of blistered green beans all do the job. I almost always put something bright on the plate so the last bite is as appealing as the first, instead of feeling heavy.
If you are building a fuller steakhouse-style spread, this dish sits right alongside my cowboy cut ribeye for a serious beef dinner, and for another hands-off short rib approach there is my beef rib steak in the slow cooker. And of course, when you want the smoky, bark-forward Texas version of this exact cut, my smoked beef short ribs are waiting.
Make-Ahead and the Cook-Chill Method
One of the quiet superpowers of sous vide is how well it fits a make-ahead plan, which is why restaurants lean on it so hard. You can run the full 72-hour or 24-hour bath days before you need to serve, then chill the sealed bags in an ice bath until cold and refrigerate them. When dinner comes, you reheat briefly in a warm bath and sear. All the long, slow work happens on your schedule, not your guests'.
To cook and chill safely, move the sealed bag straight from the water bath into a bath of ice and water and leave it until thoroughly cold, usually 30 to 45 minutes. Then refrigerate for up to a few days, or freeze for longer. The fast chill is what keeps the meat out of the danger zone. Skipping it and letting bags cool slowly on the counter is the one shortcut you should never take.
To serve from chilled, reheat the bag in a 130F to 140F bath for about 45 minutes to bring it back to temperature without overcooking, then dry hard and sear. Because the interior is already cooked, you are only warming and crusting. This is exactly how I do short ribs for a dinner party, so that when people arrive I am searing for two minutes instead of cooking for three days.
Common Sous Vide Short Rib Mistakes
The most common mistake I see is skipping the dry-and-sear step or doing it half-heartedly. Sous vide meat with no sear looks pale and tastes flat, because you have skipped all the browned, roasted flavor. Dry the surface completely and sear it hard. The second mistake is searing too long out of nervousness, which overcooks the lovely interior you worked days to perfect. Color, then stop.
Another trap is cooking below 130F to chase an even rosier color. Do not. That drops you into the danger zone for a long cook, and it is not worth the risk for a shade of pink. Stick to 131F as your floor. Equally, letting the bag float with trapped air leads to uneven cooking, so get a good seal and weigh the bag down if it bobs to the surface.
Finally, people often overload the bag with aromatics, especially raw garlic, which turns sharp and overwhelming over many hours. Keep it simple: salt, pepper, a little granulated garlic, and maybe a sprig of thyme. The beef is the star. Get the temperature, the seal, the dry, and the sear right, and sous vide short ribs are nearly impossible to mess up, which is exactly why I keep coming back to them. When you want fall-off-the-bone beef without the water bath, my slow cooker beef back ribs get there with almost no fuss.
Sous Vide Beef Short Ribs Recipe
Ingredients
- 2 to 3 pounds boneless beef short ribs, or bone-in chuck short ribs
- 2 teaspoons coarse kosher salt
- 1 teaspoon coarse ground black pepper
- 1 teaspoon granulated garlic
- 2 sprigs fresh thyme (optional)
- 1 tablespoon neutral high-smoke-point oil (avocado or grapeseed), for searing
- 1 tablespoon butter, for searing
- For an optional quick pan sauce:
- 1 small shallot, minced
- 1/2 cup dry red wine
- 1/2 cup beef broth
- 1 tablespoon cold butter
Instructions
- Season and bag the short ribs. Pat the short ribs dry and season all over with the kosher salt, pepper, and granulated garlic. Tuck in the thyme if using. Place the ribs in a vacuum bag or a sturdy zip-top freezer bag in a single layer, not overlapping. Vacuum seal, or use the water displacement method to push out the air and seal a zip-top bag tightly.
- Choose your temperature and set the bath. Decide on your texture. For a rosy, steak-like, fork-tender result, set your immersion circulator to 131F. For a softer, more traditional fall-apart braised texture, set it to 165F. Clip the circulator to a deep pot or container of water and let it preheat fully to the target temperature before adding the bag.
- Cook long and low. Submerge the sealed bag, making sure it stays fully underwater; clip it to the side or weigh it down if it floats. Cook at 131F for 72 hours for the steak-like result, or at 165F for 24 hours for the braised result. Top off the water occasionally to replace evaporation, and cover the container with foil or a lid to slow evaporation over the long cook.
- Chill or sear right away. When the time is up, remove the bag. You can sear immediately, or for the best crust, chill the sealed bag in an ice bath for 30 minutes so the surface cools and the sear does not overcook the interior. Chilling also lets you refrigerate the ribs and sear them later, which is great for entertaining.
- Dry thoroughly before searing. Take the short ribs out of the bag, reserving the juices for the sauce. Pat the meat completely, almost aggressively dry with paper towels. Surface moisture is the enemy of a good sear, so do not skip this. A bone-dry surface is what gives you a fast, dark crust instead of a gray steamed exterior.
- Sear hard and fast. Heat the oil in a cast iron skillet over high heat until it just begins to smoke. Lay the short ribs in and sear 45 to 60 seconds per side, adding the butter in the last 30 seconds and spooning the foaming butter over the meat. You only want a deep crust; the inside is already perfectly cooked, so move quickly and do not let it heat through again.
- Make the optional pan sauce. Pour off excess fat, add the shallot to the hot pan, and cook 30 seconds. Pour in the red wine to deglaze, scraping up the browned bits, and reduce by half. Add the beef broth and the reserved bag juices and reduce to a glossy sauce. Off the heat, swirl in the cold butter until silky. Season to taste.
- Rest briefly, then serve. Let the seared short ribs rest just 5 minutes; they need far less rest than grilled meat because sous vide cooks them so evenly. Slice the boneless ribs against the grain, or serve bone-in ribs whole. Spoon the pan sauce over the top and serve with mashed potatoes or a crisp salad.
Frequently Asked Questions
How long do you sous vide beef short ribs?
It depends on the texture you want. For a rosy, steak-like, fork-tender result, cook them 72 hours at 131F. For a softer, fall-apart braised texture, cook 24 hours at 165F. A middle path of 140F for 48 hours gives a tender medium with a faster turnaround. The long times are what convert the tough connective tissue in short ribs into gelatin while keeping the meat at your chosen doneness.
What temperature is best for sous vide beef short ribs?
131F gives the signature sous vide short rib: rosy, medium-rare, and sliceable yet fork-tender, which is my favorite. 165F gives a classic braised, fall-apart texture that is browner and softer. Never cook below 130F, because long holds at lower temperatures sit in the bacterial danger zone. Choose your temperature based on whether you want a steak-like or a braised result, then match it with the right time.
Can you sous vide boneless beef short ribs?
Yes, and boneless short ribs are arguably the easiest option. They lie flat in the bag, sear evenly on all sides, and slice cleanly against the grain into neat medallions for an elegant plate. Season, bag in a single layer, and cook at your chosen temperature and time just like bone-in. Look for thick, well-marbled boneless pieces and avoid the thin flanken cut, which is meant for quick grilling over a hot fire - that cut gets its own treatment in my flanken beef short ribs.
Do I have to sear short ribs after sous vide?
Yes, the sear is essential. The water bath cooks the meat perfectly but cannot brown it, so without a sear the short ribs look pale and taste flat. Dry the surface completely, then sear hard and fast in a smoking-hot cast iron pan for 45 to 60 seconds per side, just long enough to build a deep crust without overcooking the interior. A torch works too, especially for bone-in pieces.
Is it safe to sous vide short ribs for 72 hours?
Yes, when done correctly. At 131F held for many hours, the meat is pasteurized over the cook, which makes long holds safe per USDA guidance. The keys are to keep the bath continuously at temperature, never cook below 130F, and ensure the meat stays fully submerged. If you cook ahead, chill the sealed bag quickly in an ice bath before refrigerating. The danger zone is slow cooling and temperatures below 130F.
Why are my sous vide short ribs mushy?
Usually because they were cooked too long for the chosen temperature, or at a higher temperature than intended. Time and temperature both tenderize, so pushing well past the recommended hours can break the meat down past pleasant into mushy. Stick to 72 hours at 131F or 24 hours at 165F. If you preferred a firmer bite, try a shorter time at 131F, such as 48 hours, which keeps more structure in the fibers.
Can I make sous vide short ribs ahead of time?
Absolutely, this is one of the method's best features. Run the full bath days in advance, then chill the sealed bags quickly in an ice bath and refrigerate for a few days or freeze for longer. To serve, reheat the bag in a 130F to 140F bath for about 45 minutes, then dry and sear. All the slow cooking happens on your schedule, and you only sear for a couple of minutes right before serving.
What is the difference between sous vide and smoked short ribs?
Sous vide cooks short ribs in a precise water bath for exact, edge-to-edge doneness and a rosy or braised texture, finished with a quick sear indoors. Smoked short ribs cook low and slow over post oak, building a dark bark and deep smoke flavor with a probe-tender finish around 203F. Sous vide is hands-off and weather-proof; smoking is the classic Texas experience. For the smoked version, see my smoked beef short ribs recipe.